ADL500 • Quick installation guide - Specifications and connection 87
Appendix
A.1 - Optional cards
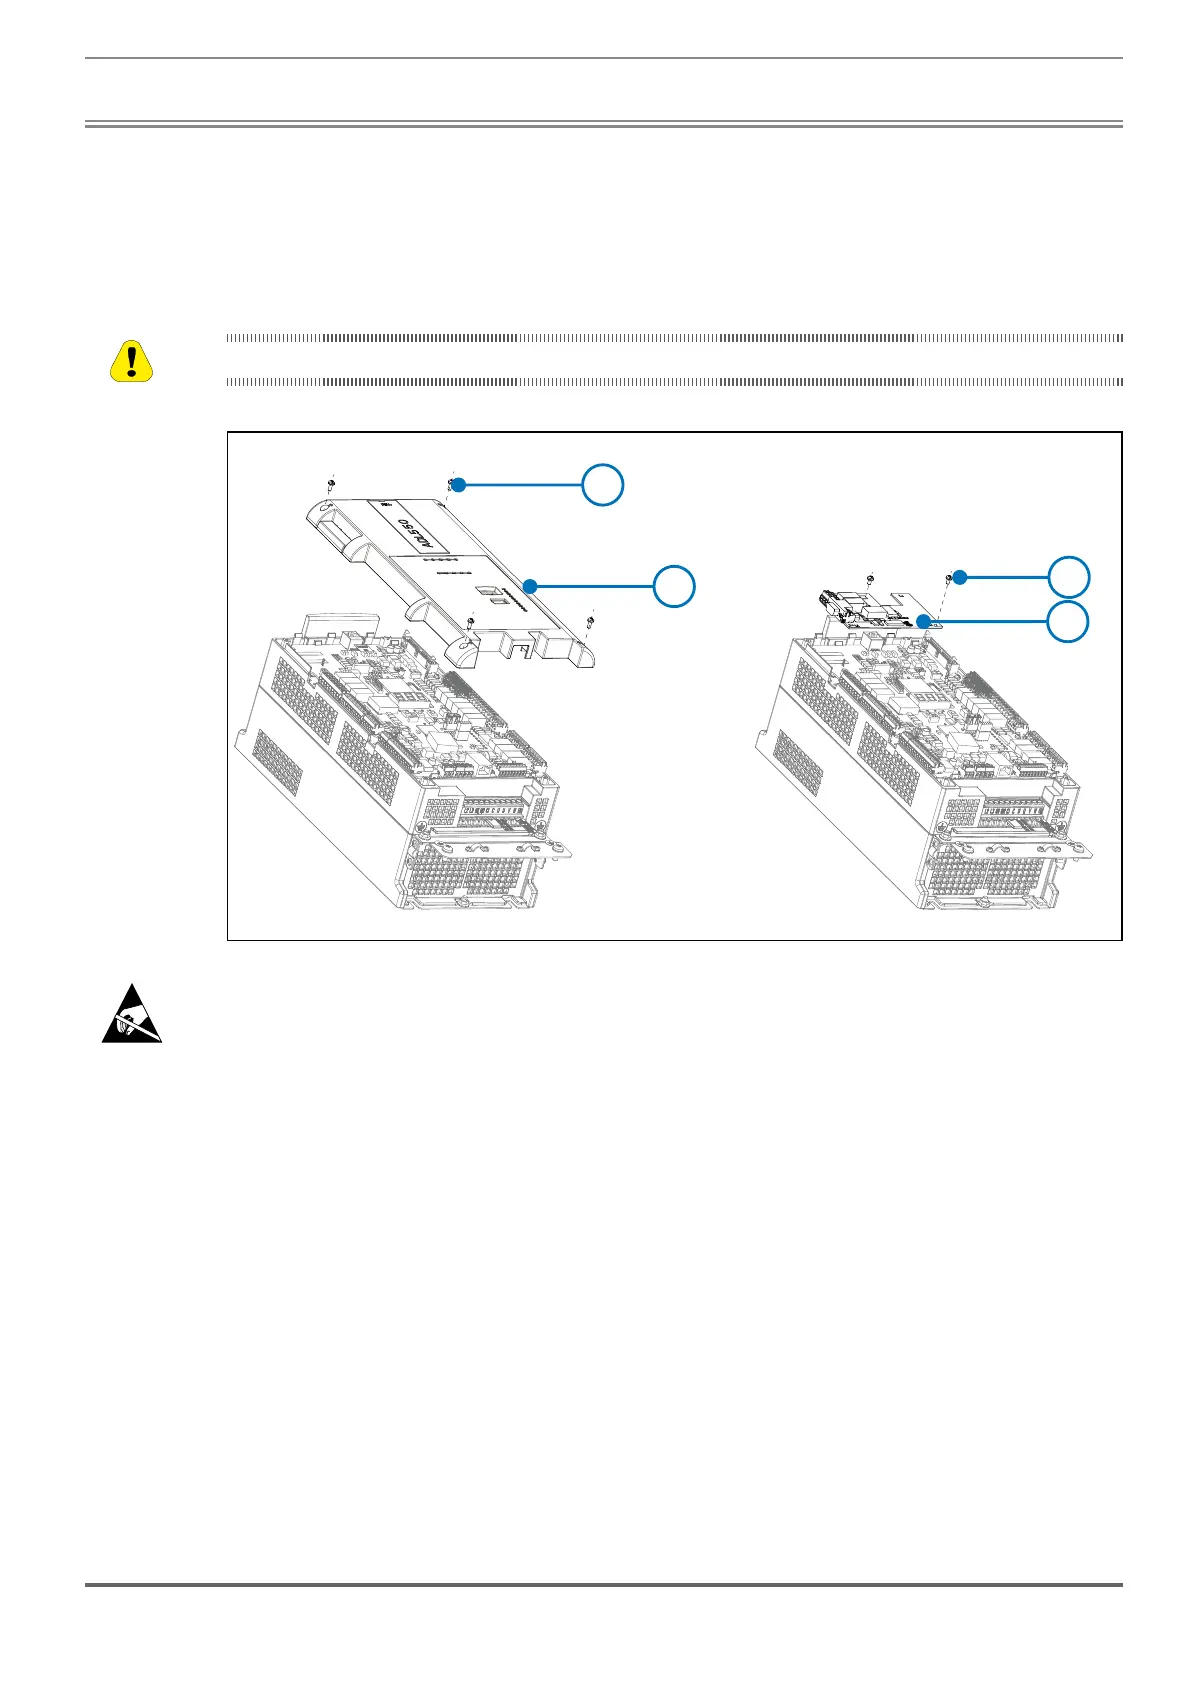
A.1.1 - Installation
Only one option card can be installed, either an EXP-IO1-ADL500 or an EXP-DCP-ADL500.
Use only the screws supplied with the option card.
1
2
3
4
1. Use a Phillips screwdriver (Ph2) to loosen the 4 M3 screws (2) and then remove the top cover (1);
2. Secure the optional board (3) by inserting the option board’s J1 female connector onto the control board’s J1
male connector;
3. Tighten down the 2 M3 screws supplied with the option board (4);
4. Replace the upper cover (1) and tighten down the 4 M3 screws (2).
 Loading...