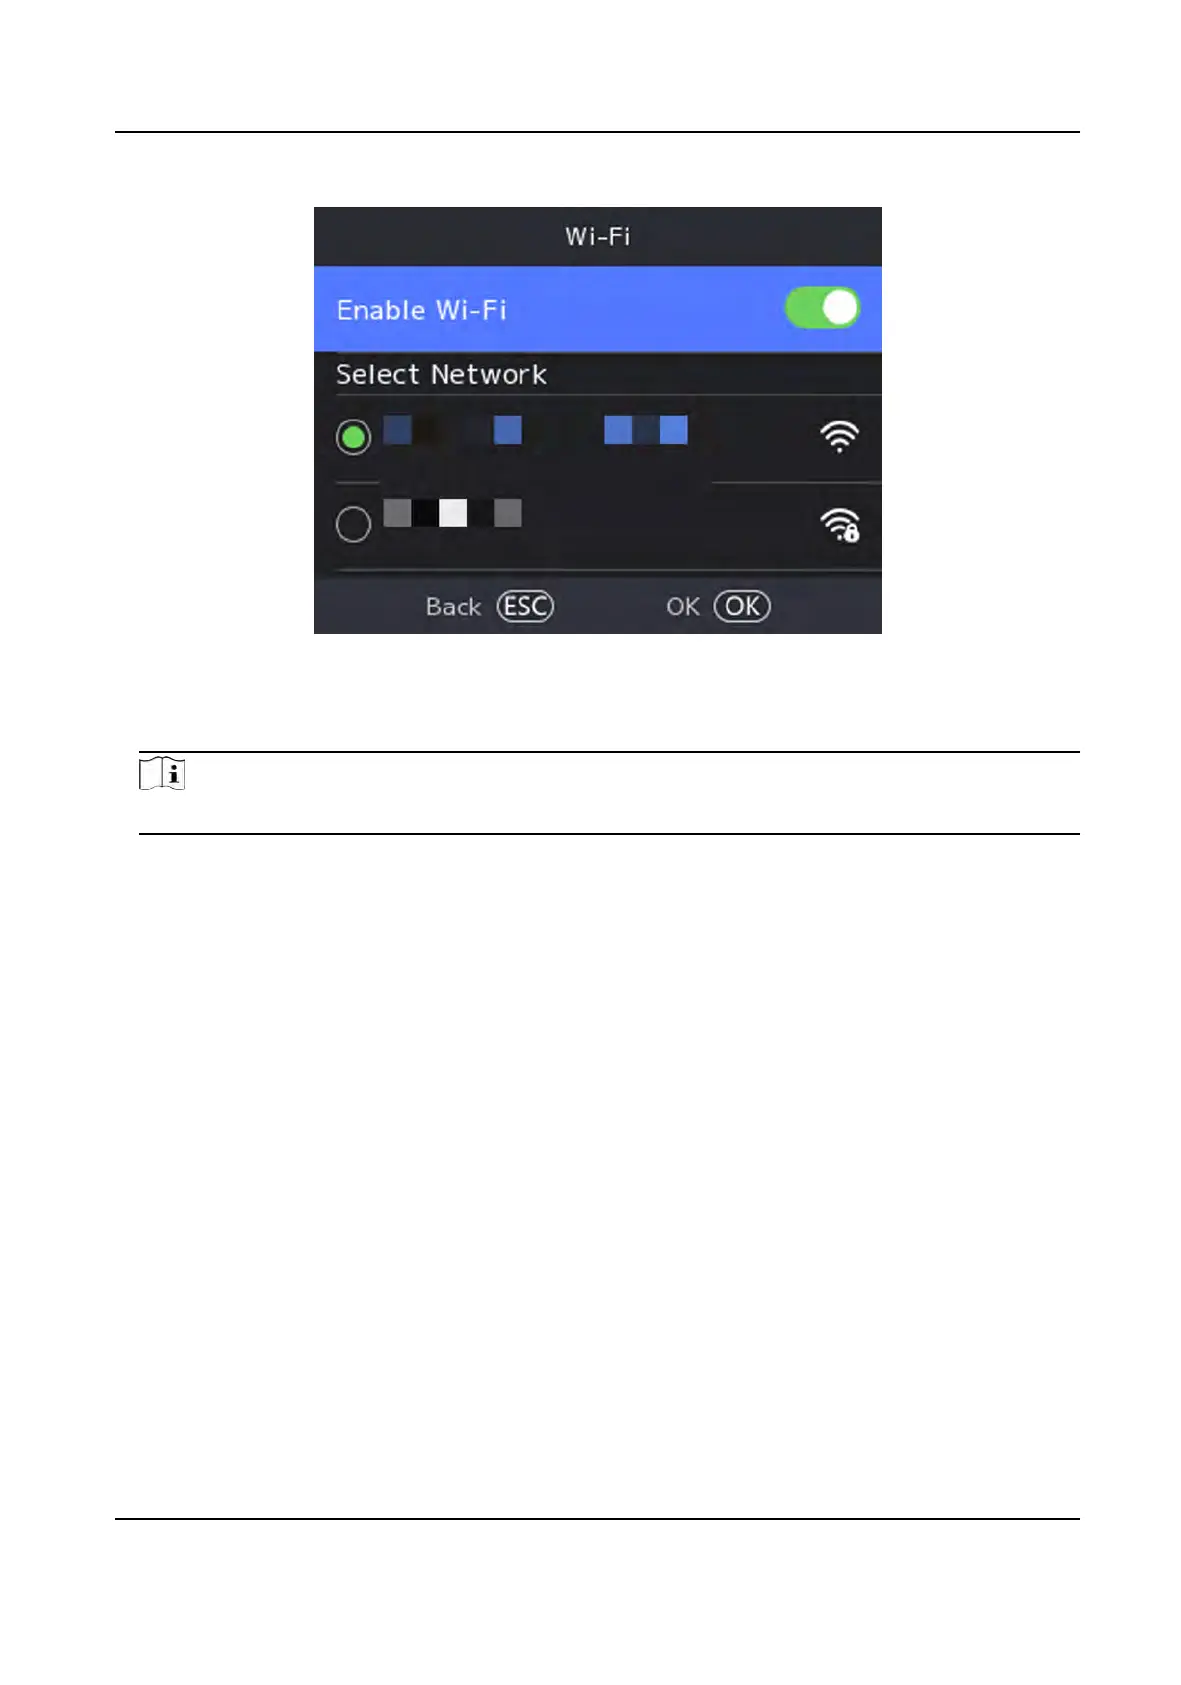
Figure 7-3 Wi-Fi
Sengs
3.
Enable the Wi-Fi funcon.
4.
Select a Wi-Fi fr
om the list, and enter the Wi-Fi's password. Tap OK.
Note
Only digits, leers,
and special characters are allowed in the password.
5.
Se
t the Wi-Fi's parameters.
-
By default, DHCP is enable. The system will allocate the IP address, the subnet mask, and the
gateway automacally.
-
If disable DHCP
, you should enter the IP address, the subnet mask, and the gateway manually.
6.
Press OK to save the sengs and go back to the Wi-Fi tab.
7.
Press ESC to save the network parameters.
7.2.3 Set ISUP Parameters
Set ISUP parameters and the device can upload data via ISUP protocol.
Before You Start
Make sure your device has connect to a network.
Steps
1.
Select Comm. → ISUP .
DS-K1T320 Series Face
Recoginon Terminal User Manual
27
 Loading...