40 Installing the Library
Installing tape drives
CAUTION: Parts can be damaged by electrostatic discharge (ESD). Keep parts in their containers until
needed. Ensure that you are properly grounded when touching static-sensitive components.
Drive assemblies ship separately from the library in most configurations. You may have to install up to 16
drives.
1. Open each drive kit and inspect the contents for potential damage or missing parts.
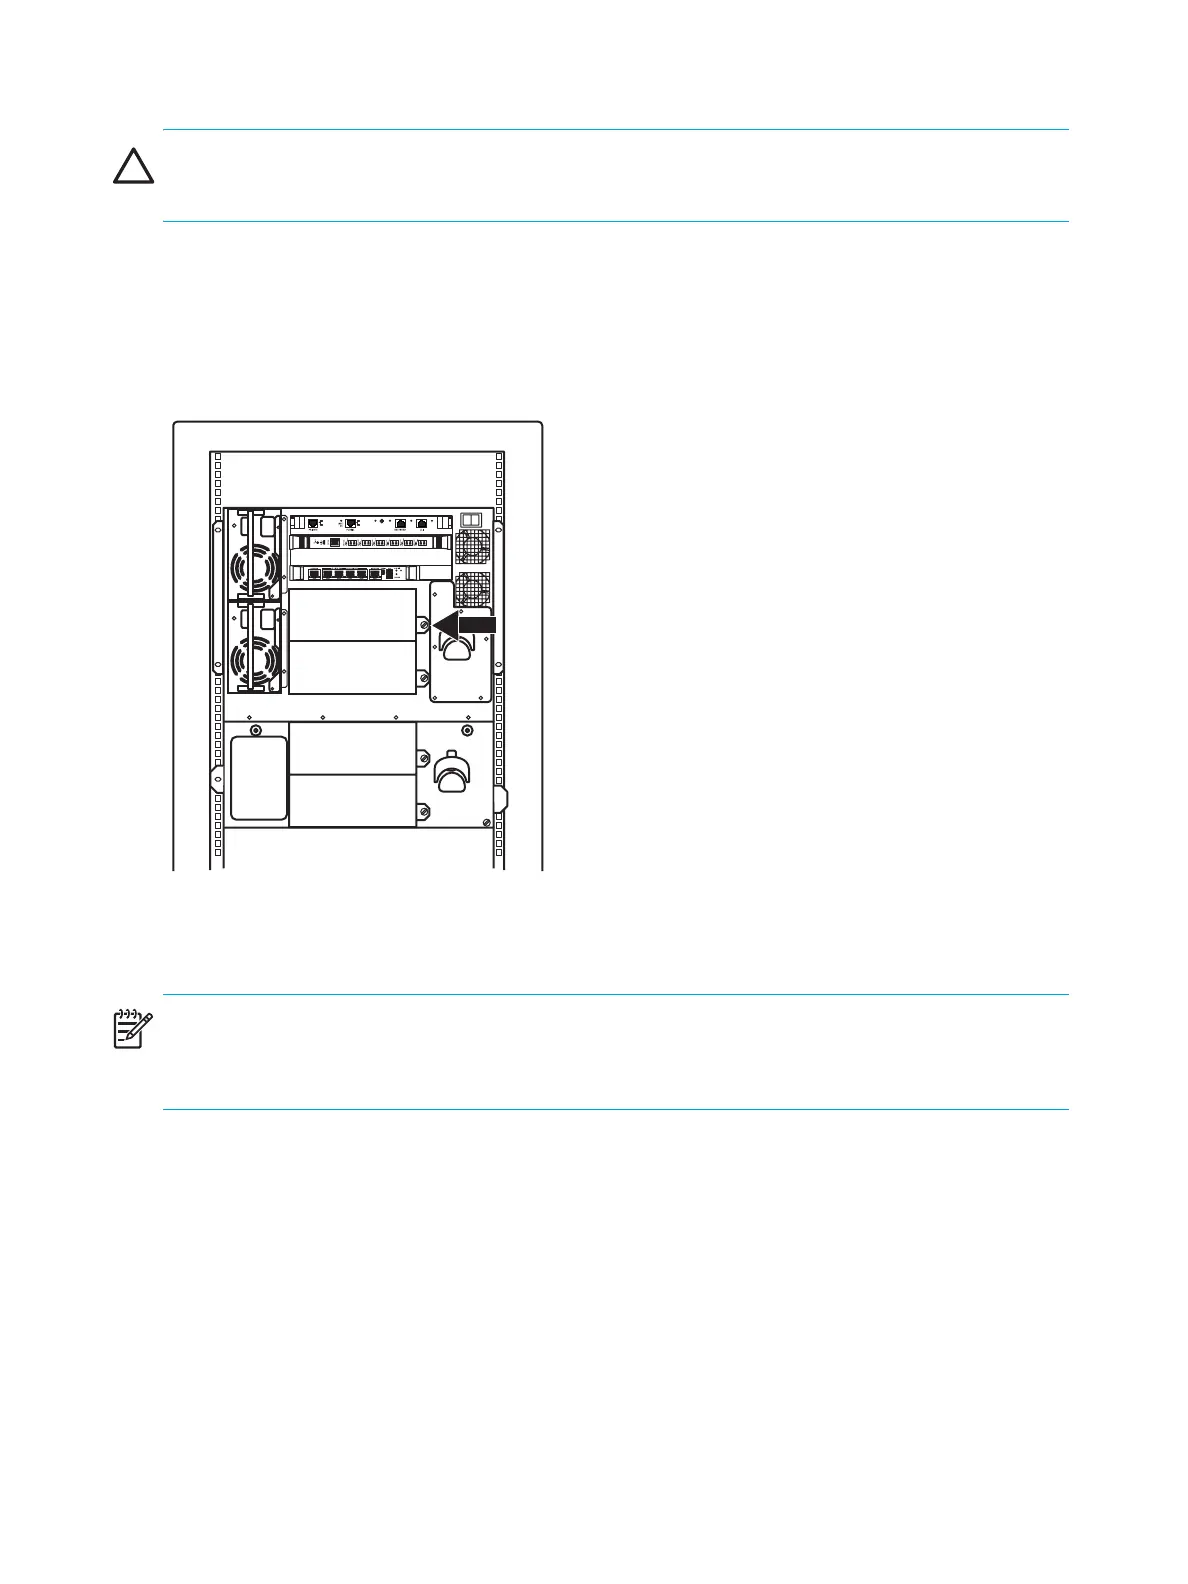
2. Using a slotted screwdriver, loosen the captive screw on the flat plate covering the drive bay for each
drive needed for installation (see Figure 27). Remove and discard the cover plates.
Figure 27 Remove drive cover plates
NOTE: HP recommends that tape drives be installed from top to bottom, with no gaps between drive
openings. For example, a configuration using four tape drives would start at the first slot at the top of the
rack and use the first four drive openings.
3. Slide each tape drive into an open bay. Insert the drive until the mounting bracket on the drive
assembly contacts the back of the module chassis.
10416
 Loading...