Removal and Replacement Procedures
PCI Riser Board Assembly
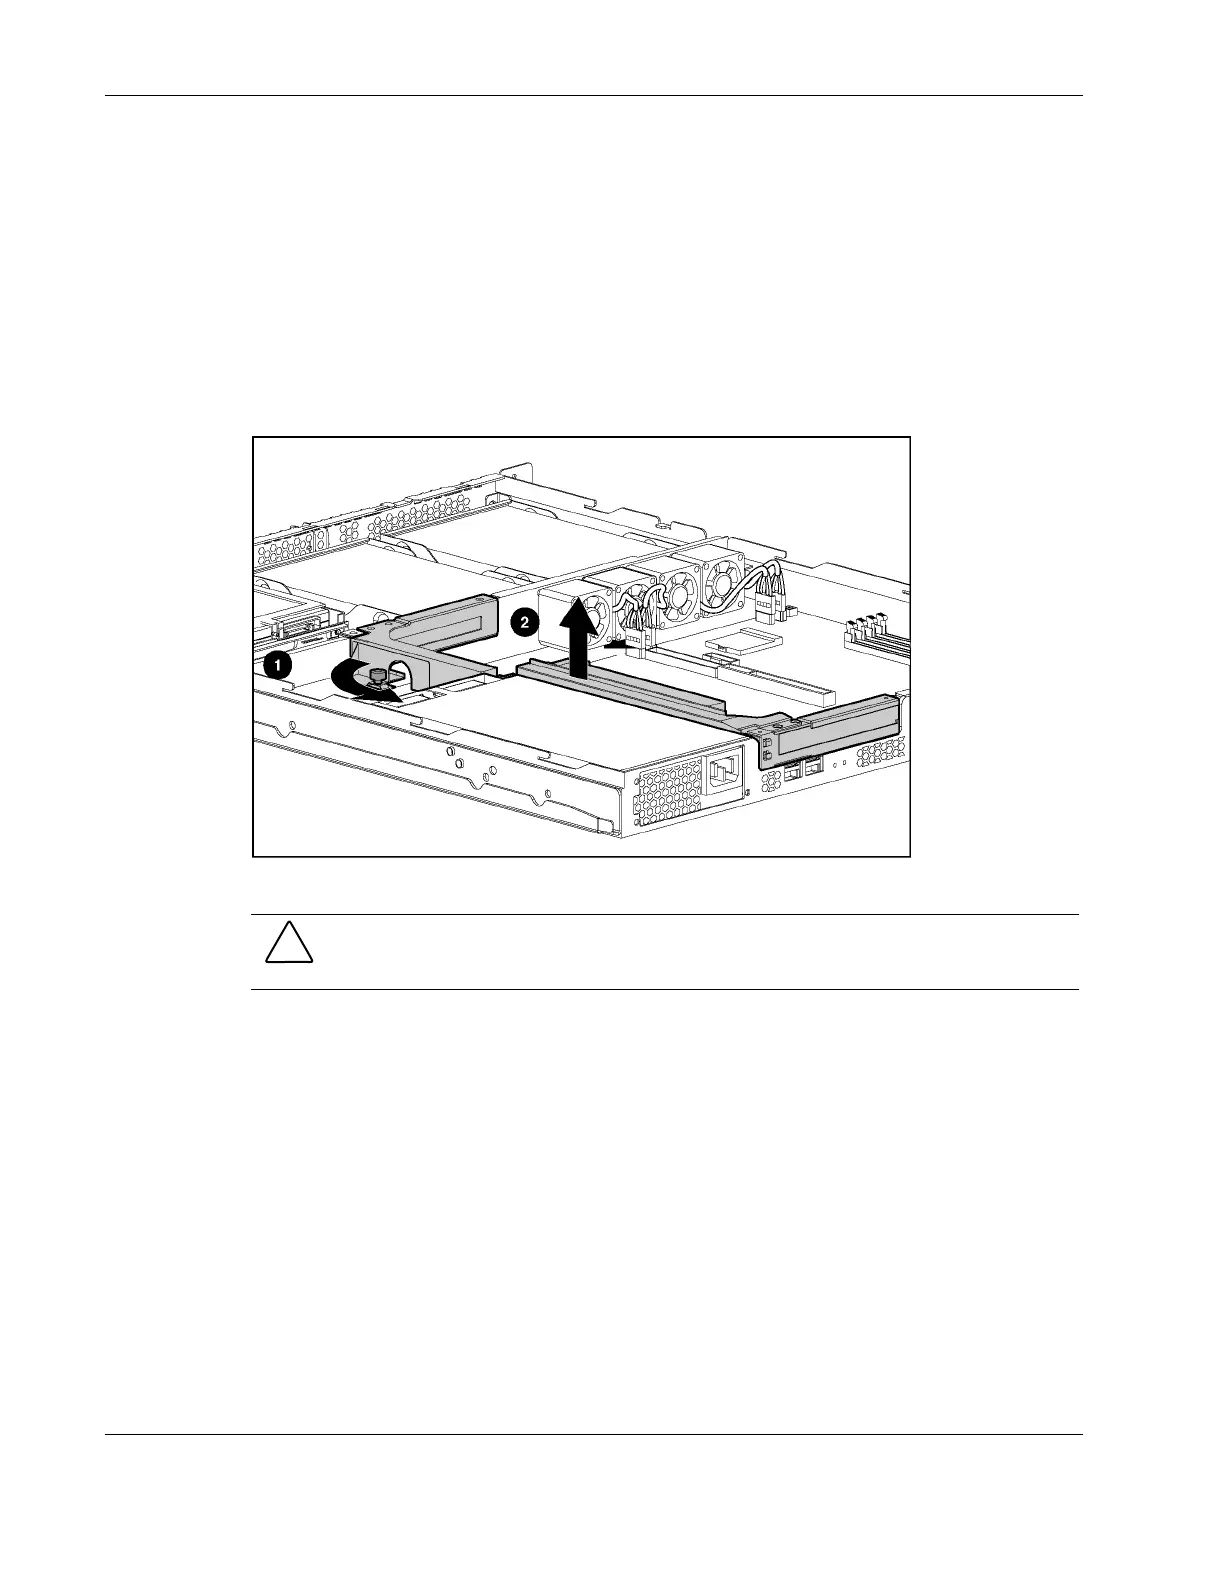
To remove the PCI riser board assembly:
1. Power down the server. See “Powering Down the Server” in this chapter.
2. Remove the access panel. See “Access Panel” in this chapter.
3. Disconnect any cables connecting an existing expansion board to the system board.
4. Loosen the PCI riser board thumbscrew (1).
5. Lift and remove the assembly from the server chassis (2).
Figure 2-16: Removing the PCI riser board
CAUTION: When removing the PCI riser board assembly, avoid damage to the system board
power cable.
When replacing an expansion board, refer to “Expansion Board” following this procedure.
IMPORTANT: Do not replace the PCI riser board assembly in the chassis unless all installation and
cabling procedures are complete.
Reverse steps 1 through 5 to replace the PCI riser board assembly, ensuring that the assembly
seats properly in the retainers on the rear of the chassis.
2-22 HP ProLiant DL320 Generation 2 Server Maintenance and Service Guide
 Loading...