User and Group Management
74 NAS 1000s Administration Guide
Enabling and Disabling Quota Management
To enable drive quotas:
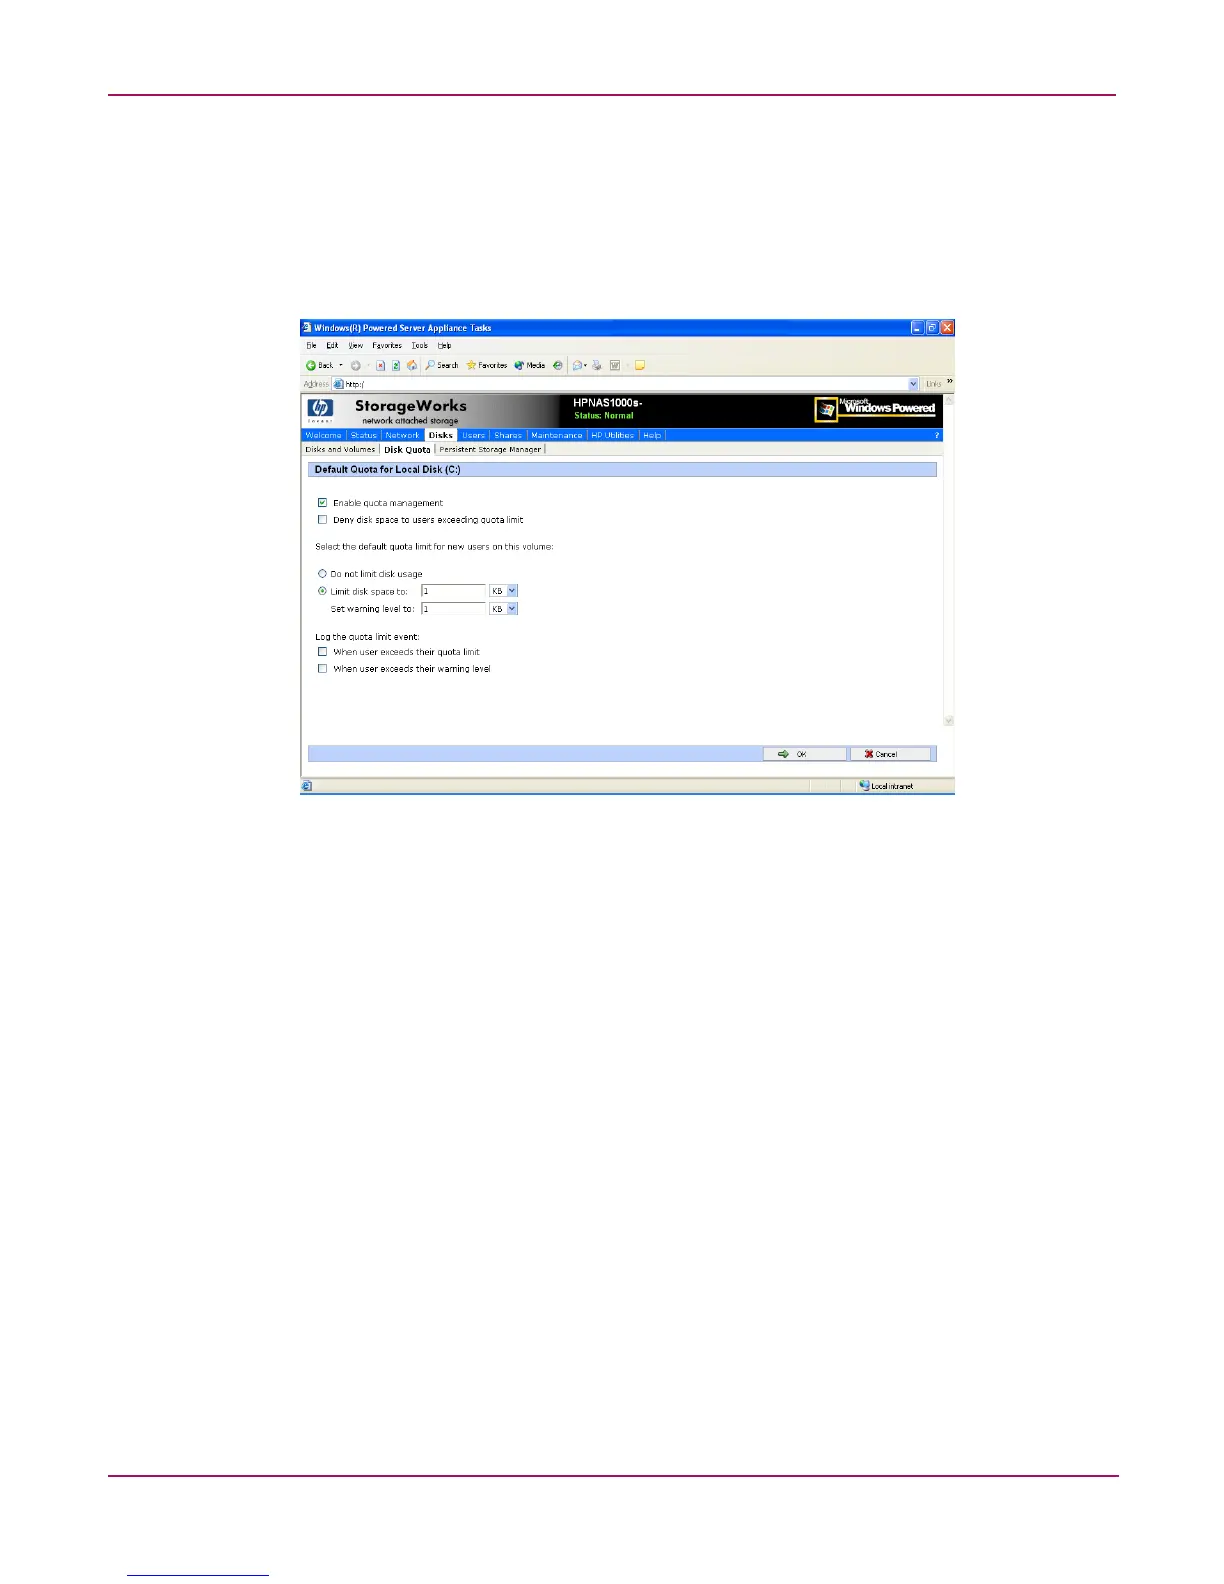
1. From the WebUI, select Disks, Disk Quota. From the Volumes and Quotas dialog box,
select a volume, and then click Quota. The Default Quota dialog box for the specified
volume is displayed.
Figure 34: Default Quota dialog box
2. To enable quotas on the selected disk, select Enable quota management. Compete the
additional data fields on the screen, including disk space and warning level limits and
auditing settings.
3. To disable quotas on the selected disk, de-select Enable quota management.
4. After completed all field entries, click OK. The Volume and Quotas dialog box is
displayed again.
 Loading...