System Rail Assembly (Type 2)
Attention: Mounting the rails is a complex procedure. To install the rack rails correctly, you must read,
and then perform each procedure step in the order given. Failure to perform each step in the order given
may cause rail failure.
To install the system rail assembly (type 2), do the following:
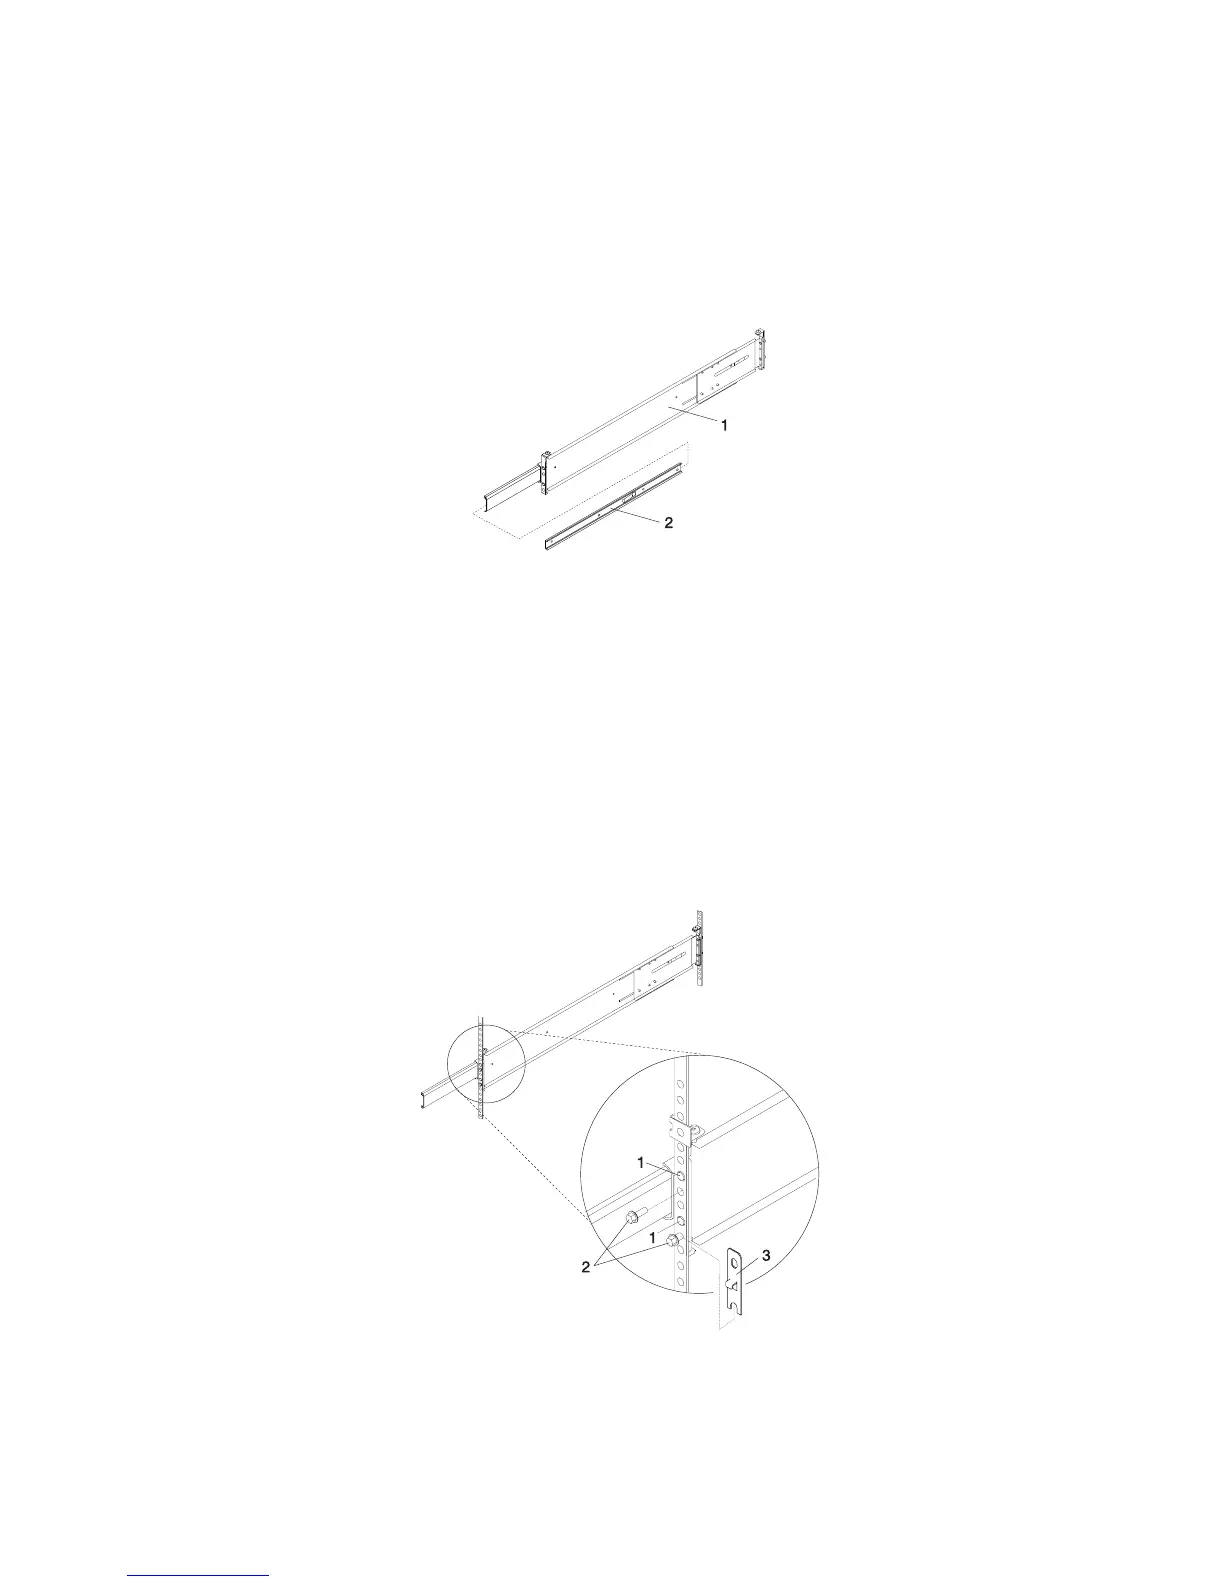
1. Beginning with the right slide rail, remove the right inner rail, as shown in the following illustration.
1 Right Outer Rail Assembly
2 Right Inner Rail
2. Position yourself at the front of the rack.
3. Facing the rack, note the EIA number of the previously installed self-adhesive dots. Insert the rail’s
rear-alignment pins into the corresponding EIA unit holes located on the rear flange.
4. Insert the rail’s front-alignment pins into the rack front flange holes that have been identified by the
self-adhesive placement dots. Ensure that the EIA number is the same from front to back.
5. Loosely thread one of the rail-retaining screws into the rail’s bottom screw hole. The screw hole is
located one position below the bottom alignment pin.
6. Locate one of the latch brackets, and place the bottom slot of the latch bracket over the rail-retaining
screw. Finger-tighten the screw.
1 Front Slide Rail Alignment Pin
2 Retaining Screws
3 Latch Bracket
576 Eserver pSeries 630 Model 6C4 and Model 6E4 Service Guide
 Loading...