3
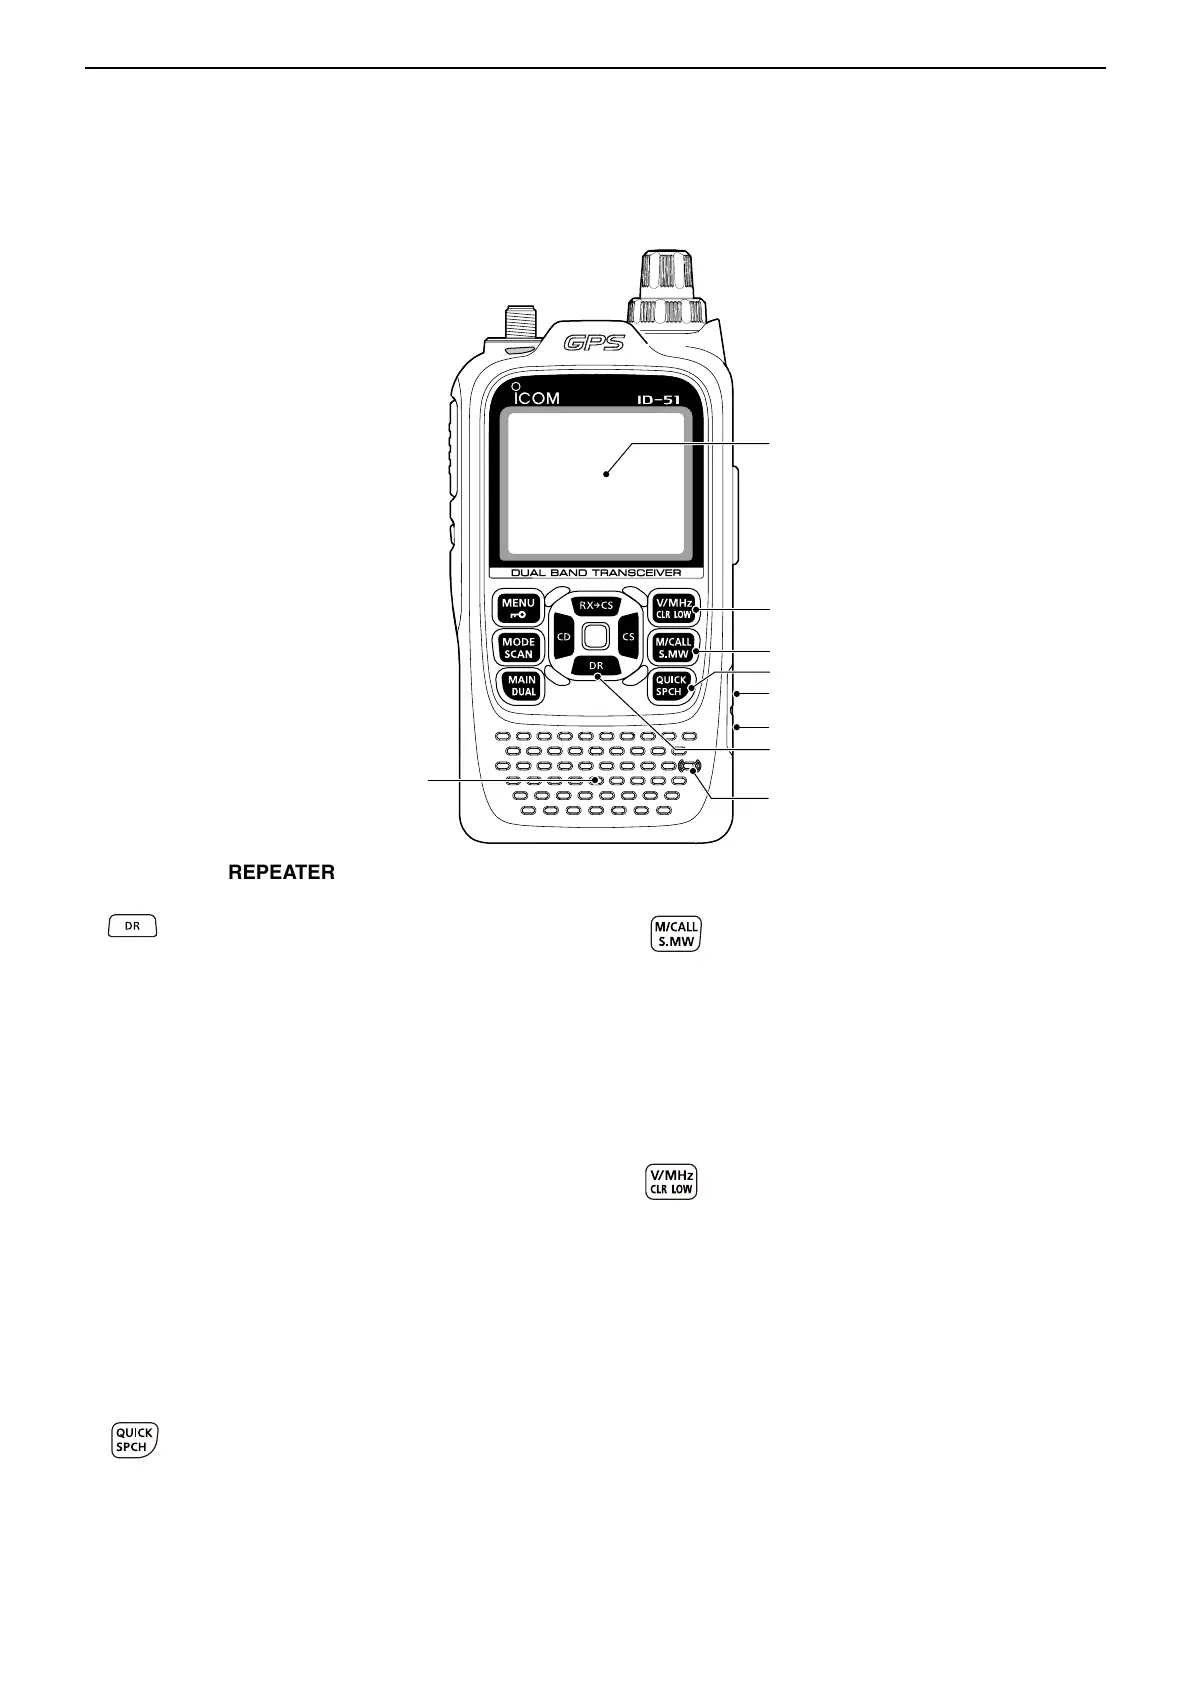
PANEL DESCRIPTION
3-3
!2 DR (D-STAR REPEATER)/D-PAD (DOWN) KEY
[DR]/D-pad()
➥ Hold down 1 second to display the DR
screen. (p. 8-3)
➥ While in the DR screen, or with the Menu
screen or Quick Menu screen open, push
to move the value or option selector bar
down. (p. 16-2)
!3 EXTERNAL DC IN JACK [DC IN]
➥ Connects to the supplied battery charger (BC-
167S) to charge the attached battery pack. (p. 4-3)
➥ Connect an external DC power source through
the optional CP-12L or CP-19R cigarette lighter
cable or OPC-254L DC power cable for external
DC operation. (p. 4-6)
!4 DATA JACK [DATA]
Connects to a PC through the optional data com-
munication cable, for data communication in the DV
mode, or for cloning. The jack is also used to connect
an external GPS receiver.
See page 9-14 or 17-17 for more details.
!5 QUICK MENU • SPEECH KEY [QUICK SPCH]
➥ Push to enter or exit the Quick Menu
screen. (p. 5-6)
• The Quick Menu is used to quickly select vari-
ous functions.
➥ Hold down for 1 second to audibly an-
nounce the displayed frequency, operating
mode or call sign. (p. 17-6)
!6 MEMORY/CALL • SELECT MEMORY WRITE KEY
[M/CALL•S.MW]
➥ In the VFO mode, push once to enter the
Memory selection mode, push again to en-
ter the Call channel mode. (p. 8-3)
For ID-51A only
In the Call channel mode, push once to
enter the Weather channel mode.
➥ Hold down for 1 second to enter the Select
Memory Write mode. (p. 12-4)
!7 VFO/MHz • CLEAR • OUTPUT POWER KEY
[VFO/MHz•CLR•LOW]
➥ Push to select the VFO mode. (p. 5-10)
➥ While in the VFO mode, push to select
1 MHz or 10 MHz tuning steps. (p. 5-8)
➥ With the Menu screen or Quick Menu screen
open, push to return to the operating mode
before displaying the Menu screen. (p. 16-2)
➥ While in the Memory Name or Call Sign
Programming mode, push to delete a char-
acter. (p. 12-11)
➥ While scanning, push to cancel a scan.
(pp. 13-5, 13-9)
➥ Hold down for 1 second to select the out-
put power. (p. 5-11)
• Select the transmit output power of High, Mid,
Low2, Low1 or S-low.
• While holding down this key, rotate [DIAL] to
select the desired output power.
■ Front, top and side panels (Continued)
Speaker
Function
display (p. 3-5)
Internal
microphone
!2
!3
!4
!5
!6
!7
 Loading...