70 - 1
Removal and Replacement
The torque converter must be removed together with the
syncro shuttle gearbox, refer to Syncro Shuttle Gearbox -
Removal and Replacement.
Replacement
1 Ensure that flywheel face, drive plate, and hardware are
clean and free from burrs or other surface
imperfections.
2 Offer drive plate 1 to the torque converter.
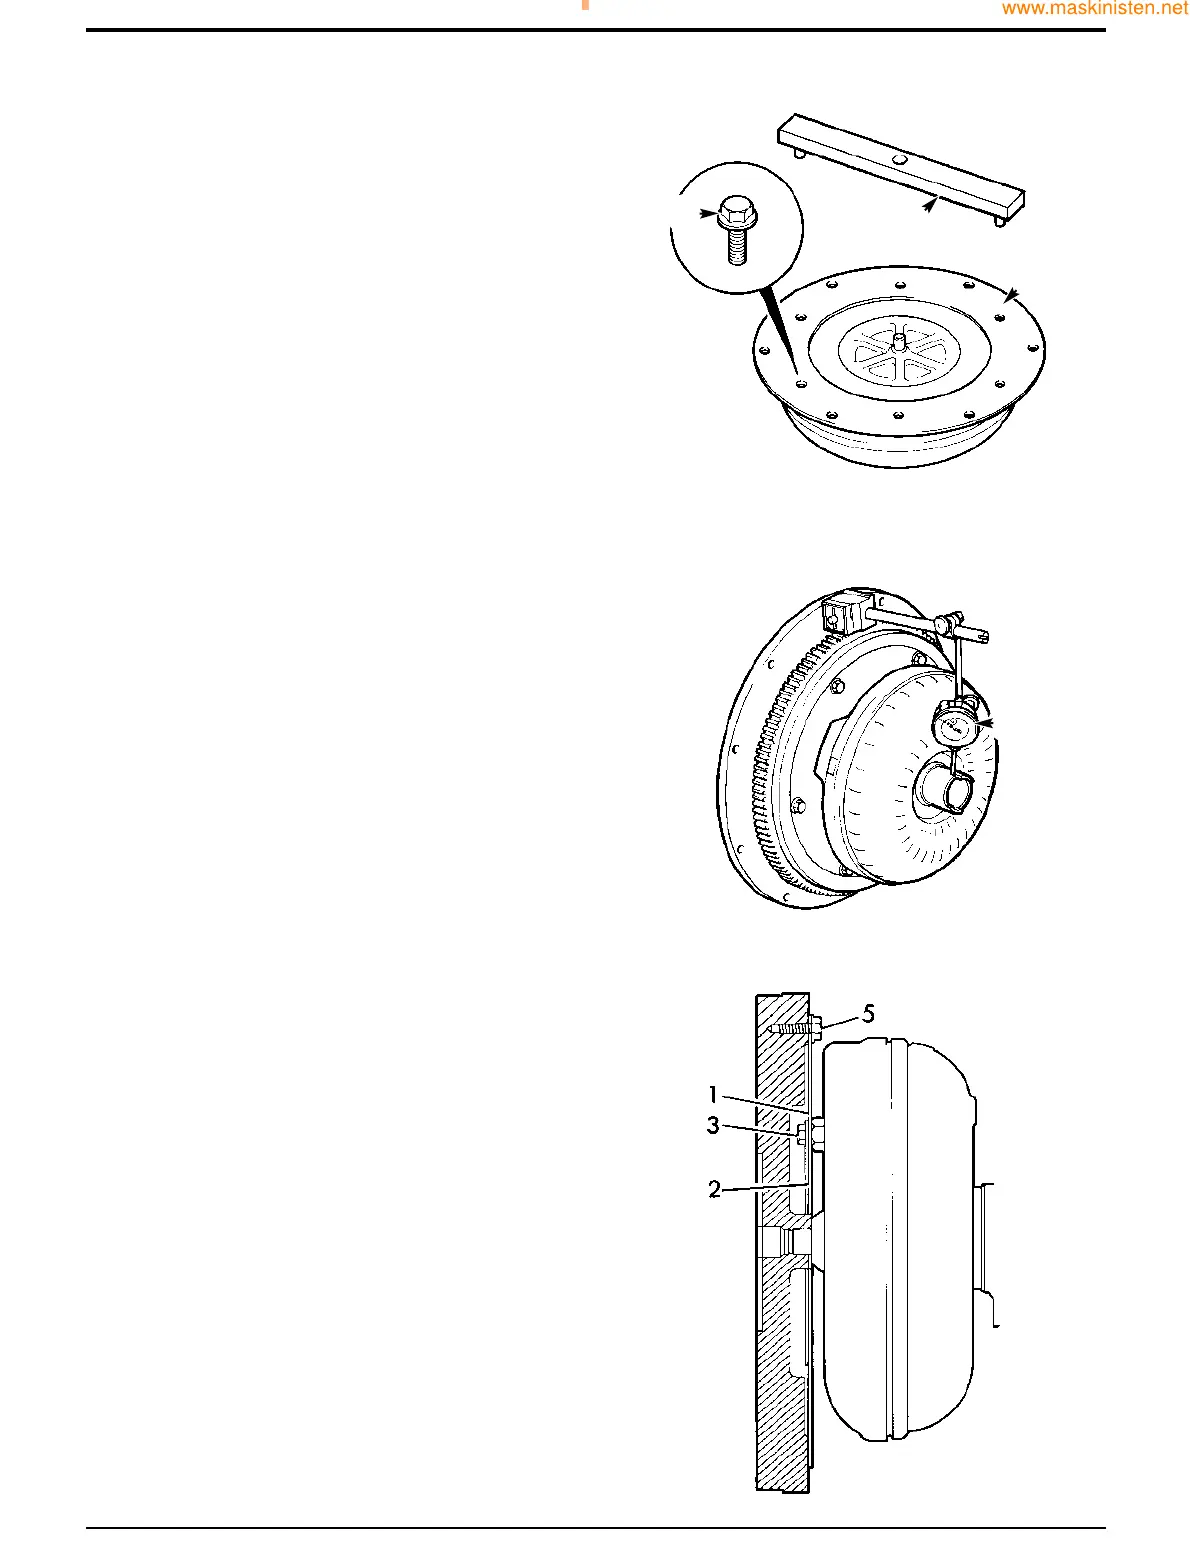
3 Place the torque converter alignment tool A over the
torque converter spigot, make sure that the tool locates
in two of the converter bolt holes as shown. It is
important to note that the converter drive tube must be
protected against damage or contamination at all times.
4 Fit four of the M10 flanged bolts 2 and torque tighten to
84 Nm (62 lbf ft). Remove the alignment tool and fit the
remaining two retaining bolts 2.
5 Offer the torque converter and drive plate assembly to
the flywheel, bolt the drive plate to the flywheel (use
only 3 bolts). Check the converter run-out as shown at
B, which should not exceed 0.38mm (0.015 in.).
Note: In the unlikely event that the run-out exceeds 0.38 mm
(0.015 in.), remove the converter and check the spigot for
burrs, remove the drive plate and rotate it 180° on the torque
converter, repeat steps 3 to 5.
6 Remove the torque converter and drive plate assembly
from the flywheel.
7 Install the torque converter with its drive plate assembly
onto the transmission input shaft, make sure that the
dogs on the converter pump drive shaft engage with
the recesses in the pump, also take care not to damage
the oil seal.
8 Rotate the engine flywheel so that one bolt hole is in a
six O' clock position.
9 Rotate the torque converter and drive plate assembly
so that one bolt hole is in a six O' clock position.
10 Install the transmission/torque converter assembly to
the engine.
11 Remove the access plate from the bottom of the engine
flywheel housing and through the access hole fit and
hand tighten one M8 flanged bolt (item 3) in the six 'O'
clock position
12 Rotate the flywheel until the next bolt hole is
accessible, fit and hand tighten the next bolt 3. Repeat
the operation until all bolts are fitted. Finally torque
tighten bolts 3 to 44 Nm (32 lbf ft), rotating the flywheel
each time to align bolts 3 with access hole. Refit
access plate.
Section F Transmission
9803/7130
Section F
70 - 1
Issue 1
Torque Converter
A265990
S161470
S267910
AA
BB
22
11

 Loading...