5 - 6
Routine Maintenance (continued)
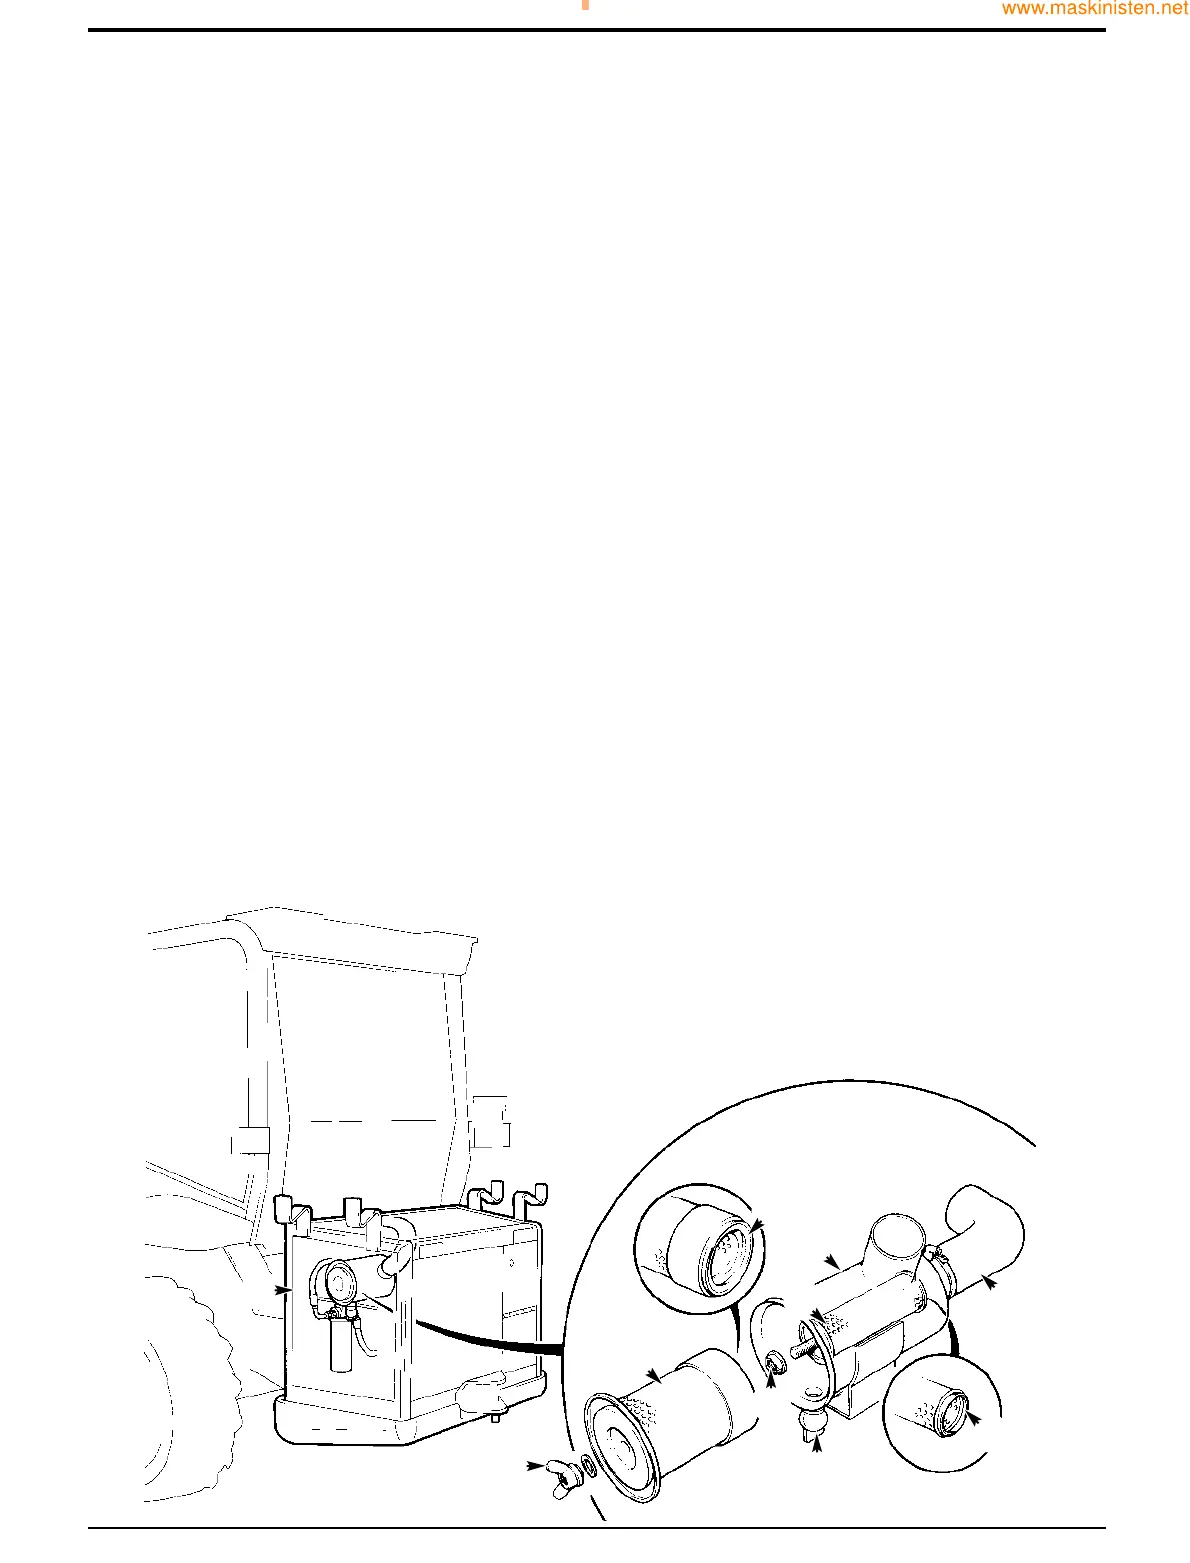
Compressor Air Filter - Changing the Elements
!!
CAUTION
Do not run the compressor when the outer element has
been removed.
!!
CAUTION
The inner element of the compressor air filter must be
replaced with a new one. Do not attempt to clean or
wash the old element.
1 Park the machine on firm level ground. Engage the
parking brake and set the transmission to neutral. Stop
the engine and remove the starter key.
2 Gain access to the filter by opening the side of the
compressor housing X.
3 If changing the inner element, disconnect the filter
induction hose A. Cover the end of the hose to prevent
rain and dirt from getting into the compressor.
4 Unscrew wingnut H. Remove the outer element G. Take
care not to tap or knock the element.
5 If required, unscrew nut F and remove inner element E.
6 Clean inside the canister C and dust valve D.
7 Test the seating of seals B and J:
a Smear the seals on the new elements with
grease.
b Insert the new elements in canister C.
c Remove the elements and check for witness
marks on the inside base of the canister.
8 If the seals are secure, re-insert the new inner element
and tighten nut F.
9 Insert the new outer element and tighten wingnut H.
10 Refit the induction hose A (if disconnected). Make sure
that the wire to the Air Filter Blocked switch is attached
to the electrical connector.
Note: Do not run the compressor with the dust valve D
removed.
Note: In dusty conditions, the outer element can be cleaned
by blowing through in the reverse direction with clean dry
compressed air. If the element is damaged, it must be
replaced. A new inner element must be fitted at least every
third time the outer element is changed. As a reminder, mark
the inner element with a felt tipped pen each time the outer
element is changed.
Section A Attachments
9803/7130
Section A
5 - 6
Issue 1
Airmaster Compressor
S211880
XX
AA
HH
GG
FF
CC
DD
BB
JJ
EE
 Loading...