– 6 –
WARNING :
To protect against possible personal injury due to abrupt start of the machine, be sure to start the
following work after turning the power o and ascertaining that the motor is at rest.
2-4. Pneumatic components (Only for the models provided with the stitch skipping
detecting device and bobbin-thread remaining amount detecting device)
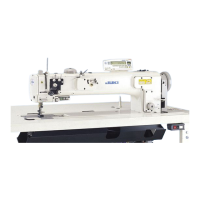
(1) Installing the regulator
1) Install regulator (asm.)
❶
on mounting plate
❺
with screw
❷
, spring washer
❸
and nut
❹
which are supplied with the unit.
2) Attach joint
❻
to inlet
1
. Attach joint
❼
to out-
let
2
.
3) Attach mounting plate
❺
on the undersurface of
the table with accessory screws
❽
supplied with
the plate.
4) Connect branch Y union
❾
to joint
❼
.
* Screw
❷
which is supplied with the unit:
Thread diameter M5; Length: 12 mm
(SM6051202TP)
* Branch Y union
❾
(PJ308060004) which comes
with the air blower solenoid valve asm._SD
should be used.
❶
❷
A
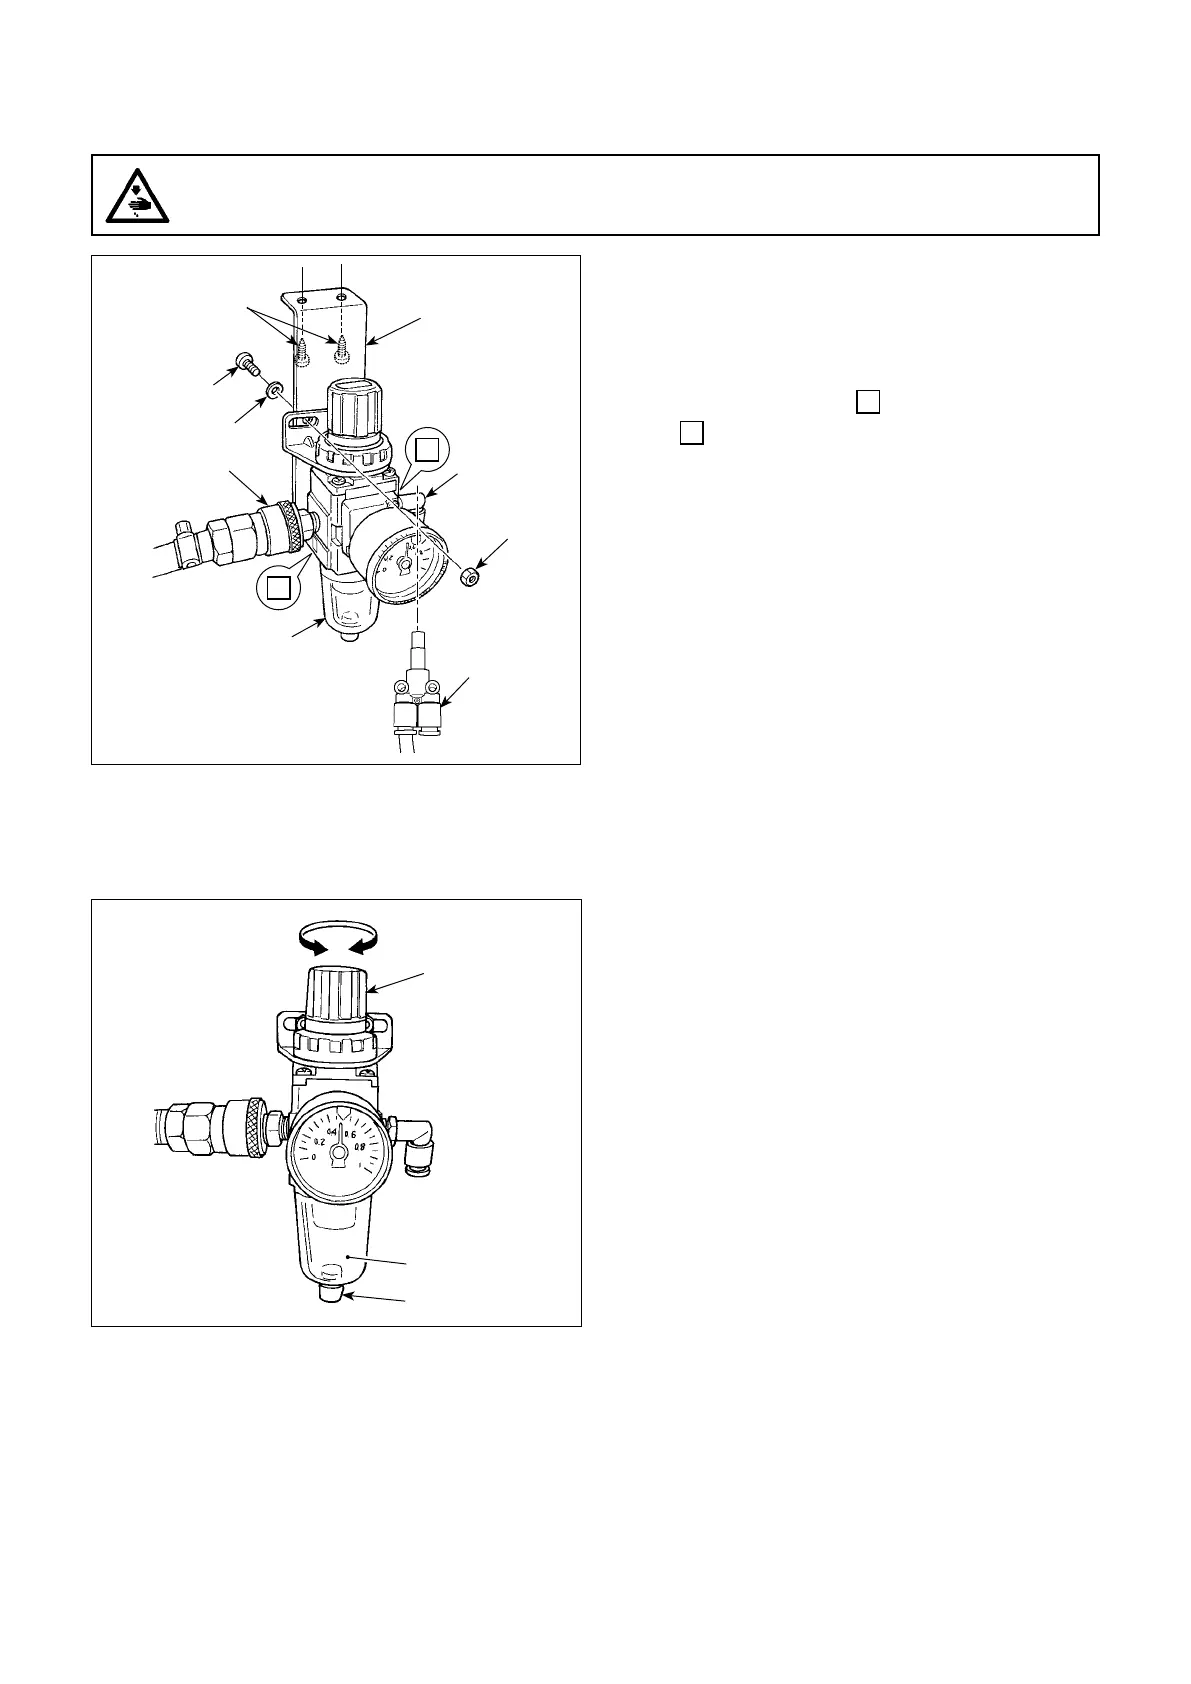
(2) Adjusting the air pressure
1) The operating air pressure is 0.5 to 0.55 MPa.
Adjust the air pressure using air pressure regu-
lating knob
❶
of the lter regulator.
2) In the case uid accumulation is observed in
A
section of the lter regulator, turn drain cock
❷
to drain the uid.
Decrease Increase
❷
❶
❺
❼
❻
❹
❸
❽
1
2
❾

 Loading...