– 31 –
4. ADJUSTING THE SEWING MACHINE
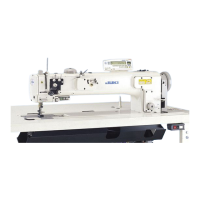
4-1-1. Adjusting the tension of thread tension
controller No. 1
1) Turn thread tension nut No. 1
❶
clockwise
A
to
shorten the length of thread remaining on the
top of needle after thread trimming. Turn the nut
counterclockwise
B
to lengthen it.
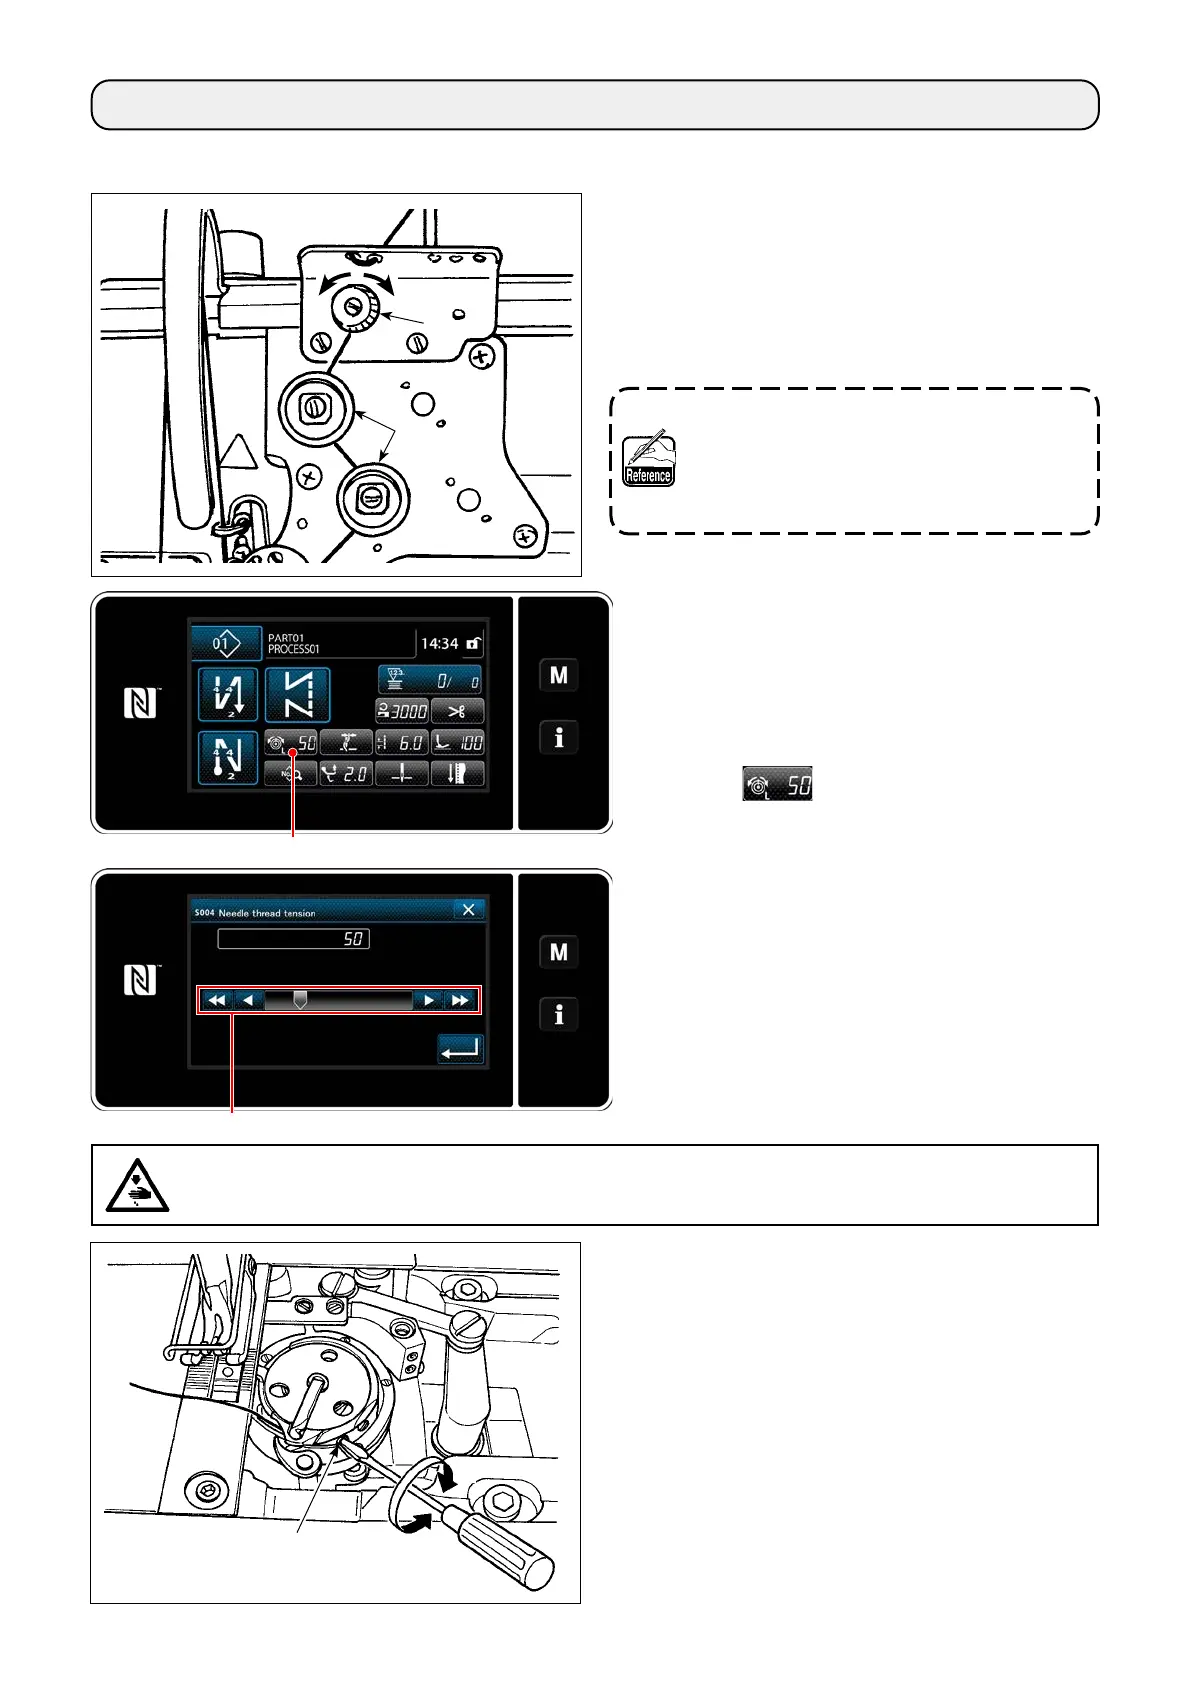
4-1-3. Adjusting the bobbin thread tension
Turn tension adjustment screw
❺
clockwise
A
to
increase the bobbin thread tension, or counterclock-
wise
B
to decrease it.
WARNING :
To protect against possible personal injury due to abrupt start of the machine, be sure to start the
following work after turning the power o and ascertaining that the motor is at rest.
4-1. Thread tension
❹
❸
❺
B
A
❶
B
A
4-1-2. Adjusting the needle thread tension
(Active tension)
Active tension
❷
permits setting of the needle
thread tension on the operation panel according
to each sewing condition. In addition, the data
can be stored in memory.
1) Press
❸
to display the needle thread
tension input screen.
2) Change the needle thread tension as de-
sired by pressing
❹
.
3) There is a setting range of 0 to 200.
When the set value is increased, the tension
becomes higher.
* When the set value is 36 at the time of stan-
dard delivery, the thread tension is adjusted
to 3.9 N (Tetoron thread #8). (Reference)
❷
In the case the length of thread remaining at
the needle tip is not increased, change the
spring of tension controller No. 1 with the
separately-available spring (Part number:
22945505).

 Loading...