i
CONTENTS
1. SPECIFICATIONS .................................................................................................1
1-1. Specications of the sewing machine head ............................................................................1
1-2. Specications of the control box .............................................................................................. 1
2. INSTALLATION .....................................................................................................2
2-1. Mounting positions of the devices and table...........................................................................2
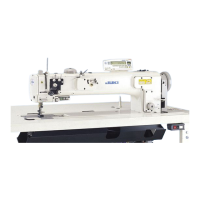
2-2. Installation of the sewing machine ...........................................................................................3
2-3. Installing the oil shield ............................................................................................................... 5
2-4. Pneumatic components (Only for the models provided with the stitch skipping
detecting device and bobbin-thread remaining amount detecting device) .........................6
2-5. Installing the thread stand ......................................................................................................... 8
2-6. Installing the thread guide pin ..................................................................................................8
2-7. Installing the handwheel cover (only in the case the protection cover sensor is
provided) .................................................................................................................................... 9
2-8. Installing the electrical box .....................................................................................................10
2-8-1. Preparing for installation of the control box ....................................................................10
2-8-2. Installing the electrical box ................................................................................................10
2-9. Installing the pedal sensor ......................................................................................................10
2-10. Installing the reactor box (Only for the EU type models) ...................................................11
2-11. Installing the control box for stitch skipping detecting device (only for the models
provided with the stitch skipping detecting device and the bobbin-thread remaining
amount detecting device) .......................................................................................................12
2-12. Installing the accessory ring core (Only for the EU type models) ..................................... 12
2-12-1. Installing the accessory ring core supplied with the electrical box ............................ 12
2-13. Connecting the power switch cable .....................................................................................12
2-13-1. Installing the power switch ..............................................................................................12
2-13-2. Connecting the power source cord ................................................................................13
2-14. Connecting the cords.............................................................................................................14
2-14-1. Connecting the cords coming from the sewing machine .............................................14
2-14-2. Connection of the cords coming from the stitch skipping detecting device,
bobbin-thread remaining amount detecting device and cover sensor ........................... 15
2-15 Handling the cords ..................................................................................................................18
2-15-1. Handling the cords coming from the control box .........................................................18
2-15-2. Handling the cords coming from the control box for stitch skipping detecting
device .................................................................................................................................... 18
2-16. Attaching the connecting rod ................................................................................................ 19
2-17. Adjustment of the pedal ......................................................................................................... 20
2-17-1. Installing the connecting rod ...........................................................................................20
2-17-2. Adjusting the pedal angle ................................................................................................ 20
2-18. Pedal operation.......................................................................................................................20
2-19. Lubrication ..............................................................................................................................21
2-20. How to use the operation panel (Basic explanation) ..........................................................22
2-20-1. Selection of the language (operation to be done at rst) .............................................22
2-20-2. Names and functions of the panel keys .........................................................................24
2-20-3. Basic operation .................................................................................................................25
3. PREPARATION BEFORE SEWING ...................................................................26
3-1. Attaching the needle ................................................................................................................26