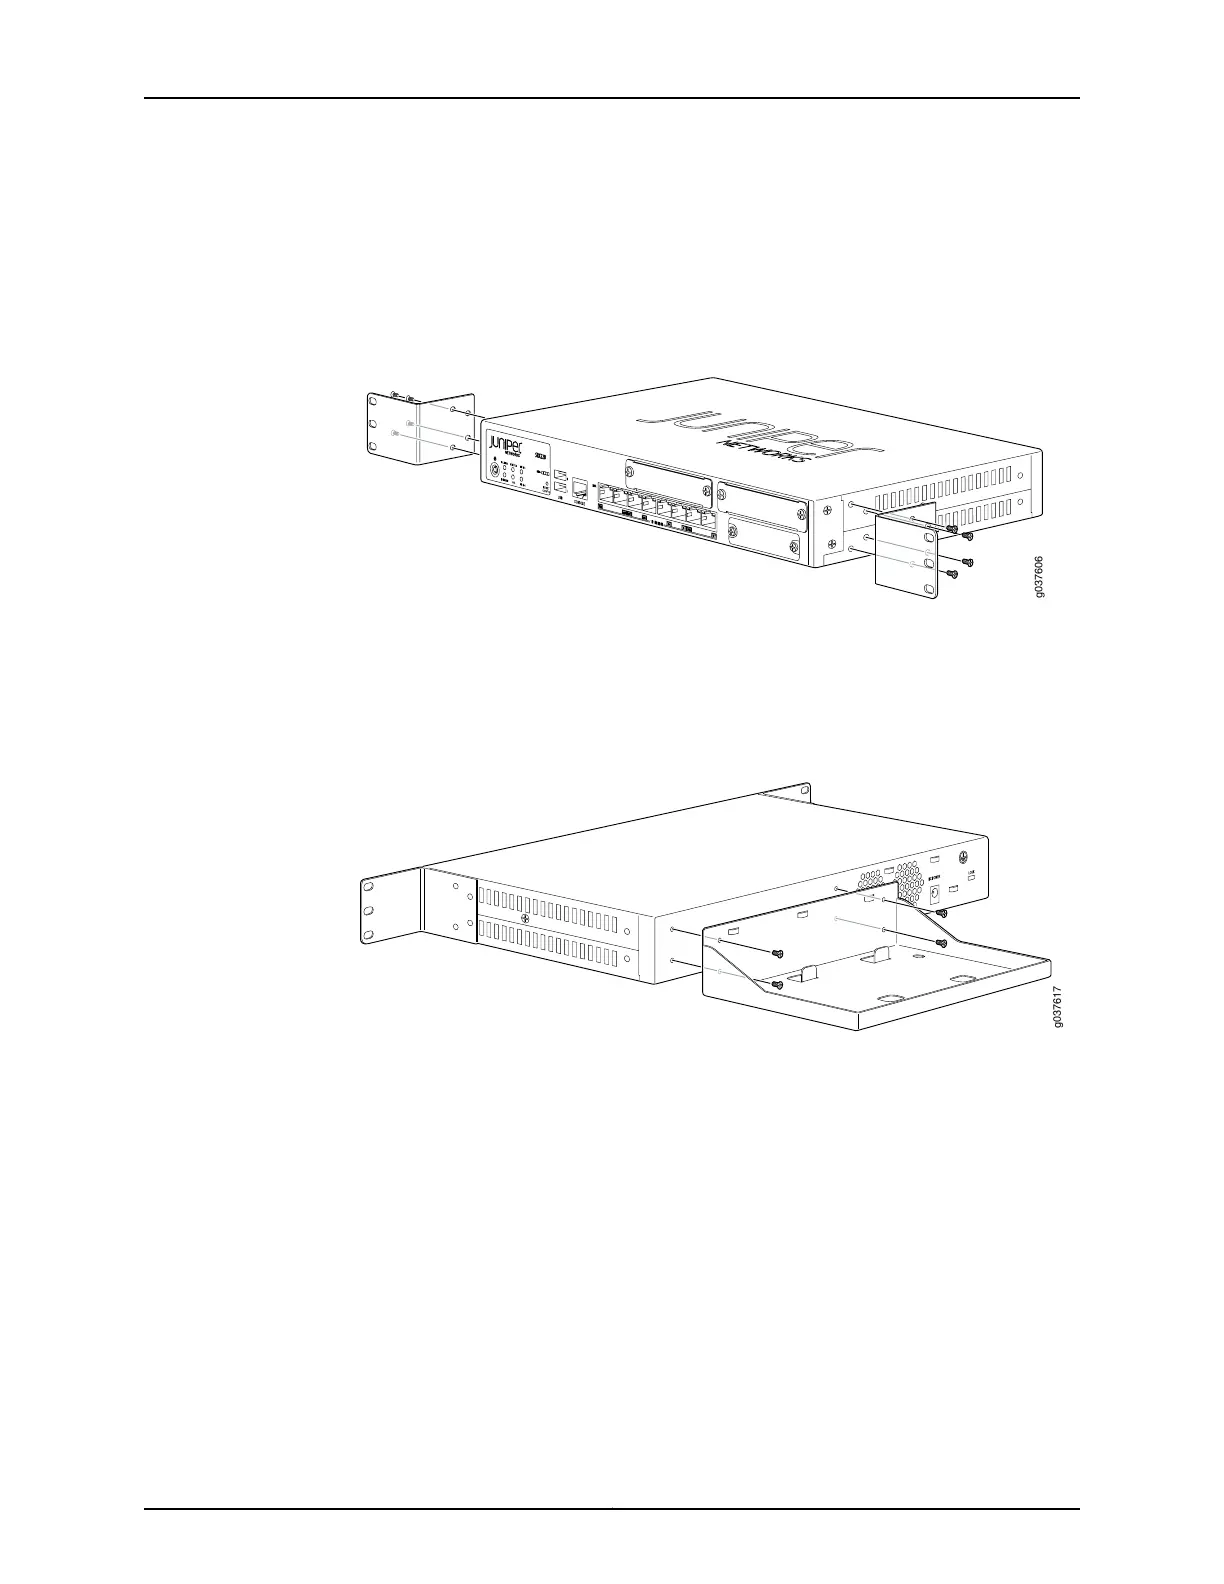
To install the device in a rack:
1. Position a mounting bracket on each side of the chassis, as shown in
Figure 10 on page 58.
Figure 10: Installation of SRX220 Services Gateway in a Rack — Attaching
the Mounting Brackets
2. Use a number-1 Phillips screwdriver to install the screws that secure the mounting
brackets to the chassis, as shown in Figure 10 on page 58.
3. Orient the power supply tray, as shown in Figure 11 on page 58.
Figure 11: SRX220 Services Gateway Rack Installation — Attaching the
Power Supply Adapter Tray
4. Use a number-1 Phillips screwdriver to install the screws that secure the power supply
tray to the chassis, as shown in Figure 11 on page 58.
5. Place the power supply adapter in the tray, as shown in Figure 12 on page 59 and
Figure 13 on page 59.
Copyright © 2016, Juniper Networks, Inc.58
SRX220 Services Gateway Hardware Guide for H Model Numbers
 Loading...