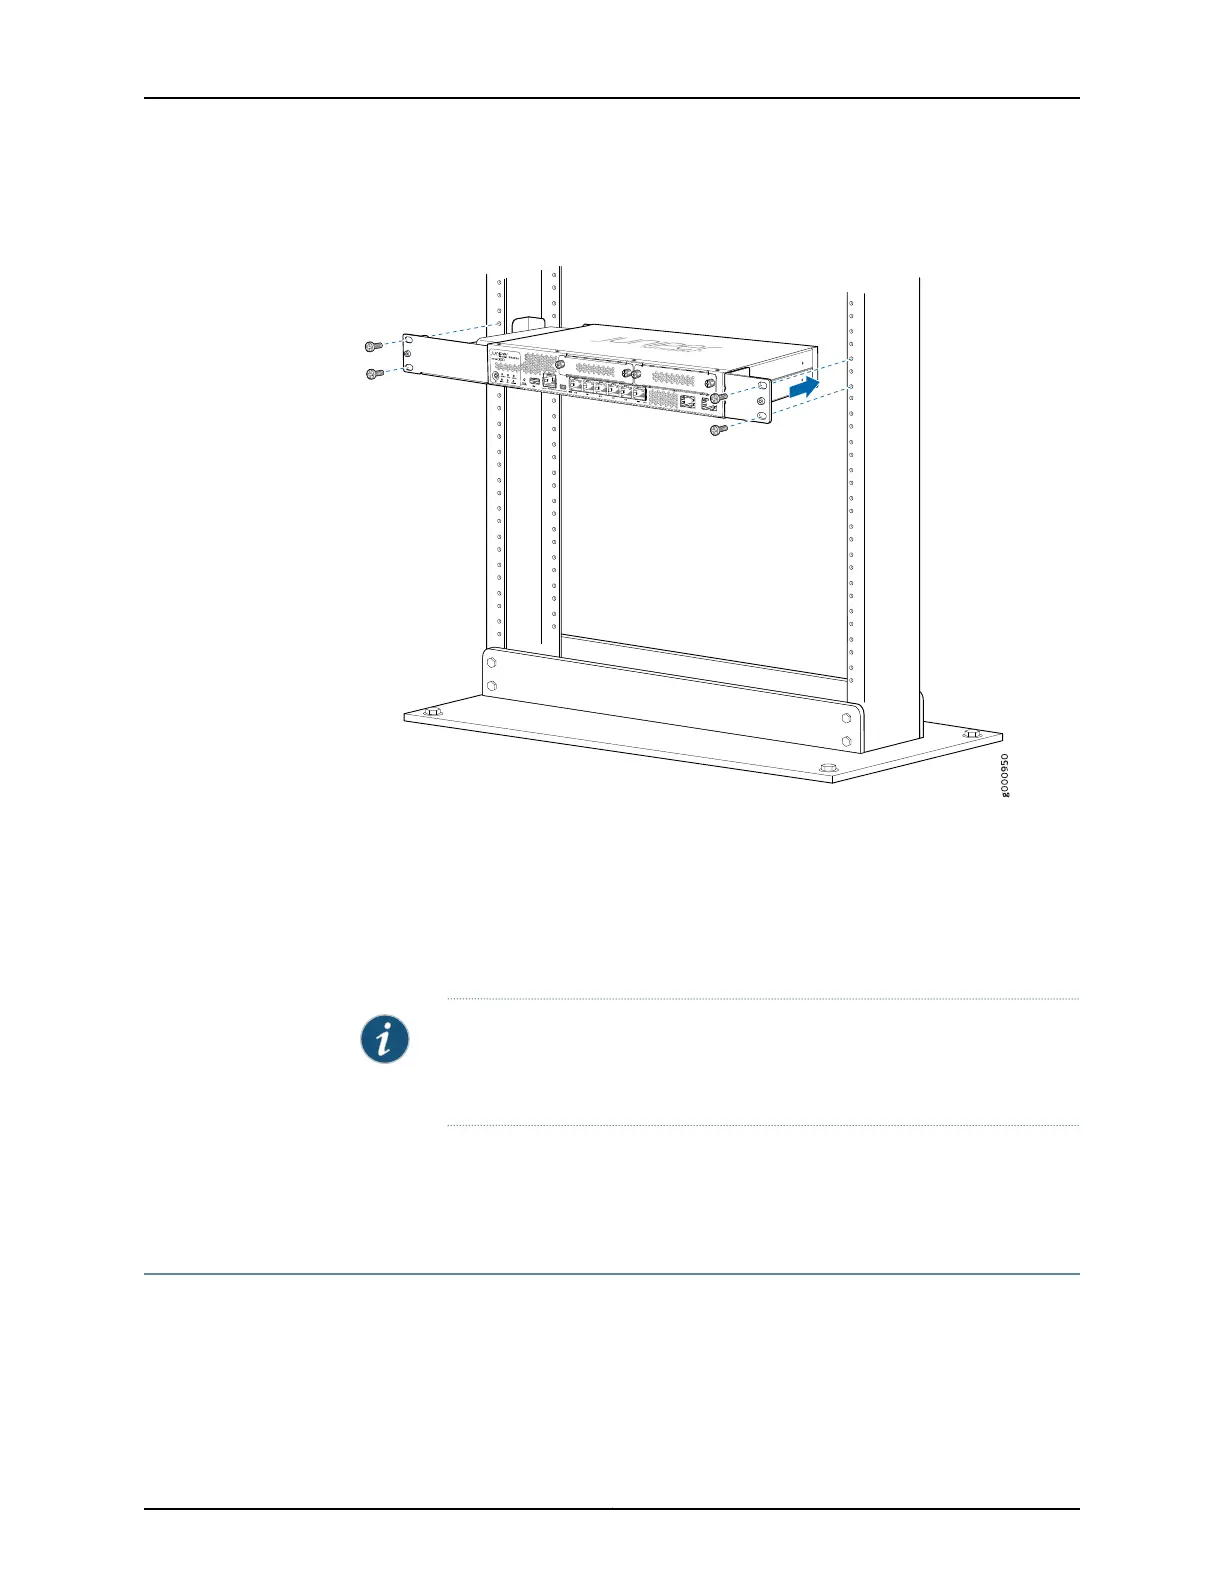
Figure 10: Positioning the SRX320 Services Gateway (with 75 W Power
Supply Adapter) in a Rack
6. Have a second person install a mounting screw into each of the two aligned holes.
Use a number-1 Phillips screwdriver to tighten the mounting screws.
7. Install the second screw in each mounting bracket.
8. Verify that the mounting screws on one side of the rack are aligned with the mounting
screws on the opposite side and that the device is level.
NOTE: For information on installing Mini-Physical Interface Modules
(Mini-PIMs), see the SRX300 Series and SRX550 High Memory Services
Gateway Interface Modules Reference.
Related
Documentation
Installing the SRX320 Services Gateway on a Desk on page 56•
• Installing the SRX320 Services Gateway on a Wall on page 57
Installing the SRX320 Services Gateway on a Desk
Follow these guidelines when installing the SRX320 Services Gateway on a desk:
•
You can install the SRX320 Services Gateway on a desk, table, or other level surface.
•
The device is shipped with the rubber feet attached. The rubber feet are necessary to
stabilize the device on the desk.
Copyright © 2016, Juniper Networks, Inc.56
SRX320 Services Gateway Hardware Guide
 Loading...


