3: Calibration Model DMM7510 7½ Digit Graphical Sampling Multimeter
3-6 DMM7510-905-01 Rev. A / April 2015
Remote calibration adjustment procedure
During remote calibration, the front-panel display shows the calibration step with a status progress
bar.
Example calibration code that provides additional front-panel display prompts is provided in Example
TSP calibration code (on page 3-20).
Rear terminal adjustments
To adjust the Model DMM7510 using the rear terminals:
1. Set the TERMINALS switch to REAR. Ensure that the orange R is displayed.
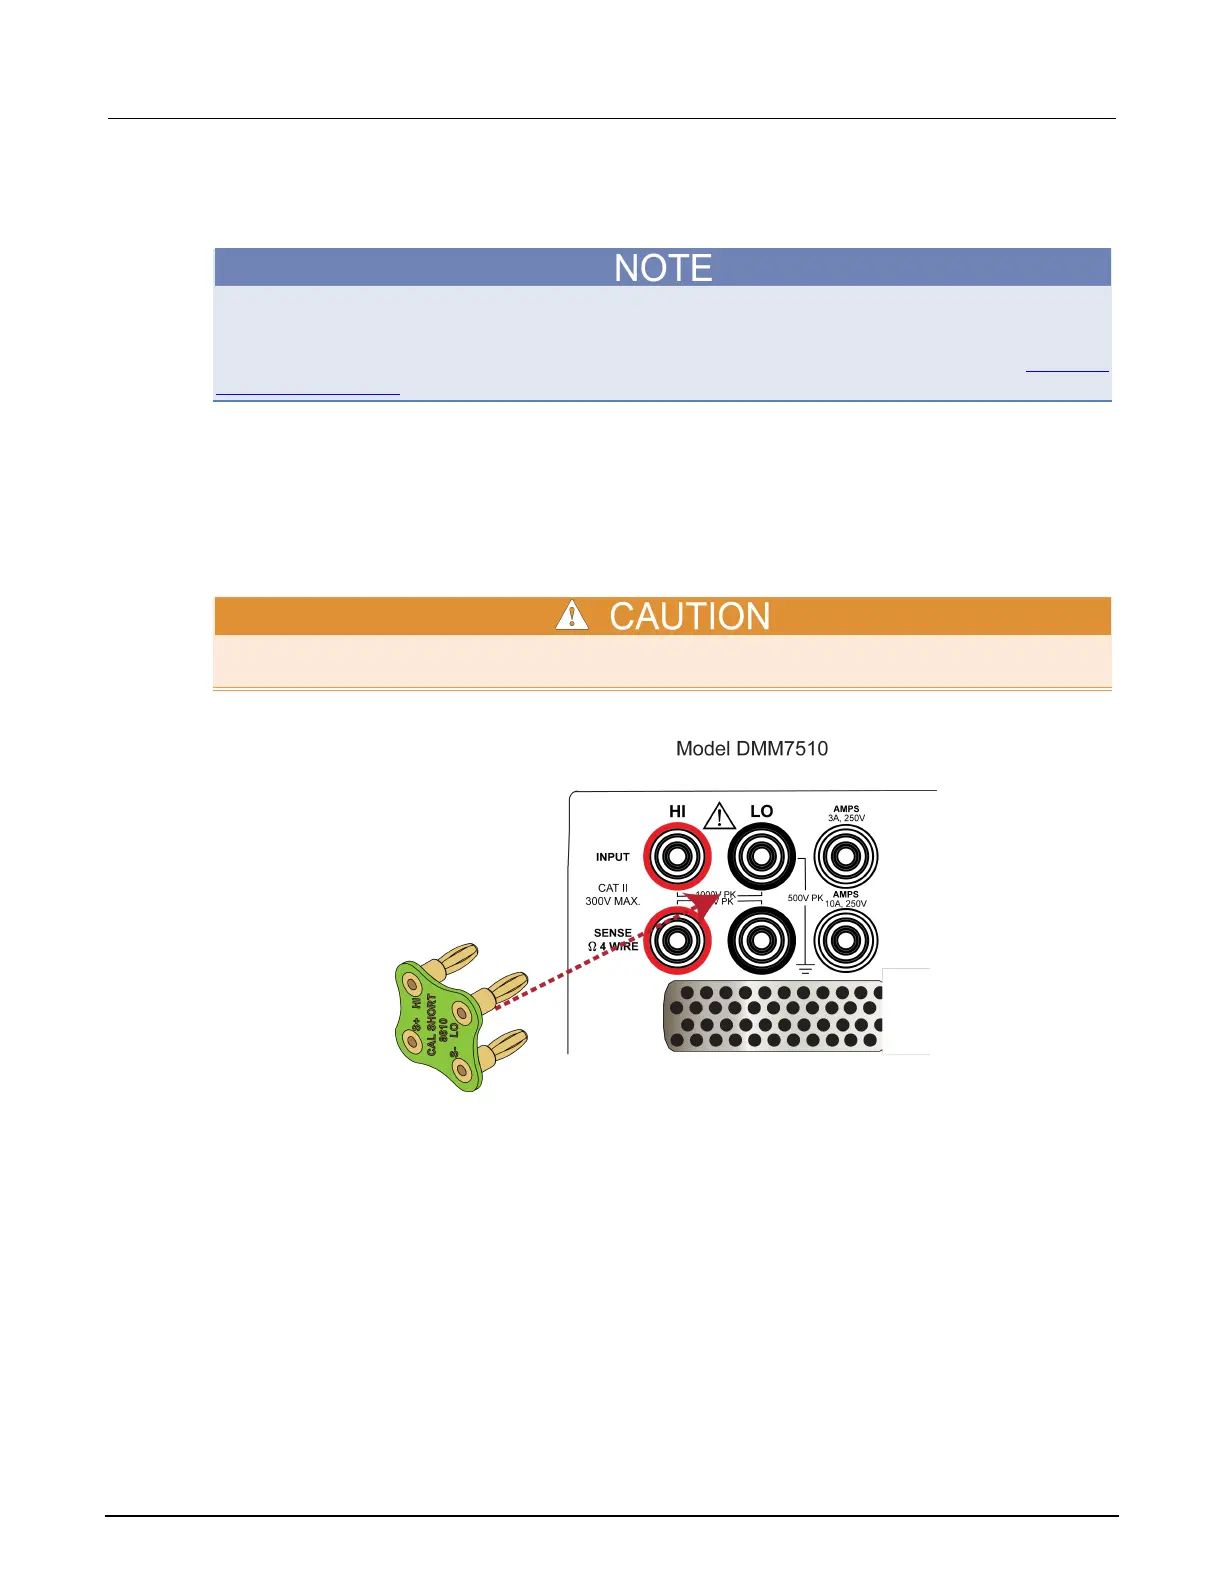
2. Install the Keithley Model 8610 or 8620 shorting plug on the rear terminals of the Model
DMM7510, as shown in the figure below.
The shorting plug terminals must be connected so that HI and LO are correctly aligned. Zero
accuracy will be affected if the shorting plug terminals are not aligned correctly.
Figure 15: Rear panel 4-wire shorting plug orientation
3. Allow the instrument to settle for five minutes.
4. Perform the cal.adjust.rear.dc steps 0 through 3 and cal.adjust.rear.ac steps 1 and
2. The descriptions of these steps are:
DC Step 0: Internal amplifier offset adjustment
DC Step 1: 4-wire zero, DCA 10A, DCV, Digitize DCV, 2W Ω, and 4W Ω
DC Step 2: Open Terminals, Capacitance
DC Step 3: 2 Amp, DCA 10A range
AC Current Step 1, 0.5 A 1 kHz, AC current 10A range zero
AC Current Step 2, 2 A to 10 A 1 kHz, AC current 10A range full-scale
 Loading...