6-5
TROUBLESHOOTING GUIDE
Some tests will require accessing components. See Figure 1 for component locations.
PROBLEM POSSIBLE CAUSE / TEST
NOTE: Possible Cause/Tests MUST be performed in the sequence shown for
each problem.
WON’T POWER UP.
(No response when
buttons are pressed.)
1. Supply connections. See TEST #1.
2. Check harness connections.
3. User interface assembly. See TEST #6.
WON’T START CYCLE
WHEN START BUTTON
IS PRESSED.
1. If number display flashes, check to be sure the
door is completely shut, and press and hold down
START for about 1 second
.
2. See TEST #3a.
3. See TEST #7.
WON’T SHUT OFF
WHEN EXPECTED.
1. Check STOP button. See TEST #6.
2. User interface assembly. See TEST #6.
3. Moisture sensor. See TEST #5.
PROBLEM POSSIBLE CAUSE / TEST
CONTROL WON’T
ACCEPT SELECTIONS.
User interface assembly. See TEST #6
.
WON’T HEAT.
1. Heater.
See TEST #4.
2. Check harness connections
.
3. Check installation
.
HEATS IN AIR CYCLE.
Heater. See TEST #4.
SHUTS OFF BEFORE
CLOTHES A
RE DRY.
1. Check the dryness setting for auto cycles.
2. Check for full lint screen.
3. Check for clogged vent
.
4. Moisture sensor. See TEST #5.
5. Dryness level adjust. See Adjustin
g
Customer-Focused Drying Modes
.
TROUBLESHOOTING TESTS
NOTE: These checks are done with the dryer
unplugged or disconnected from power.
TEST #1 Supply Connections
This test assumes that proper voltage is pres-
ent at the outlet.
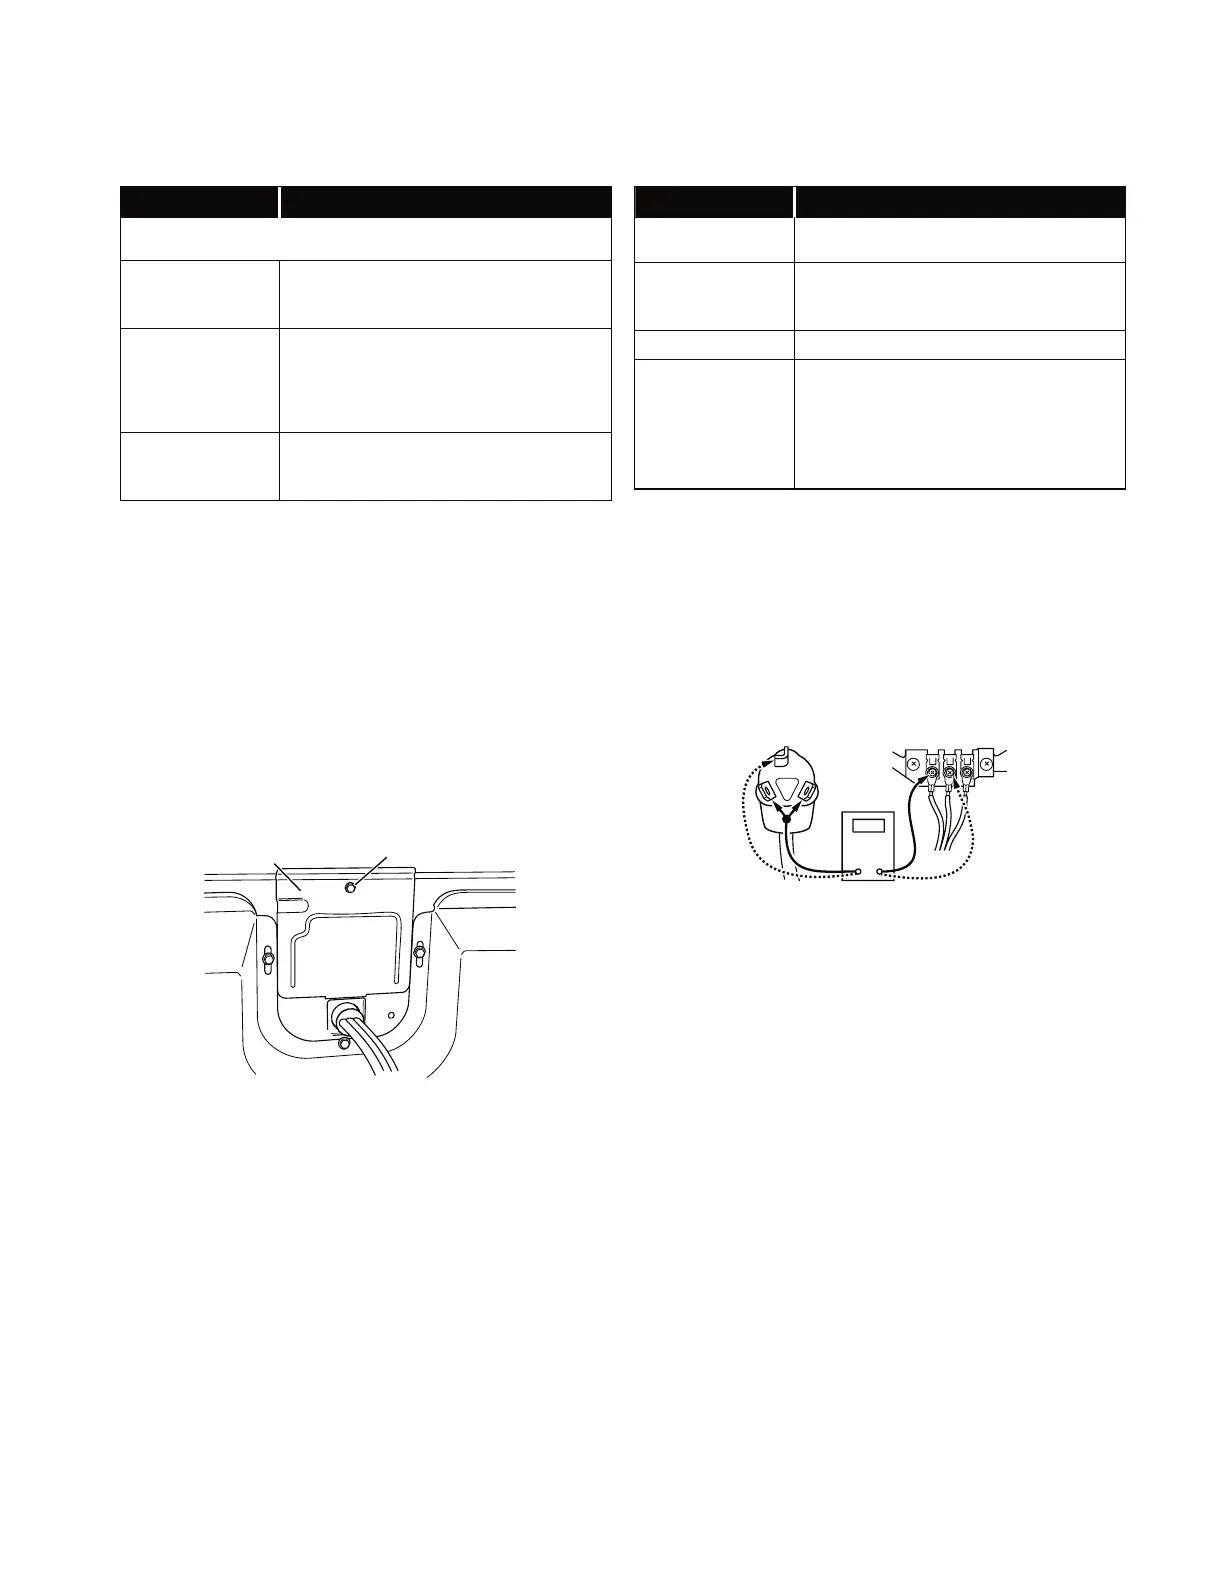
1. Unplug dryer or disconnect power.
2. Remove the cover plate from the back of
the dryer. See Figure 3.
3. Make sure the power cord is securely
fastened to the terminal block.
4. With an ohmmeter, check for continuity
between the neutral (N) terminal of the
plug and the center contact on the termi
-
nal block. See Figure 4.
Remove Screw
Cover
Plate
L1
Figure 3. Remove the cover plate.
COM
N
L1
Po
wer Cord
Plug
Te
rminal Block
Figure 4. Plug-to-terminal connections.
If there is no continuity, replace the
power cord and test the dryer.
If there is continuity, go to step 5.
5. In a similar way, check which terminal
of the plug is connected to the left-most
contact on the terminal block and make
a note of it. This will be L1 (black wire) in
the wiring diagram. See Figure 4 and the
appropriate wiring diagram in Section 7.
When this is found, go to step 6.
If neither of the plug terminals have
continuity with the left-most contact of
the terminal block, replace the power
cord and test the dryer.
•
•
•
•
 Loading...