G2-8 Tires and Rims G02022
RIM AND TIRE
Tire Removal
DO NOT weld or apply heat on the rim assembly
with the tire mounted on the rim. Resulting gases
inside the tire may ignite causing explosion of
tire.
When inflating tires always use a safety cage.
Never inflate a tire until the lockring is securely in
place. Do not stand in front of, or over the lock-
ring during inflation procedures. Never overin-
flate a tire. Refer to tire manufacturers
recommendations.
1. Place tire and wheel assembly in safety cage
and discharge all air pressure from tire.
2. Attach a hydraulic bead breaker to the rim by
slipping the jaws of frame assembly over the
outer edge of flange (5, Figure 2-8). Make sure
the jaws of the frame are as far in on the flange
as possible.
3. Following tool manufacturers instructions, move
tire bead in far enough to permit placing a
wedge between tire and flange at side of tool.
4. Repeat this procedure at locations approxi-
mately 90° from the first application. Continue
this procedure until tire bead is free from rim.
5. After bead is broken loose, insert flat of tire tool
in beading notch on lockring (6, Figure 2-8). Pry
lockring up and out of groove on rim.
6. Pry in on bead seat band (2) until O-ring (4) is
exposed. Remove O-ring.
7. Remove bead seat band (2) from rim (3) and
remove flange (5).
8. Reposition wheel assembly and repeat removal
procedure on opposite side of tire. Remove tire
from rim.
Rim And Tire Preparation
The first step in mounting radial off-road tires is to
properly prepare the tire and rim assembly.
1. Clean the rim base, bead seat band, and
flanges with a wire brush. Remove all paint from
knurling on bead seat band and back section.
Never weld or repair damaged rims.
2. Check rim assembly for damage or corrosion.
Replace any damaged or broken components.
Verify that the rim does not have any burrs.
3. Apply rust inhibitor to any corrosion.
4. Clean the tire and bead area.
5. Check for and remove any object(s) from the
interior of the tire that could cause damage to
the tire.
6. Check the tire bead area and inner liner for
damage that would allow air to leak from the
tire. Replace or repair any tire with bead dam-
age.
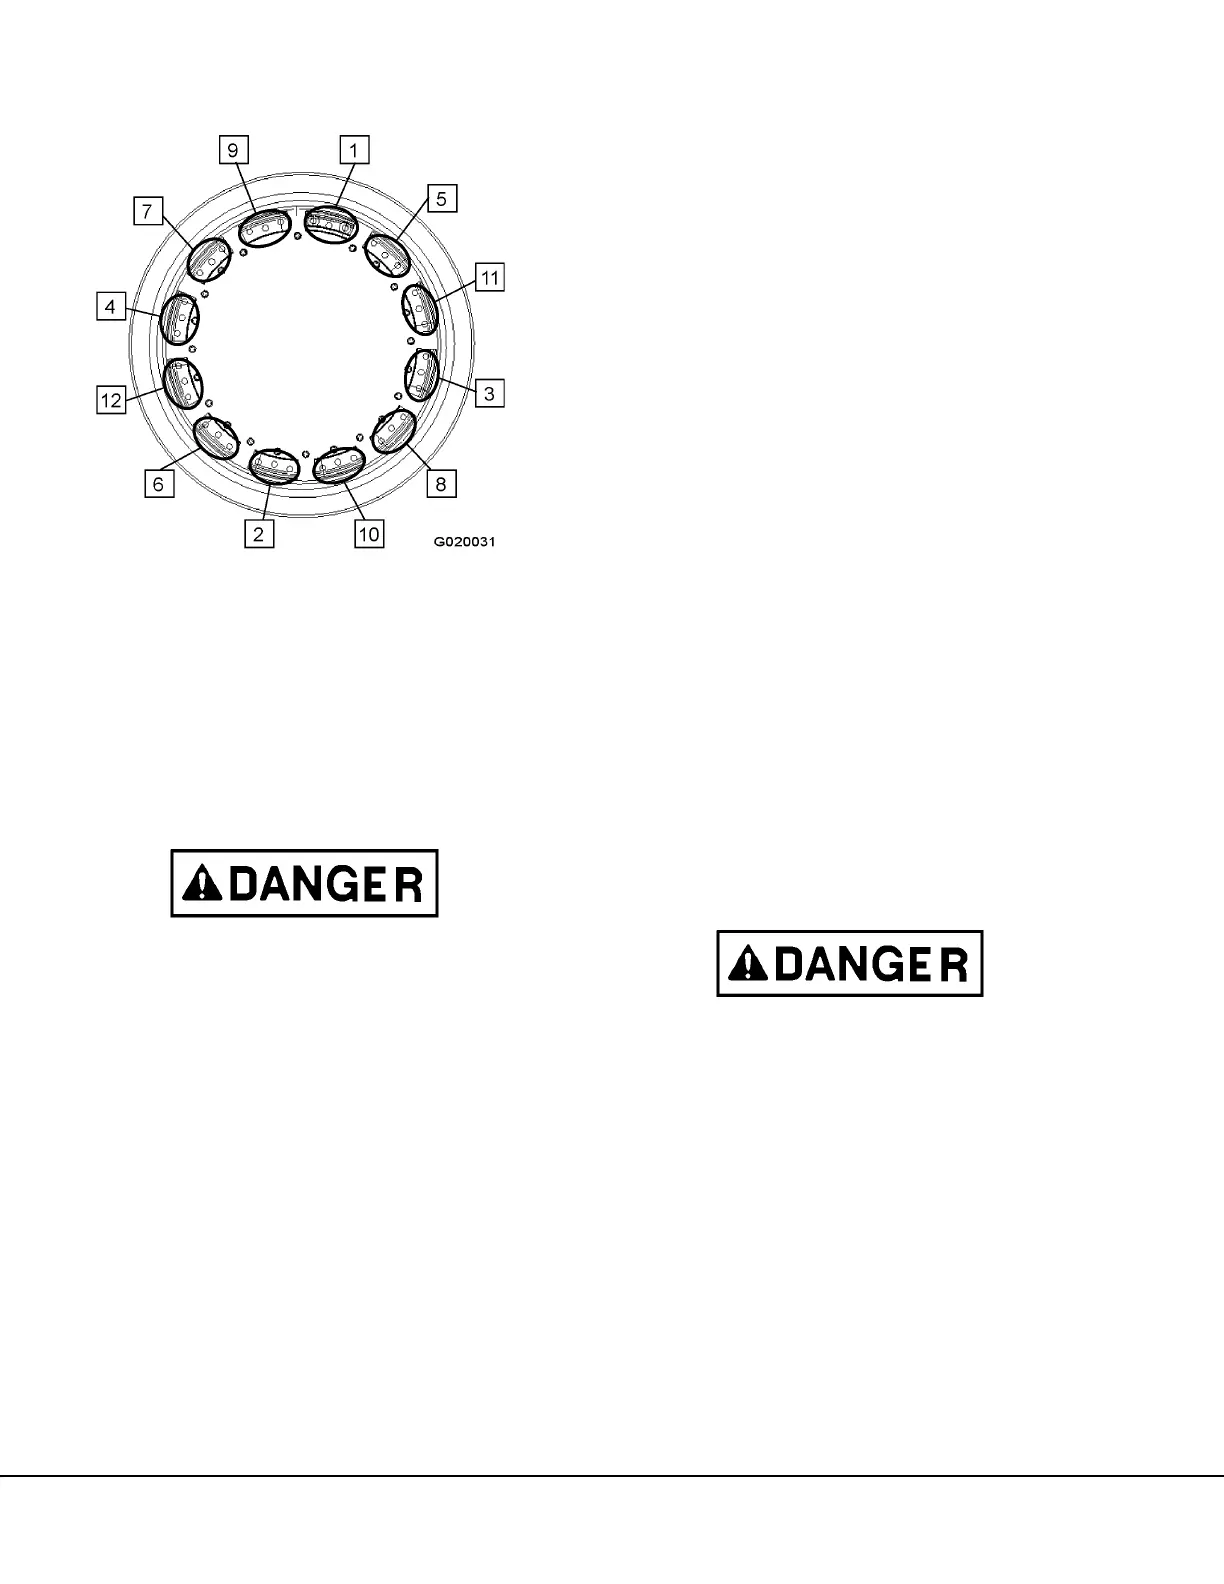
FIGURE 2-7. REAR WHEEL TIGHTENING
SEQUENCE

 Loading...