38 Basic image processing
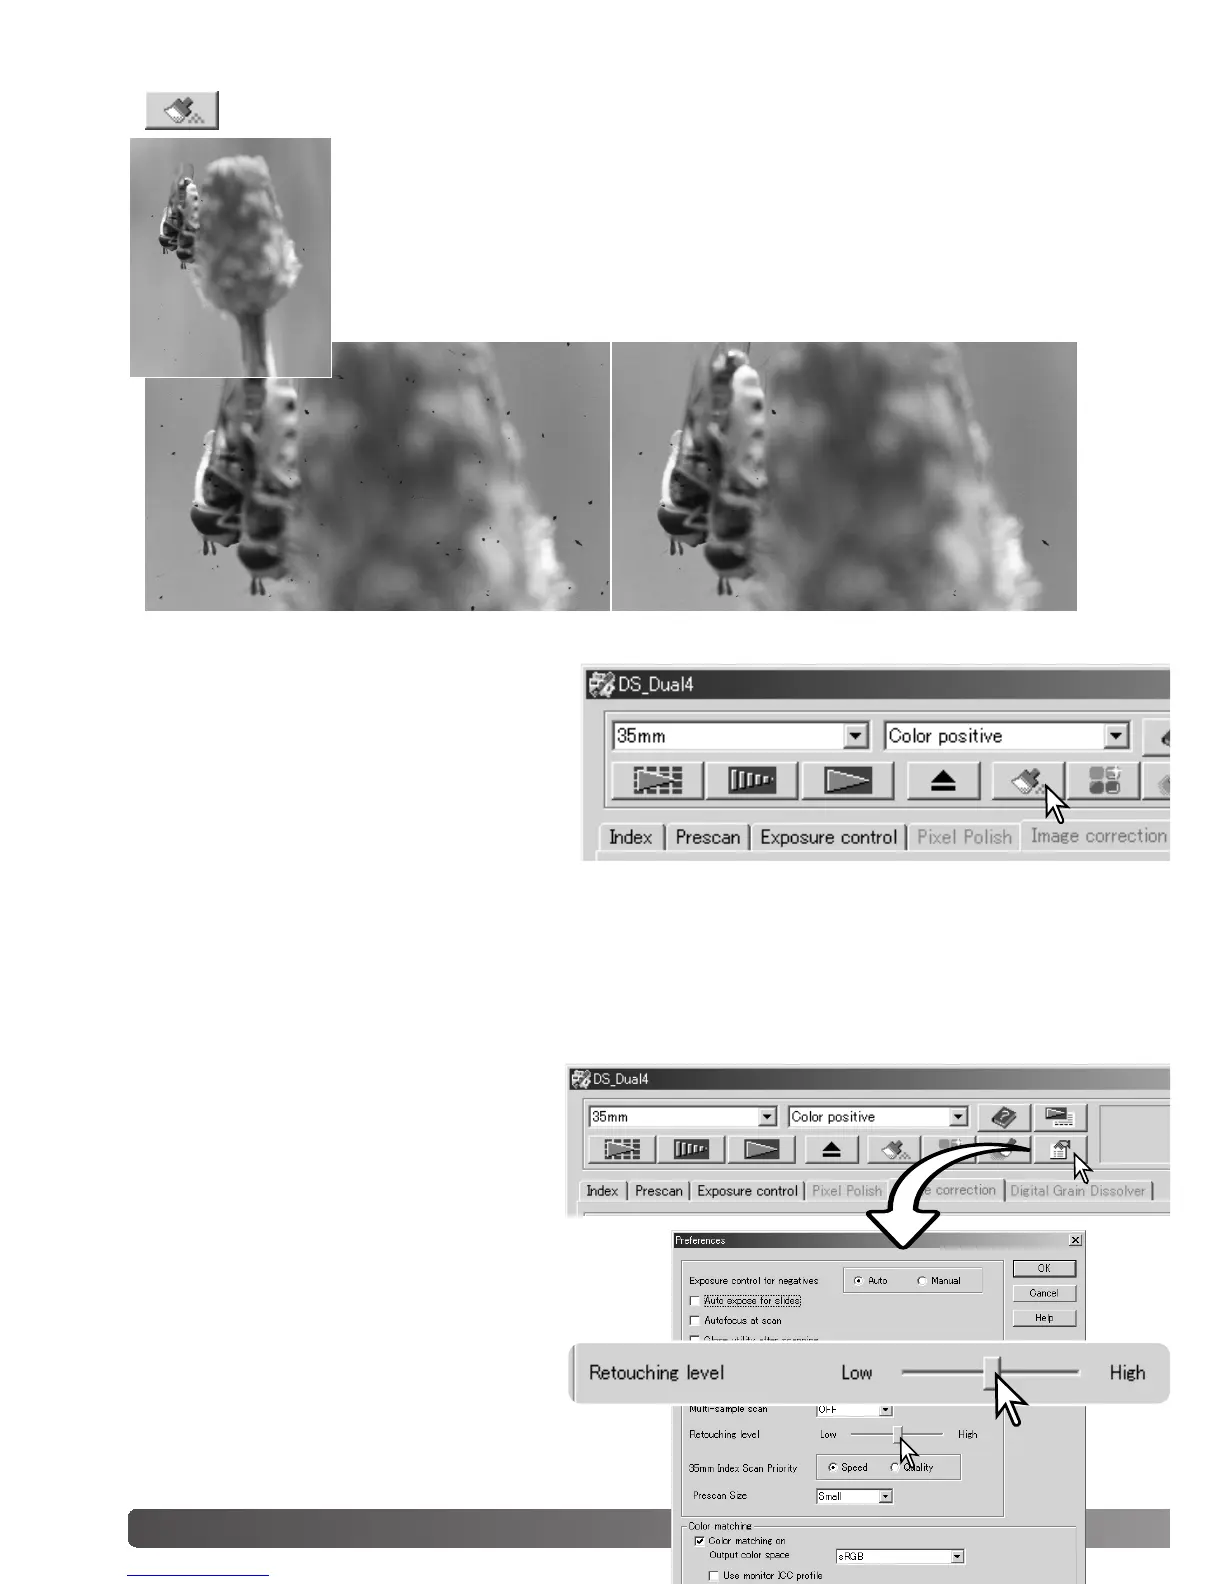
Auto Dust Brush
Original image With Auto Dust Brush processing
The Auto Dust Brush reduces the visibility of fine dust particles on the film
surface that cannot be removed with a brush or blower; all visible dust
should be removed from the film. See handling film on page 18. The scan-
ning time increases with the use of the Auto Dust Brush. This function can-
not be used with 16-bit linear color depth. See page 11 for memory
requirements.
Click the Auto Dust Brush button to acti-
vate the function; the dust removal pro-
cessing is done at the final scan and is not
applied to the prescan image. To cancel
the Auto Dust Brush, click the Auto Dust
Brush button again.
The Auto Dust Brush effect varies with the images and exposure control settings. The dust-
removal effect is greater at high input resolutions. The retouching level can be changed in the
preferences dialog box, see below. The Auto Dust Brush plug-in allows more control over a
scanned image, see page 84.
Auto Dust Brush retouching level
The degree of retouching applied with the
Auto Dust Brush can be adjusted.
Click the preferences button in the main
window to open the preferences dialog
box.
Adjust the retouching level slider and
click OK to set the level.
Scan the image to confirm the level of
processing.
 Loading...