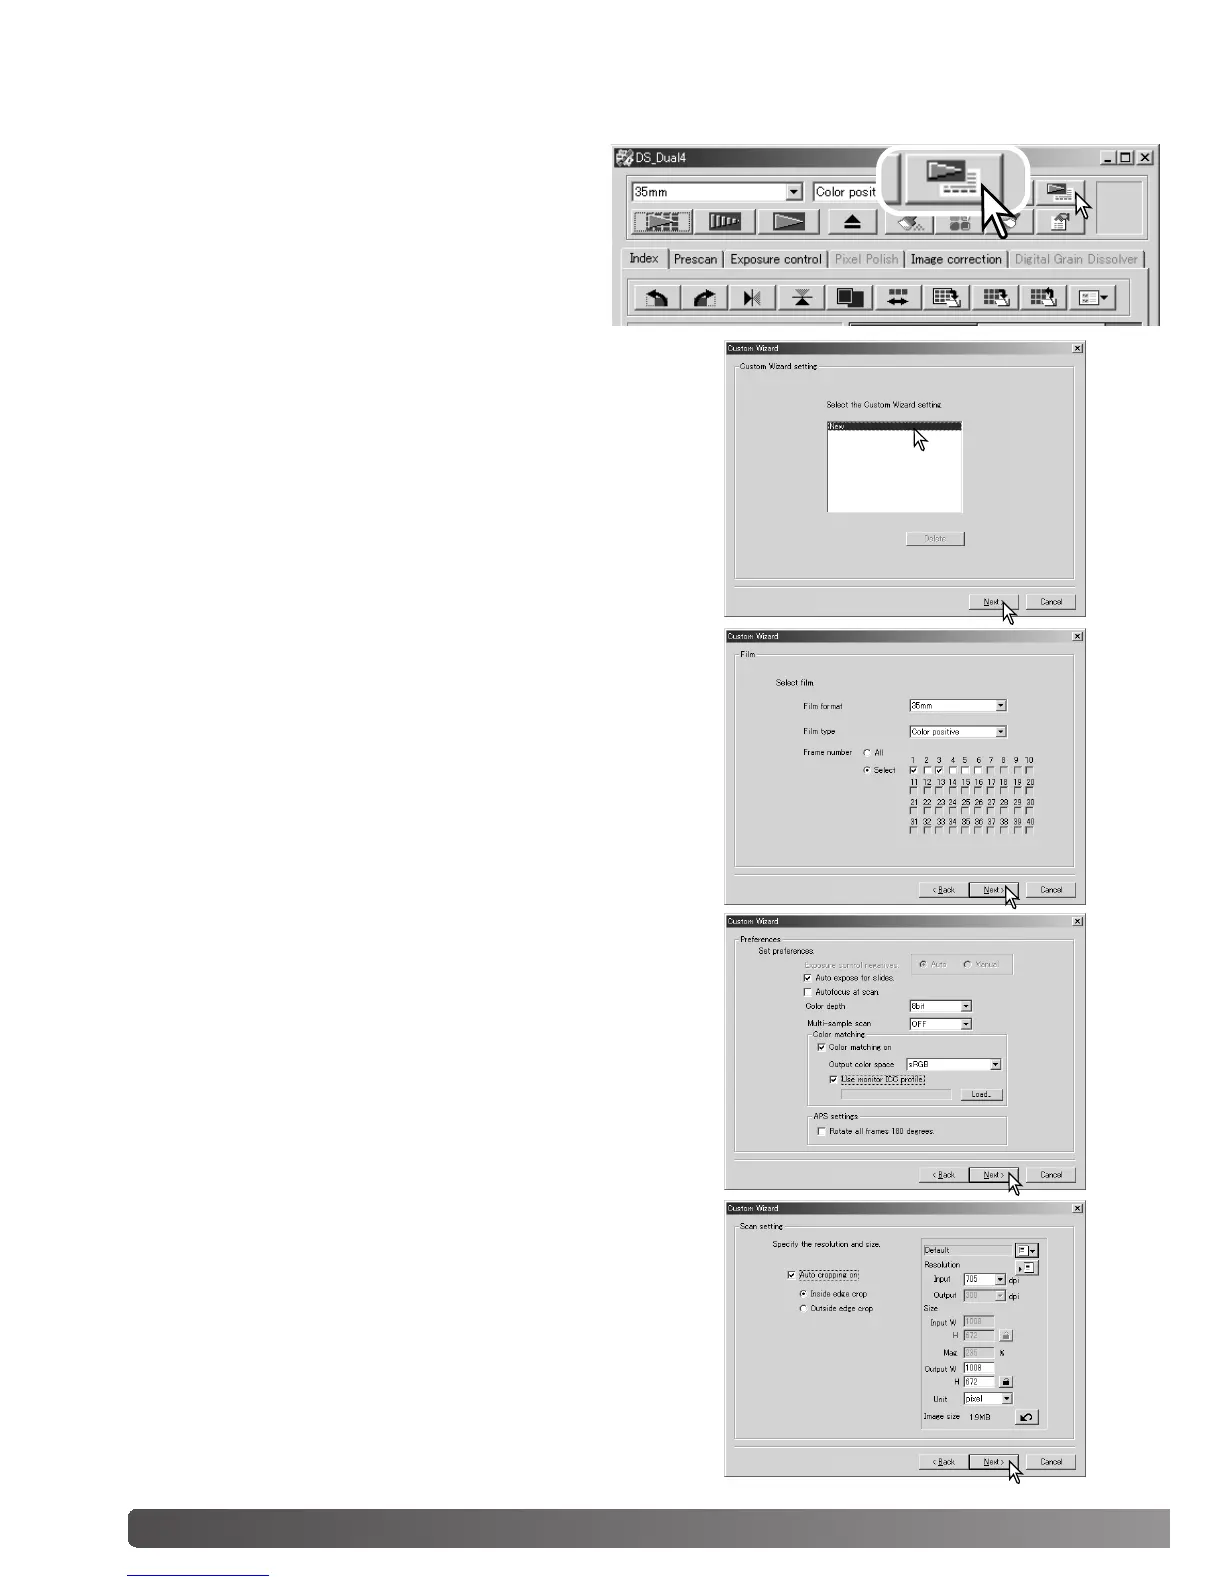
74 Custom wizard
The Custom Wizard is an automated scanning
routine. Screens vary with scanner model.
Insert a film holder into the scanner. Click the
Custom Wizard button.
Custom wizard
Select scanning preferences in the dialog box. Click the
next button to continue.
For information on the preference settings, see page 44.
For information on color matching, refer to page 80.
Set up the dialog box for the film and holder in use. Select
the frame number(s) of the images to be scanned. The
frame number refers to the frame number of the holder or,
in the case of the optional APS adapter, the film frame
numbers.
Click the next button to continue.
Enter scan settings. Click the next button to continue.
See pages 34 and 54 for details on Jobs and manual scan
settings. See page 33 for information on auto-cropping.
The auto-cropping function will take priority over any scan
settings entered.
On the Custom-Wizard-setting dialog box, select New
from the Custom Wizard settings. Click the next button.
If previous Custom Wizard settings have been saved, they
will be displayed in this window. To use any setting, sim-
ply select it with the mouse. The delete button erases the
selected setting.
 Loading...