Image corrections can be stored temporarily as a thumbnail next to the displayed image. Simply
click the snapshot button on the tool bar to create a thumbnail with the current image correc-
tions.
To return to a previous image
correction, click on the corre-
sponding snapshot thumbnail.
The thumbnail image will
replace the displayed image.
The number of snapshots that
can be made is only limited by
the computer memory. To
delete a snapshot, click on the
thumbnail and press the key-
board delete key.
Snapshot display area
69
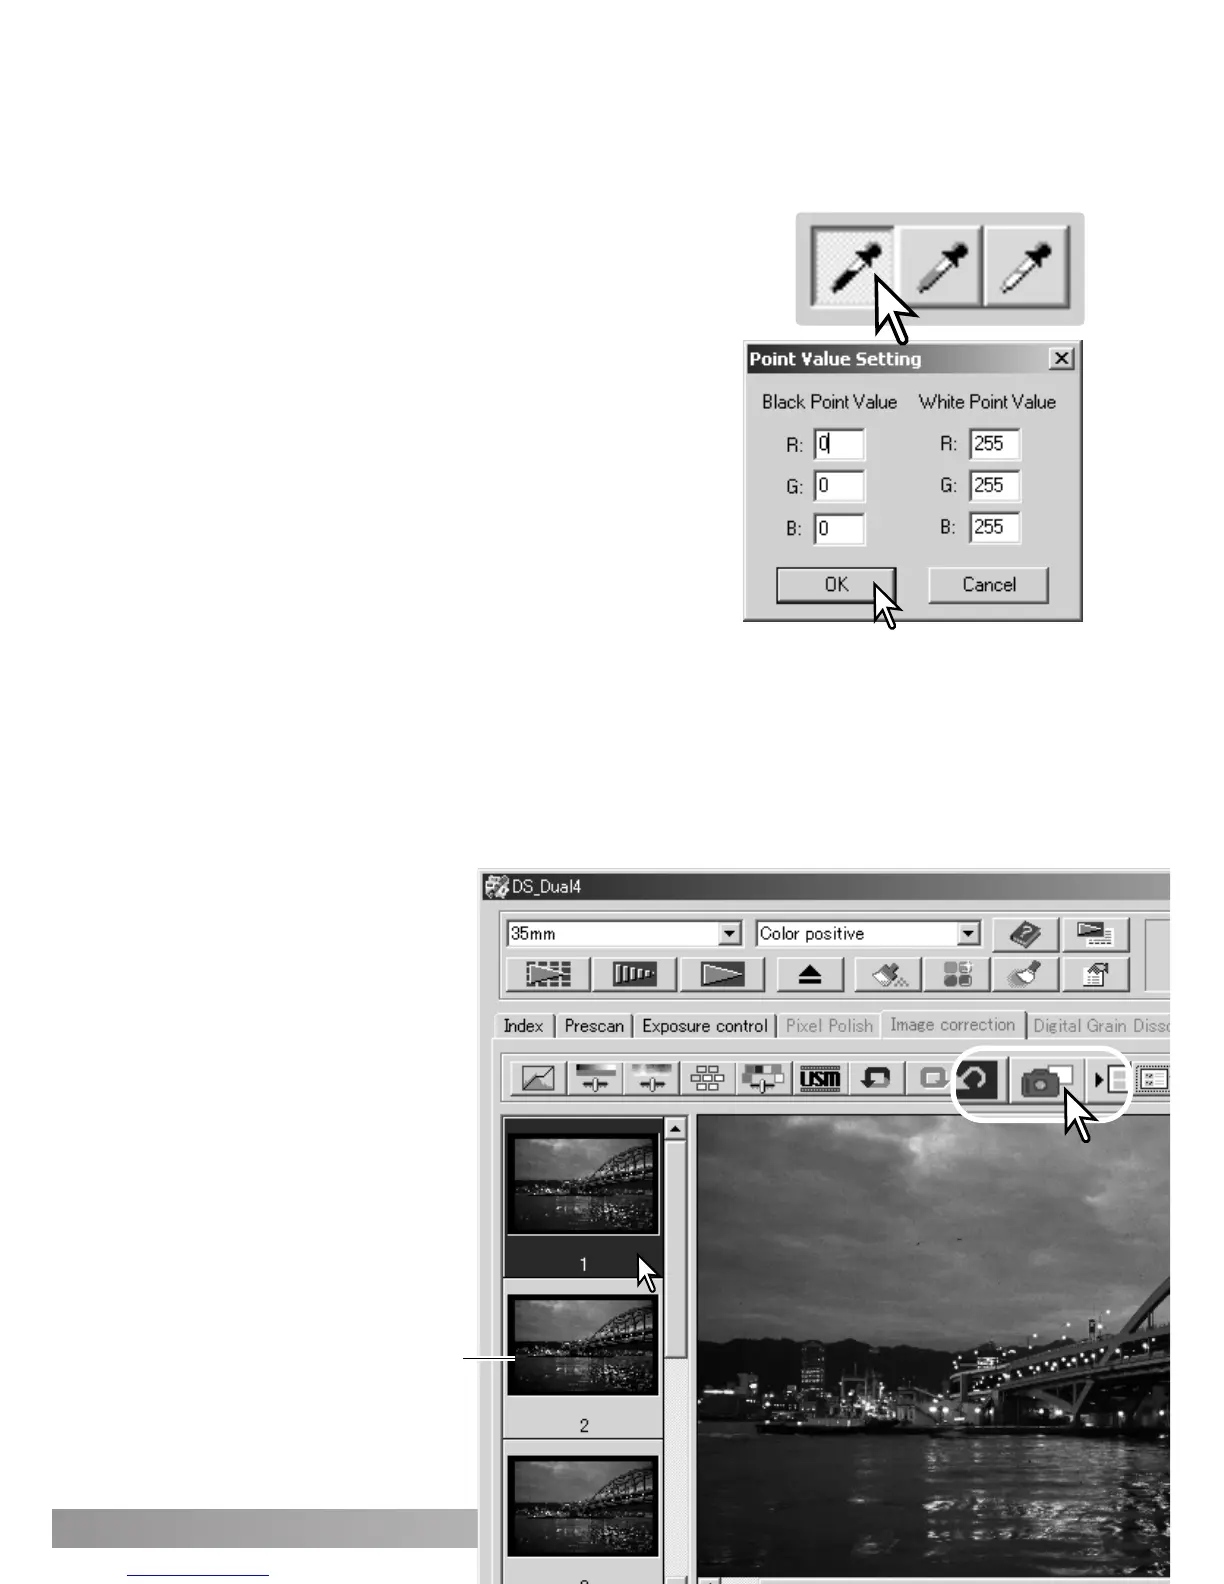
The white and black-point values are set to 255 and 0 for each RGB level. Changing these val-
ues allow the calibration of an image with no true white or black.
Double-click on either the white-point or black-point button to
activate the point-value-setting dialog box.
Enter the new white-point or black-point values. Click OK.
With the point-value-setting dialog box open, the mouse
pointer can be used to measure the color of any point on
the displayed image. The RGB display shows the original
values for the image on the left and the current values for
the image on the right.
Calibrate the image as described in the white, black, and gray point corrections section.
Setting the white and black-point values
Tracking image corrections - Snapshot button
 Loading...