Introduction Getting Ready
Taking Pictures
Playback Set Up
GB-108
Viewing Still Images | Viewing Movies | [o] Viewing Images Automatically as a Slideshow (slideshow) | [O] Viewing Multiple Images | [INFORMATION] Viewing Image Information | [J]/[I] Erasing Unwanted
Images | [U] Protecting Images from Accidental Erasing (PROTECT) | [p] Adding Voice Messages to Still Images (POSTRECORDING) | [V] Resizing and Trimming Images (RESIZE) | [W] Rotating an Image |
[T] Using DPOF to specify print settings | [G] Printing by Connecting the Camera Directly to a Printer (PictBridge) | Connecting to a Windows PC | Connecting to a Macintosh
BACK
Contents (Top page) Detailed Contents Index Nomenclature Menus and Settings Troubleshooting
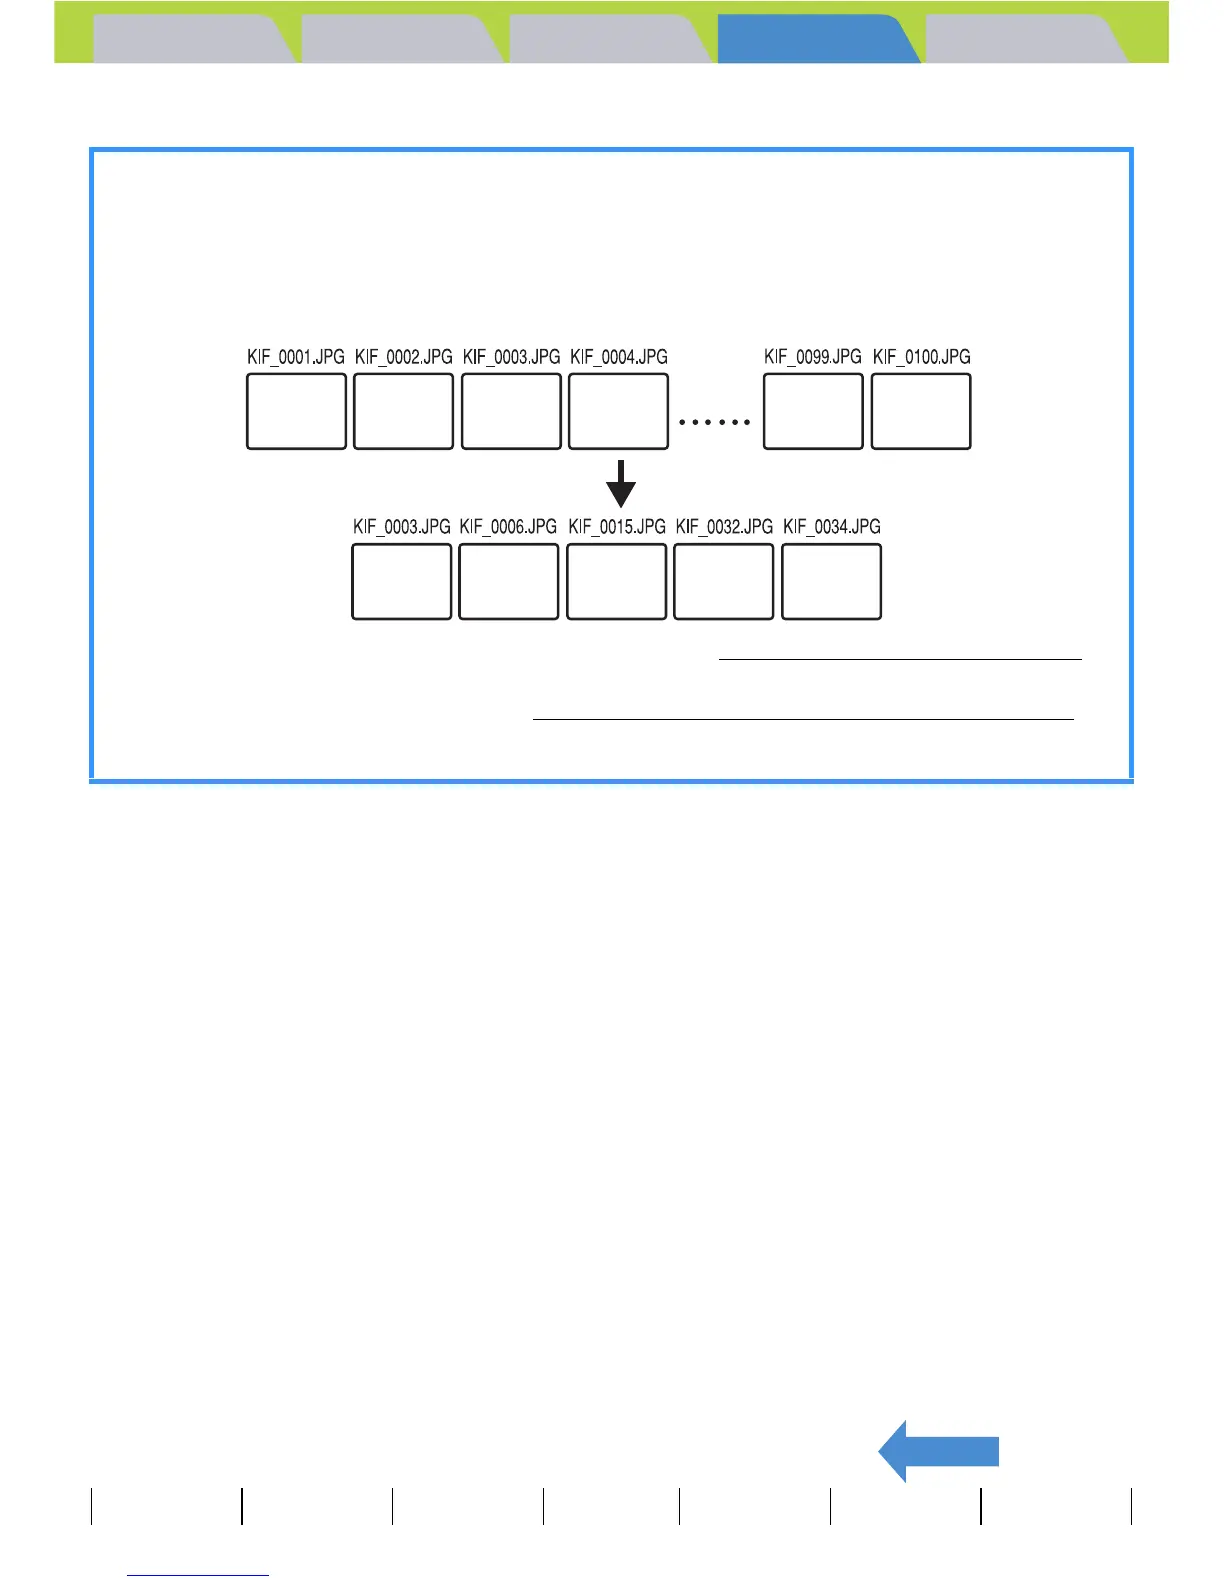
Tips for Erasing Images Using [PROTECT] and [ERASE ALL]
For example, if you have 100 recorded images and you only want to keep 5 or 6 of them, using [ERASE] or
[SELECT AND ERASE] to erase individual images can be very time-consuming.
In a situation like this, where you have a large number of recorded images and you only want to keep a few
of them, you can accomplish it in just a few steps using [PROTECT] and [ERASE ALL].
1
First protect the images you want to keep. (See "Protecting an image" on p.106.)
2
Then erase all the images. (See "Erasing all the images (ERASE ALL)" on p.105.)
All the unprotected images are erased, leaving just the protected images behind.
 Loading...