5.NotetheorientationoftheeSATAconnectororIEEE1394connectorandroutetheeSATAconnectoror
IEEE1394connectorcableintothecableclip.
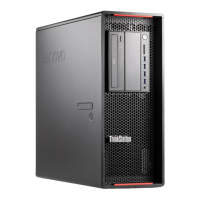
6.PlacetheeSATAconnectororIEEE1394connectorintothemetalretainer.TheninserttheeSATA
connectororIEEE1394connectorintothecorrespondingslotintheflexmoduleasshown.
Figure41.InstallingtheeSATAconnectororIEEE1394connectorintheflexmodule
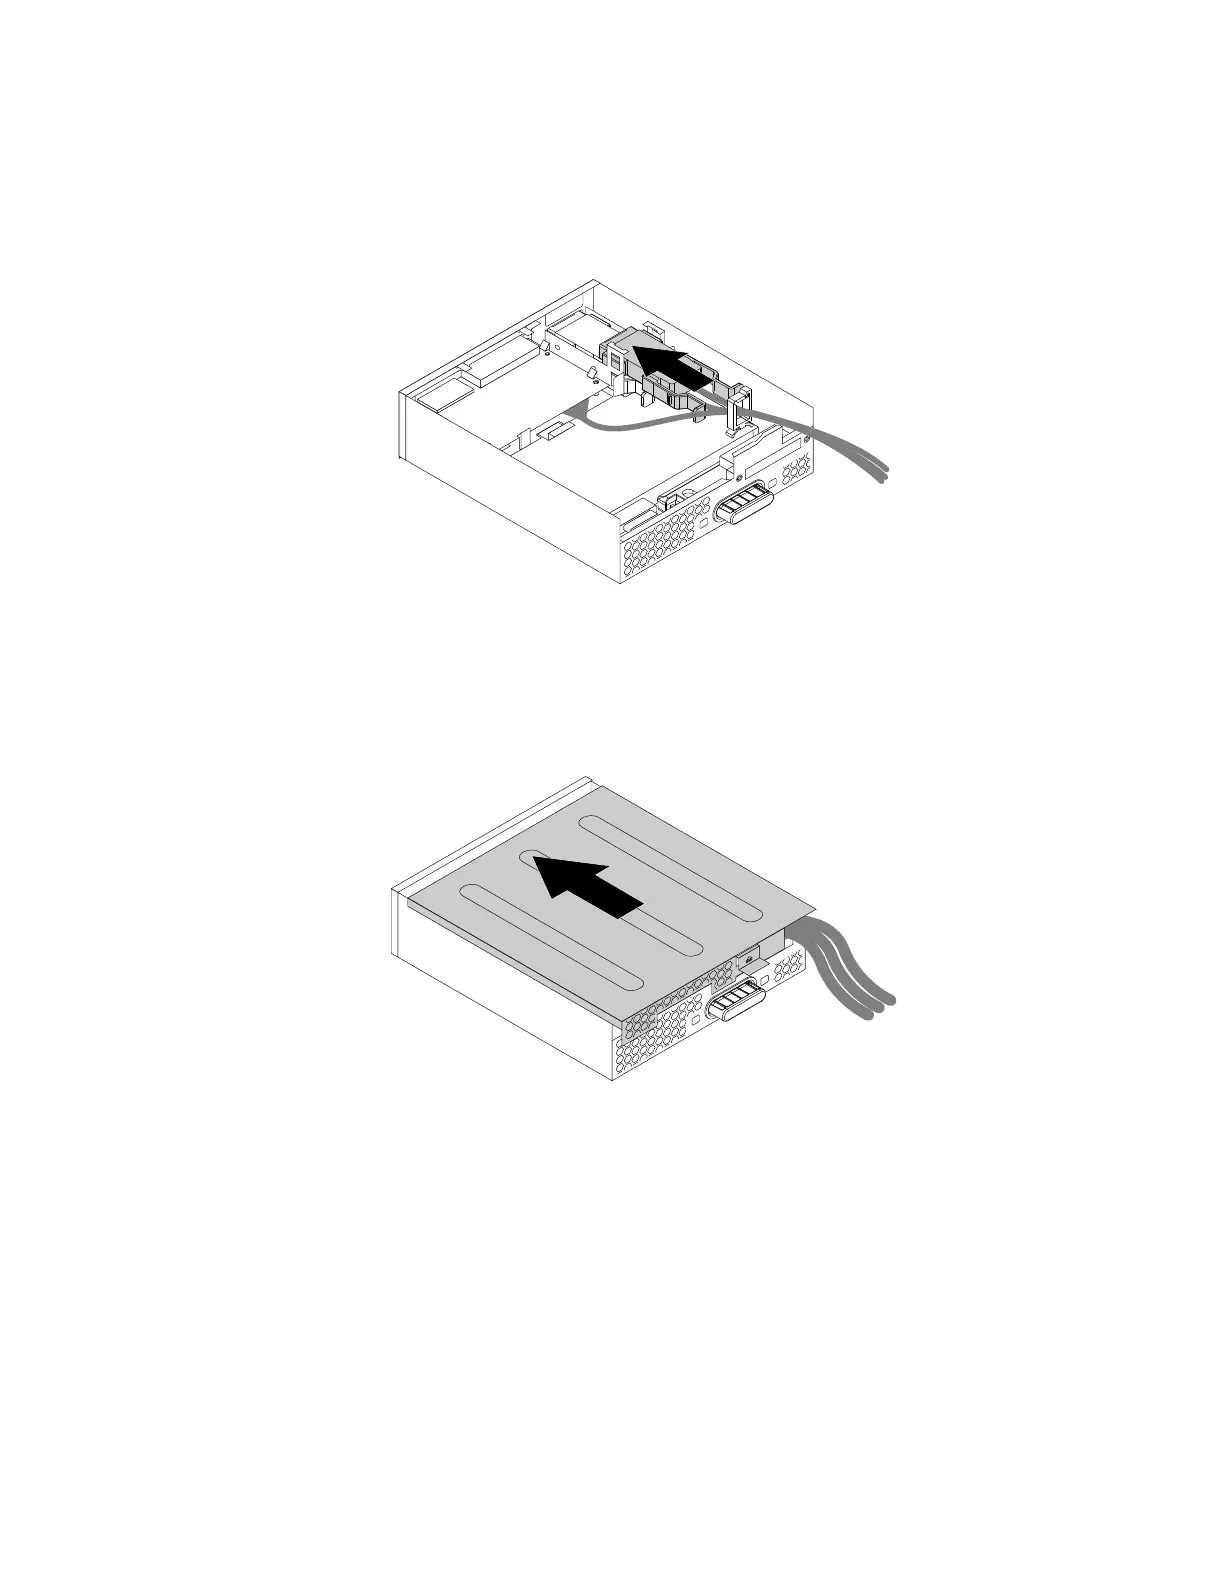
7.Positiontheflexmodulecoverontheflexmodule.Ensurethattherailguidesonthebottomoftheflex
modulecoverengagetherailsontheflexmodule.Then,pushthecovertothefrontoftheflexmodule
untilitsnapsintoposition.
Figure42.Reinstallingtheflexmodulecover
8.ConnecttheeSATAconnectororIEEE1394connectorcabletothecorrespondingconnectoronthe
systemboard.See“Partsonthesystemboard”onpage7.
Whattodonext:
•Toworkwithanotherpieceofhardware,gototheappropriatesection.
•Tocompletetheinstallationorreplacement,goto“Completingthepartsreplacement”onpage133.
Optical-drivebracket
Attention:Donotopenyourcomputerorattemptanyrepairbeforereadingandunderstandingthe“Read
thisfirst:Importantsafetyinformation”onpagev
.
Chapter7.Installingorreplacinghardware79
 Loading...