CONTENTS
48
Ferrous Limits (Continued)
FERROUS LIMITS AUDIO
Targets detected within the Ferrous Limits grey area will
give no target response or ferrous indication. In All Metal,
targets will give a ferrous tone as defined by the Ferrous
Tones setting (page 46), and the Ferrous Indicator will
be displayed.
Targets detected outside of the Ferrous Limits in the white
area will give a regular target response as defined by the
Target Tones setting (page 44).
PRESET FERROUS LIMITS
The Preset Ferrous Limits are pre-defined settings that
maximise the rejection of common ferrous targets that
appear in specific zones of the ID Map. The Preset settings
are designed to cover most detecting scenarios so you can
confidently detect using the Presets, rather than needing
to create your own Custom Ferrous Limits.
Preset Ferrous Limits provide a range of settings suitable
for almost all scenarios, and most users will operate using
Presets, rather than Custom Ferrous Limits.
The Presets can be copied to any of the Custom
Ferrous Limits to serve as a starting point for further
editing — see "Copy Preset Limits to Custom" (page 49).
The use of Custom Ferrous Limits enables tuning for very
specific detecting scenarios, such as the ability to accept
specific ferrous coins, or to reject ferrous trash.
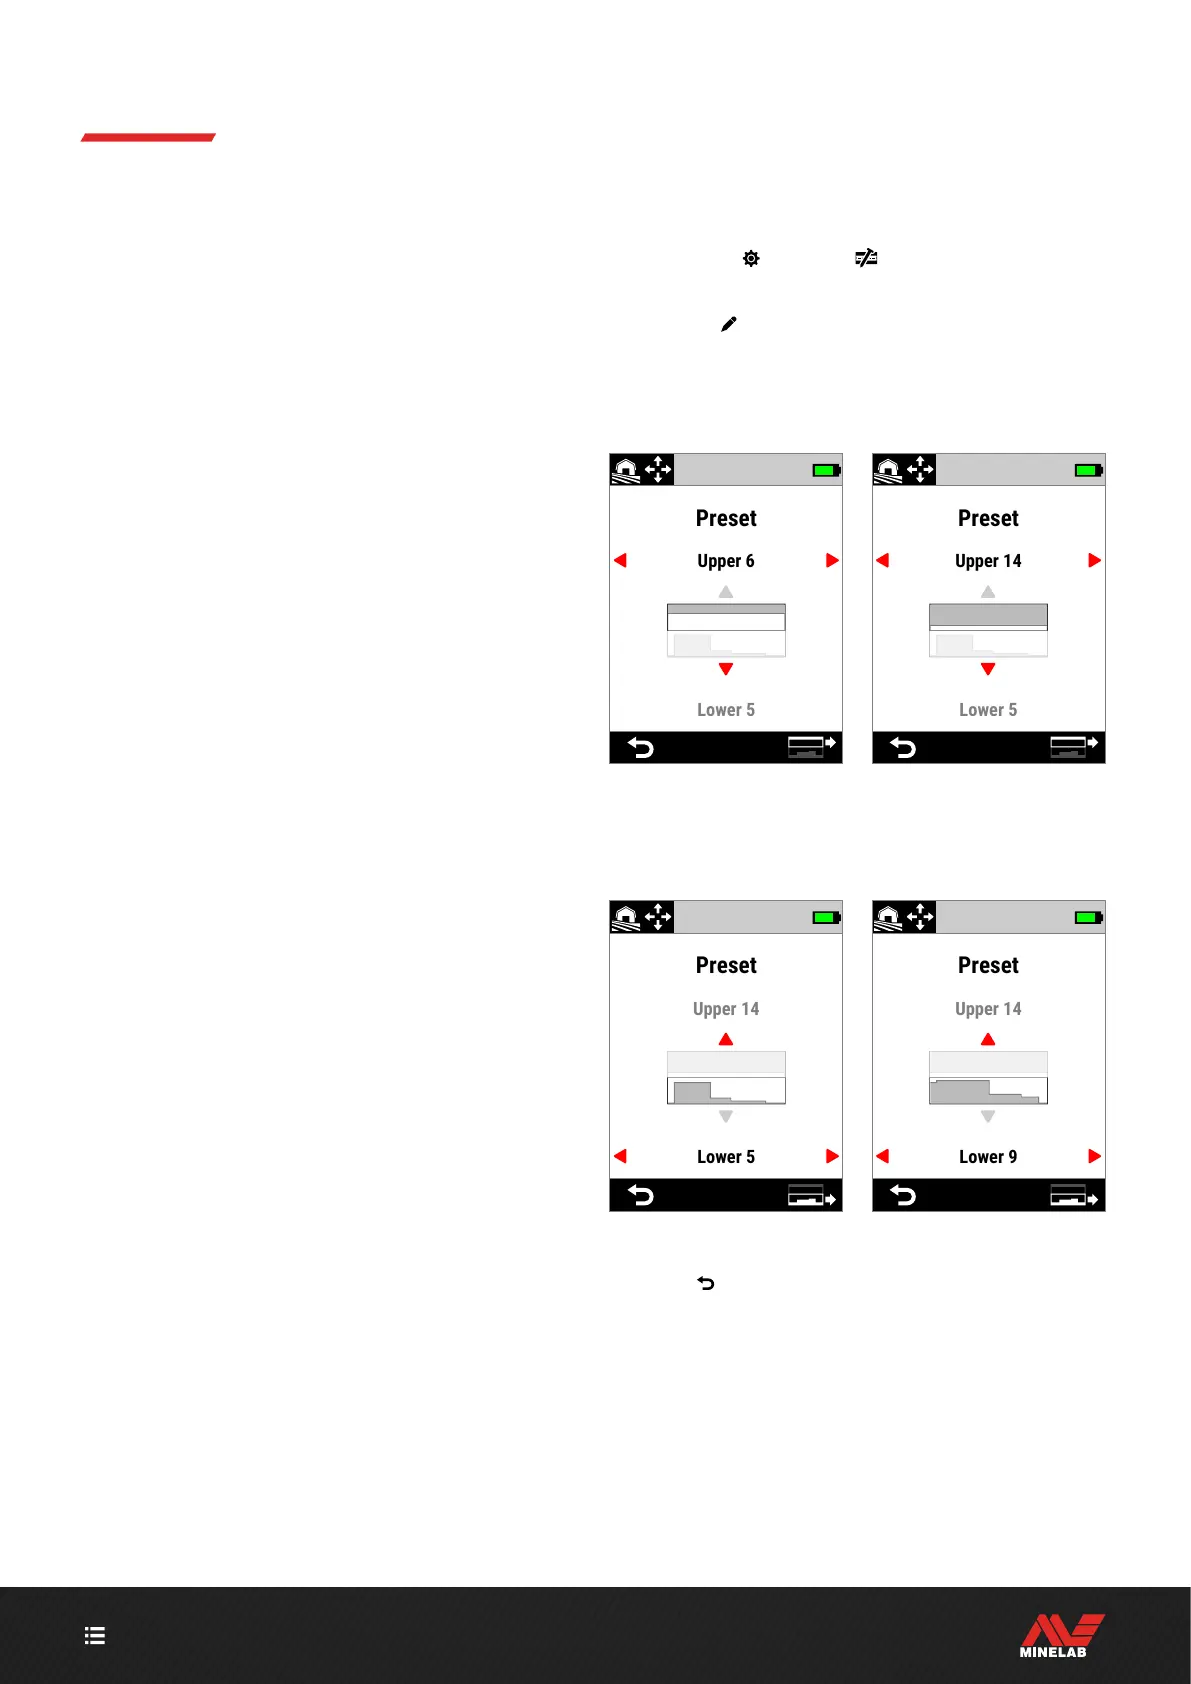
SELECT THE PRESET FERROUS LIMITS
1. Navigate to: Settings > Ferrous Limits
2. Press / to select Preset, then press the Right
Soft Key (
Edit) to open the Preset Ferrous Limits
Selector.
3. Press to select the Upper Limits, then
press / to select an Upper Limits setting.
The Upper Limits Preset increased from 6 to 14 by pressing .
4. Press to select the Lower Limits, then
press / to select a Lower Limits setting.
The Upper Limits Preset increased from 5 to 9 by pressing .
5. Press ( Back) to return to the Settings Menu.
 Loading...