CONTENTS
51
Ferrous Limits (Continued)
Edit Ferrous Limits to Reject Difficult Ferrous Targets
1. Place your test target on the ground in a
metal-free location.
2. Navigate to:
Settings > Ferrous Limits
3. Press / to select the Custom Ferrous Limits you
want to adjust, then press the Right Soft Key (
Edit)
to open the Editor.
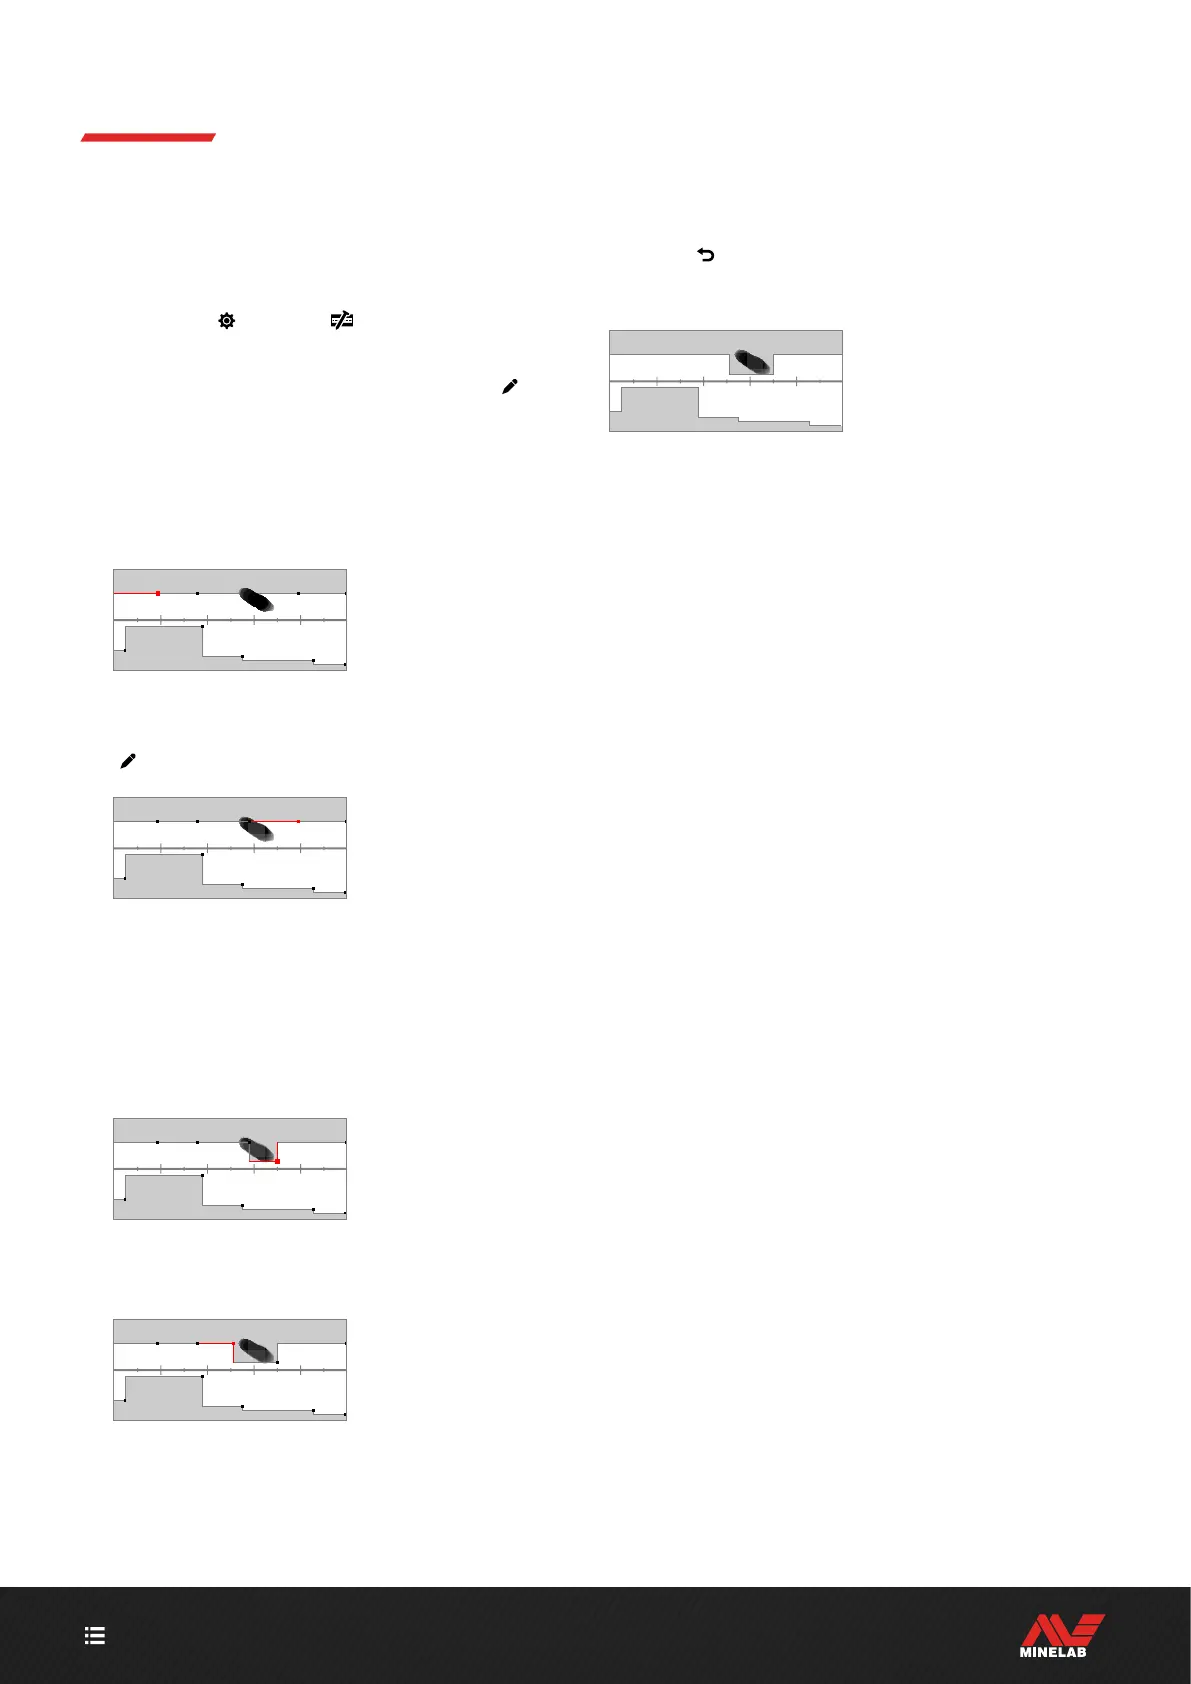
4. Swing the Coil over the test target — in this example, a
hex head screw was used. The Target Trace will appear
on the ID Map. The example shows the hex head screw
falsing, i.e. being incorrectly classifed as non-ferrous.
The Target Trace of a
falsing hex head screw.
5. Press /// to navigate to the Region nearest to
the screw's Trace and then press the Right Soft Key
( Edit).
The Region nearest to the screw
selected for editing.
6. Wave the Coil over the screw at a range of heights,
adjusting the Ferrous Limits until all of the Target Trace
is captured inside the grey area.
To be thorough, you can also change the orientation
of the test target a few times in between swings to
captured the any Trace variation for that target.
The screw Trace included in
Ferrous Limits grey area.
7. You may need to adjust adjacent Regions to capture any
last parts of the Trace.
The left adjacent Region
adjusted to capture the
entire Trace.
8. Press ( Back) to return to the top-level of the Editor.
You will now reject the difficult ferrous target.
The Target Trace of a
hex screw (rejected).
 Loading...