32
11
Differential Interference Contrast Microscopy under the Dia Illumination
1
Attach the accessories required for the DIC microscopy under the dia illumination.
The following accessories must be attached to perform the DIC microscopy under the dia illumination.
• Universal condenser (dry) (See Page 78 and the LV-CUD instruction manual.)
• Rotatable polarizer for the diascopic illumination (See Page 94.)
•
Analyzer (See Page 83.)
•
DIC objective for biologic microscopes (See Page 93.)
• Condenser DIC prism (attached inside the universal condenser)
(See Page 66 and the LV-CUD instruction manual.)
• Objective DIC prism (attached to the nosepiece)
(See Page 81.)
• Lambda plate holder (for the sensitive color microscopy) (See Page 80.)
* Set up the microscope according to the “LVSetup” and set information of objectives correctly.
2
Focus on the specimen with the bright-field microscopy under the diascopic illumination.
(See Pages 26 to 27.)
3
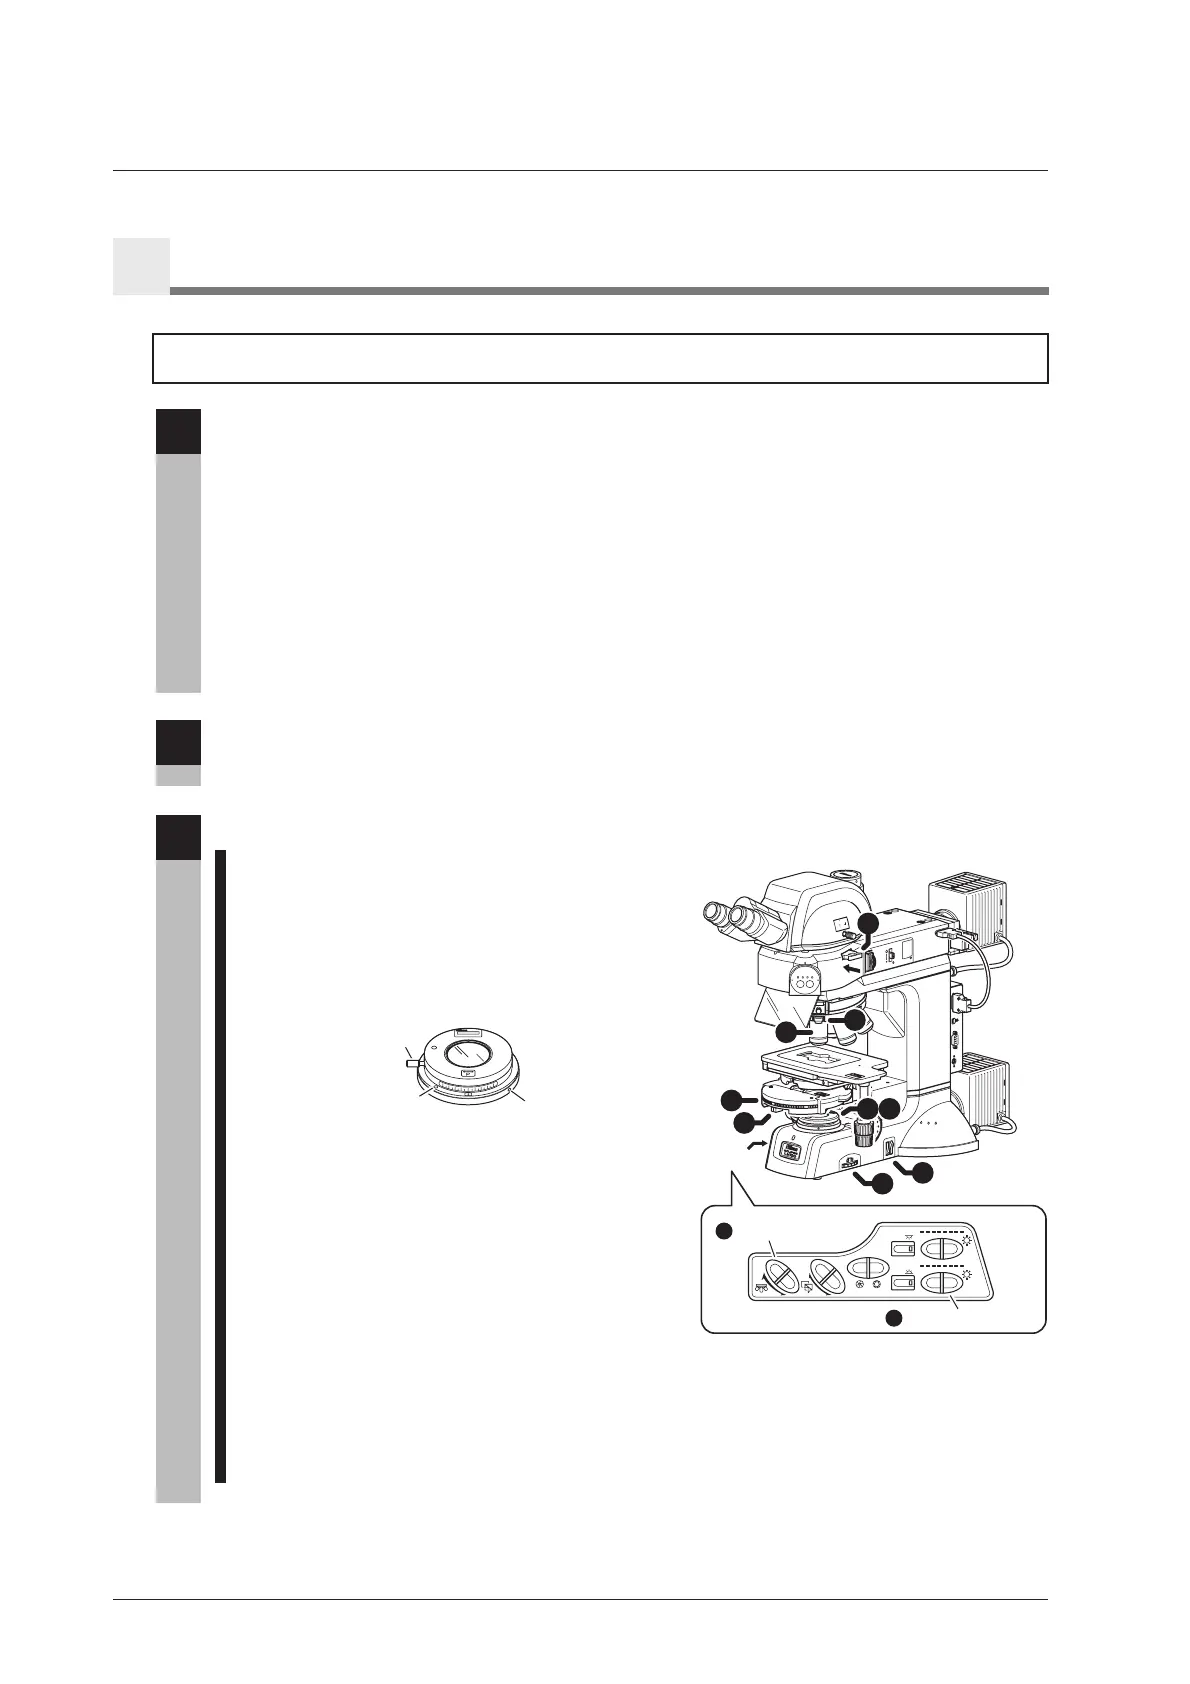
Set the microscope for the DIC microscopy under the diascopic illumination.
1 Push in the analyzer slider to locate the analyzer
into the optical path. (See Page 60.)
2 Attach the rotatable polarizer for the diascopic
illumination and rotate the upper part of the
polarizer to make a crossed Nicols position.
(See Page 59.)
753701
JAPAN
D-DP
Swing-out
center
Thumbscrew
Setscrew
U
E
P
I2
A
US
B
RS
2
3
2C
L
CN
T
N
D
8
N
C
B
F
.
S
.
7
5
3
7
0
1
J
A
PA
N
A
chr
N
.
A
=
0
.
9
JAPAN
0
.
8
0
.
7
0
.6
0
.
5
0
.
4
0
.
3
0.2
0.1
3
x
2
S
T
A
G
E
J
A
P
A
N
J
A
P
A
N
6
9
60
0
1
3
x
2
S
T
A
G
E
J
A
P
A
N
F
.
STO
P
J
A
P
A
N
BF DF FL1 FL2
FL1
FL2
1
0
020
0
1
0
0
IN
OUT
LV
-
T
T2
OBJ.
CUBE
A.S.
EPI
DIA
EPI
DIA
1
6
3
4
2
3
8
5
7
8
9
Operation
panel
OBJ. switch
DIA brightness switch
3 Press the OBJ. switch on the operation panel and
locate the objective for the DIC microscopy into
the optical path. (See Page 43.)
4
Attach the objective DIC prism slider to the
nosepiece to locate the objective DIC prism into the
optical path.
(See Page 66.)
5
Set the condenser turret to the “N1,” “N2,” or “NR”
position to locate the condenser DIC prism suitable
for the objective into the optical path. (See Page 55.)
6 Operate the DIA brightness switch on the
operation panel to adjust the brightness of the
diascopic illumination. (See Page 42.)
7 Adjust the brightness with ND filters. (See Page 44.)
The Senarmont method is used for the DIC microscopy under the dia illumination.

 Loading...