45
III. Operation of Each Part
7
Stage
Stage operation
The 3x2 stage, the 6x4 stage, the 6x6 stage, the
rectangular stage, and the rotatable rectangular stage
are equipped with stage fine movement knobs. The
upper knob is used for the Y-axis and the lower knob
is used for the X-axis. These knobs are provided to
finely move the specimen.
* If you move the stage plate directly by hands, the
stage will be damaged. Make sure to use these fine
movement knobs to move the stage.
Glass slide usage
To observe a specimen by using a glass slide on the 3x2 stage, replace the stage glass to an optional
glass slide holder.
Loosen the clamp screw on the left side of the stage to remove the standard stage glass. And then,
mount the glass slide holder and secure it by the clamp screw.
* When a high NA condenser such as a slide condenser is used, do not use the standard stage glass.
They can collide with each other. Make sure to use the glass slide holder.
Stage rotation
The specimen can be observed in any direction by rotating the stage when placed on the circular
graduated stage (P circular graduated stage or P-GS2 G Stage 2) or the rotatable rectangular stage.
• Rotating the stage
For the circular graduated stage, loosen the clamp screw on the front of the stage to turn the stage
by hand. For the rotatable rectangular stage, loosen the clamp screw on the bottom of the stage to
turn the stage by hand.
• Centering the circular graduated stage
The rotation center of the circular graduated stage must be aligned with the center of the field of
view. Center the stage according to the following procedure.
1 Search and focus on the target of the
specimen with the 10x objective.
2 Move the target to the center of the
viewfield by operating the stage knobs.
3 Turn the stage by 180 degrees.
4 When the target is shifted from the center,
adjust the stage centering screws (two
positions) with the hexagonal screwdriver
to move the target to the half position of the
moving distance of the target from the
center of the viewfield.
A stage centering screw is provided to each side rear of the elevating section.
5 Repeat steps 2 to 4 for two or three times to achieve a proper position.
6 Switch the objective to the one of a high magnification (40x or such) and repeat steps 2 to 5.
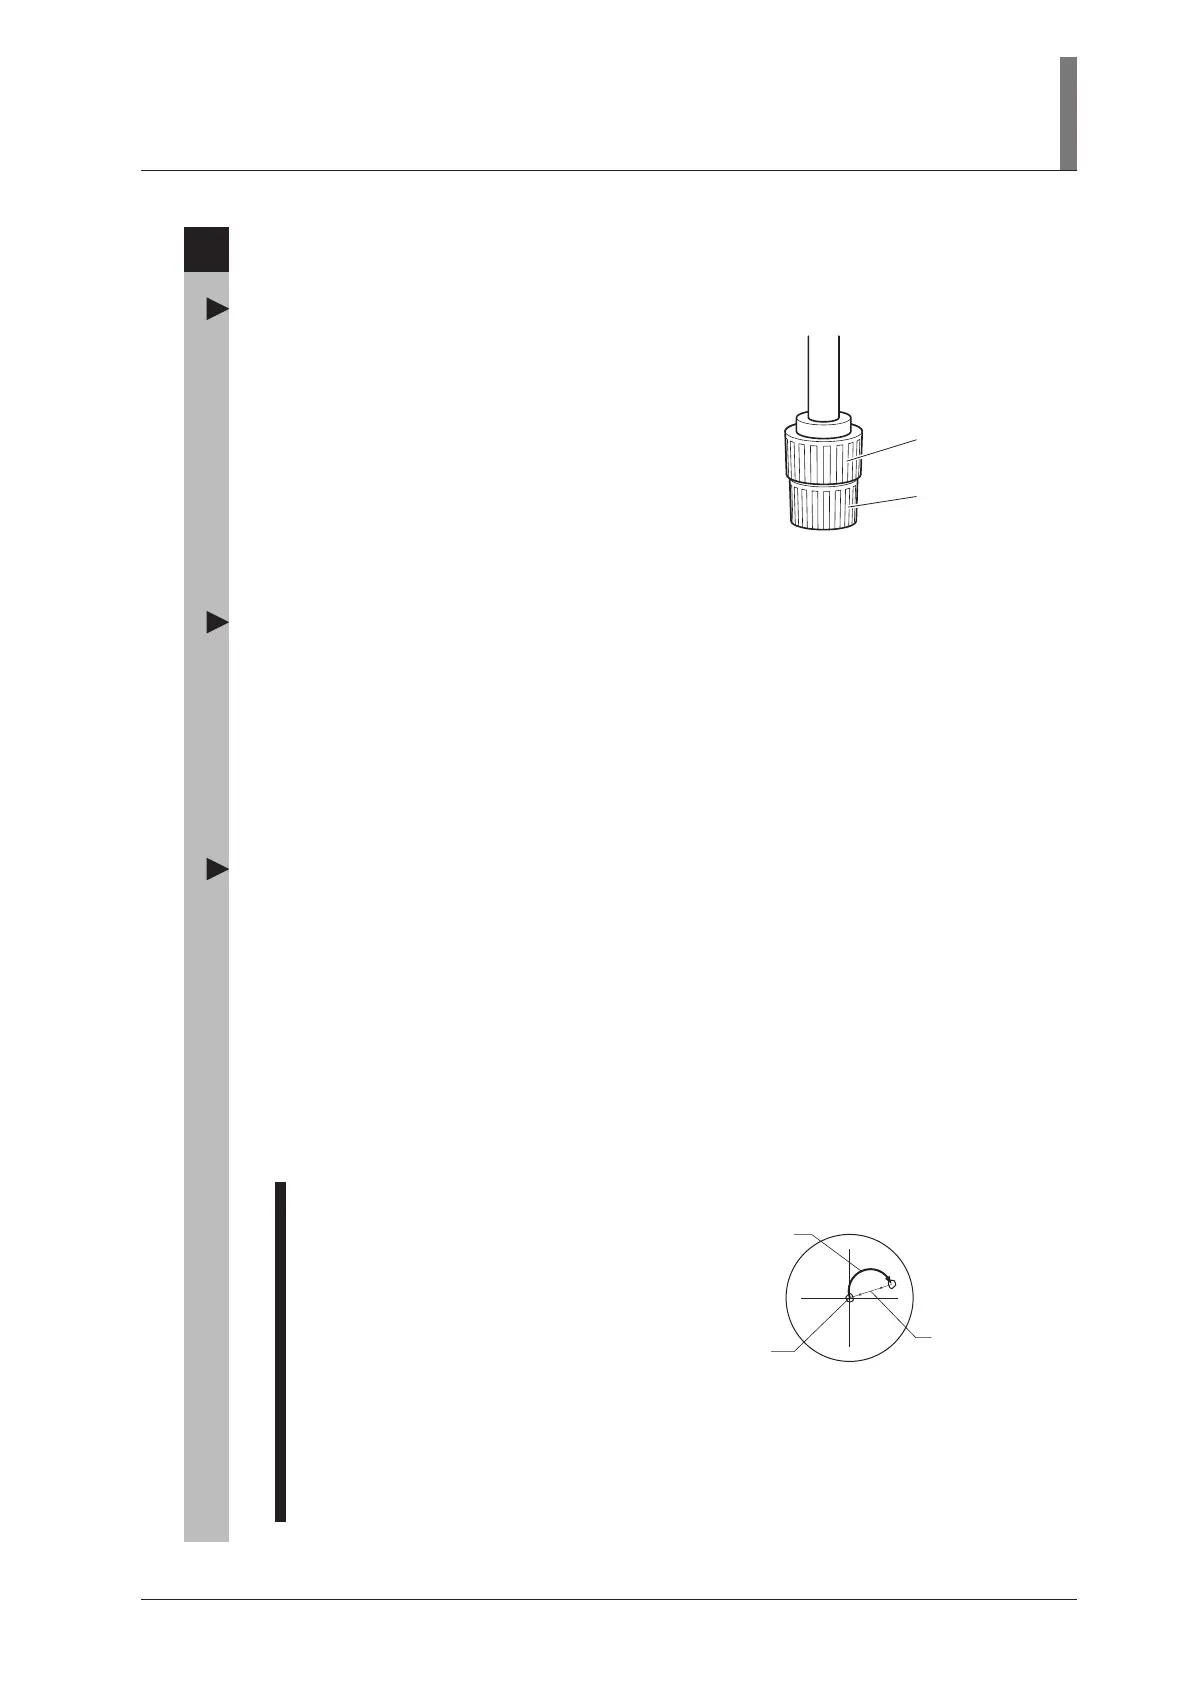
Fine movement knob
for the Y-axis
Fine movement knob
for the X-axis
180° rotation
Target
Half position
of the moving
distance of
the target

 Loading...