IV. Assembly
79
3
Attaching the Nosepiece
1. Attaching the motorized nosepiece
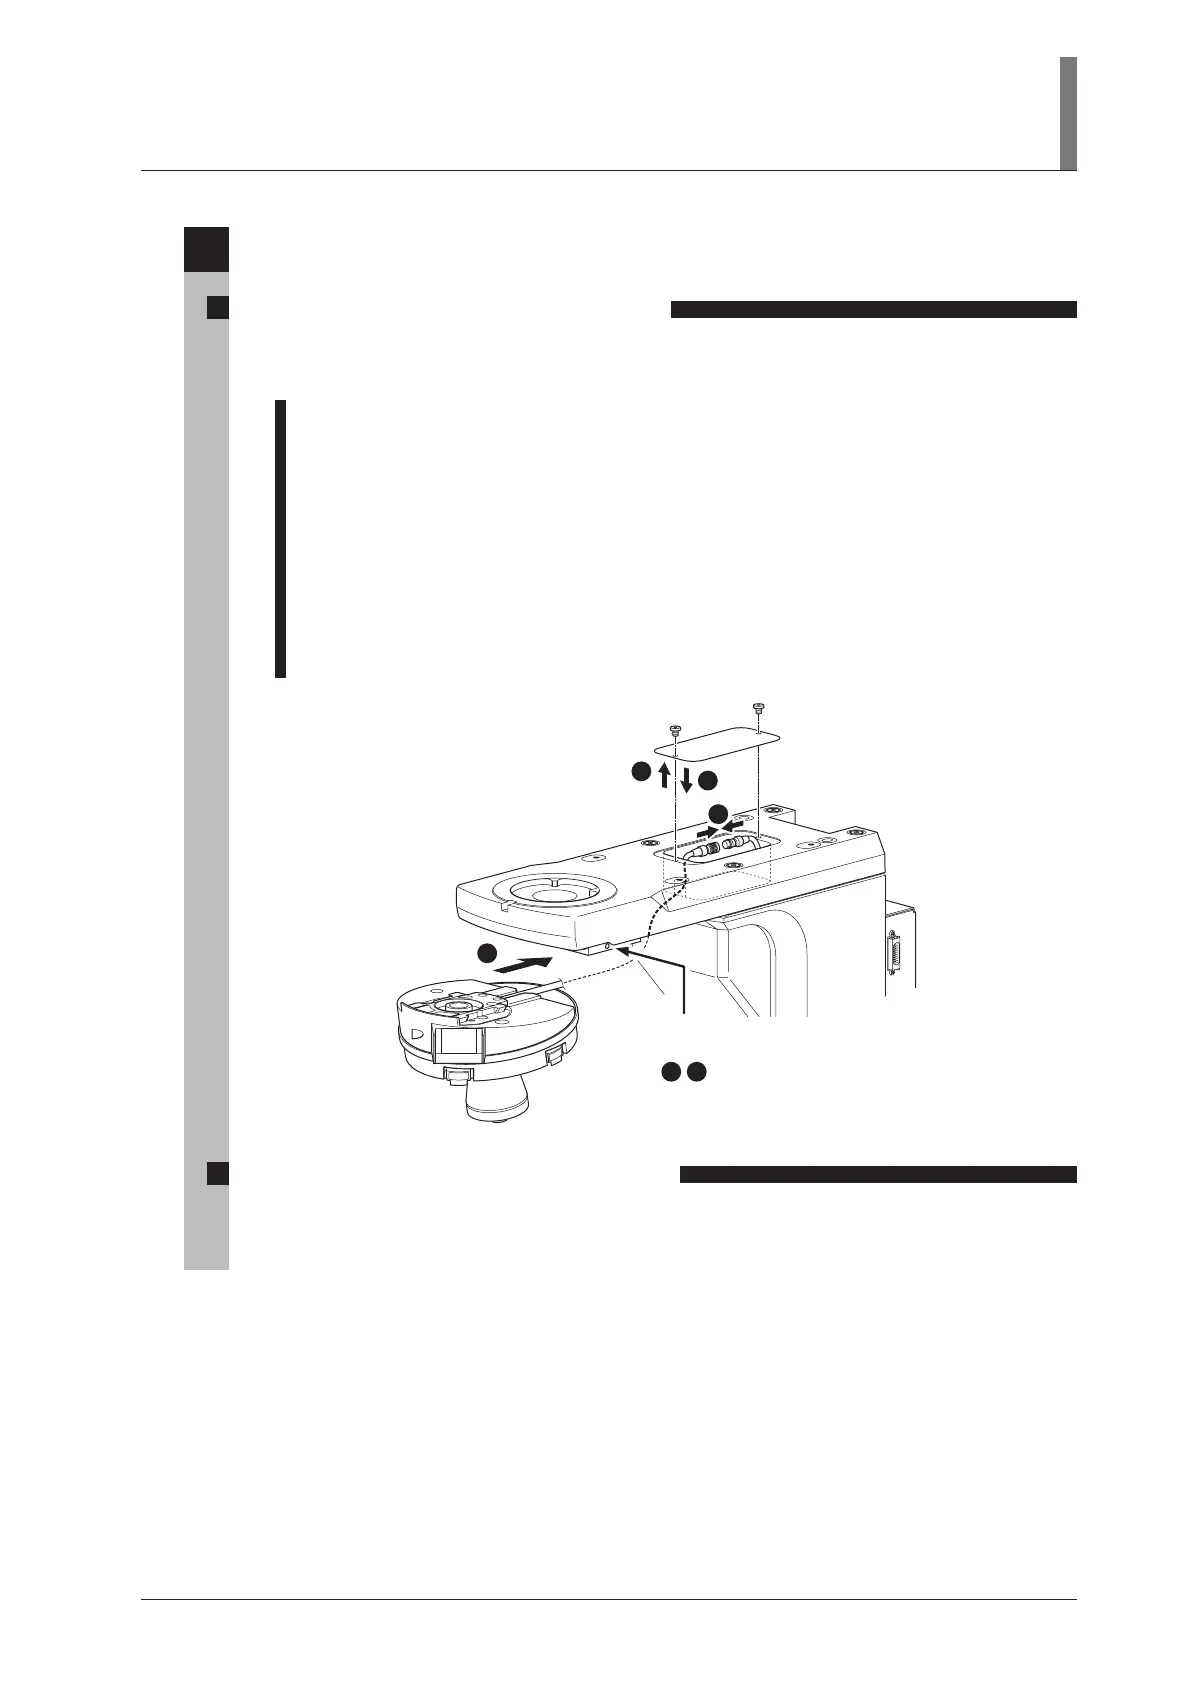
The motorized universal quintuple nosepiece (LV-NU5AI) is used for this microscope. The
nosepiece must be attached before attaching the epi illuminator.
1 Remove the two M4 screws at the top of the microscope arm by using a hexagonal wrench
and remove the cover at the connection port.
2 Fully loosen the nosepiece clamp screw located on the right side of the microscope arm using
the hexagonal screwdriver.
3 Insert the nosepiece from the front with aligning it to the groove at the bottom of the
microscope arm and slide it toward the back as far as it goes.
At this step, the cable of the nosepiece must be drawn into the microscope through the hole at
the bottom of the arm.
4 Fix the nosepiece with the nosepiece clamp screw.
5 Connect the cable of the nosepiece to the cable inside the arm.
6 Put the cover back to its original position and fix it with the two M4 screws.
UEPI2A
Nosepiece
clamp screw
2
1
4
5
3
6
2. Removing the motorized nosepiece
To remove the nosepiece, reverse the attaching procedure. At this time, lower the stage fully, and
remove the specimen and all objectives. Then hold the nosepiece by hand to prevent falling.

 Loading...