Menu Key 5
Pulse Laser Station NPL-302 Series Instruction Manual 161
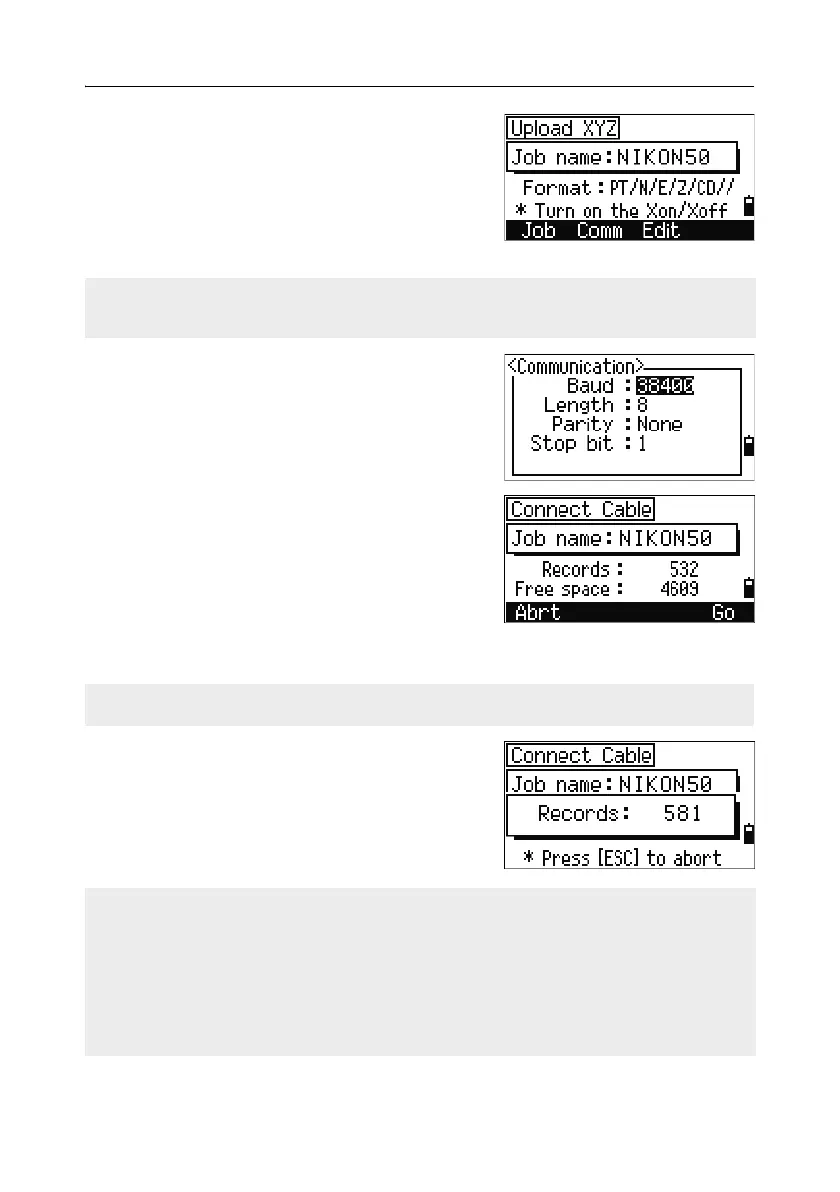
The default data format appears. To change the
order of data fields, press the
Edit softkey. For
more information, see Advanced feature: Editing
the data order for upload, page 162.
Otherwise, just press
[ENT].
To change the communication settings, press the
Comm softkey. The serial port settings must match
the settings used by the terminal software on the
computer.
Use an RS-232C cable to connect the instrument
to the computer.
The Free space field shows the number of points
that can be stored.
Press
[ENT] to put the instrument in receive mode.
Then use the Send Text File command in the
terminal program on the computer to start sending data.
As each point is received by the instrument, the
value in the Records field is incremented.
Press the Job softkey to go to the Job Manager screen. For more information, see
Job Manager, page 116.
In the terminal program, set flow control to Xon/Xoff.
If you press [ESC] during data upload, the upload is canceled and the display returns
to the Communication menu. Records that were received before you pressed [ESC]
are stored in the job.
The system truncates any code that is longer than 16 characters.
Duplicate points
If the existing point is a UP, CC, or MP record, and it is not referred to by any ST or
BS, it is automatically overwritten by the uploaded point. No error message appears.
 Loading...