Programming 15088:K 3/21/01
3-13
General Considerations
The capability of the control panel to provide the functions of Alarm Verification, Signal Cut-out, and Signal-
Silence Inhibit can be enabled/disabled by the programmer in both Full and Partial System Programming.
However, to make use of these functions, the Signal Silence option (for silenceable control modules) and the
Alarm Verification option (for addressable detectors) must still be enabled/disabled individually for each SLC
Loop device under Full or Partial Point Programming.
For instance, when programming Alarm Verification:
• Under Full or Partial System Programming, the programmer turns Alarm Verification ON and sets the
verification time period.
• Under Full or Partial Point Programming, the programmer individually selects Alarm Verification for each
detector:
Detector 1 = YES
Detector 2 = NO
Detector 3 = YES
Detector 4 = YES
and so forth for each detector in the system.
For signal cut-out, the data can be entered in one second increments: however, the AM2020/AFP1010 will round
up to the nearest value/increment of 8. For example, if 7 is entered, the displayed value will be 8. If 9 or 15 is
entered, the displayed value is 16. If 60 is entered, the value is 64.
Section 1.1.4 Enabling the Trouble Bus
D }X1X4X
4=AVPS
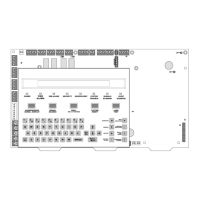
The presence of auxiliary power supplies (formerly the AVPS-24) and other optional devices employing the trouble
bus connector at P5 on the CPU must be programmed into memory by selecting option 4 from the Partial System
Programming submenu. At the prompt "ENTER THE NUMBER OF AVPS-24 INSTALLED IN THE SYSTEM (0-16)",
enter the total number of devices employing the trouble bus. The devices must be physically installed and
connected to P5 on the CPU to prevent creating a system trouble condition. The example below illustrates the
software installation of two AA-30 amps, one AA-120 amp, and two APS-6R power supplies.
PRESS@1=INST,2=STY,3=TDLY,4=AVPS,5=ZBND,6=EXTEQ,7=LOCP,8=ISIB,9=PARM@@@@@@@@@:@4
ENTER@THE@NUMBER@OF@AVPS-24@INSTALLED@IN@THE@SYSTEM@(0@-@16)@@@@@@@@:@5
Section 1.1.5 Zone Boundary
D }X1X5X
5=ZBND
The AM2020/AFP1010 can make use of up to 240 software-defined “zones.” These zones can be either
forward–activated (FZON) or reverse–activated (RZON), depending upon the particular installation
requirements. These forward and reverse zones must be grouped separately, with the forward group always
preceding the reverse group. The highest forward-activated zone in the system is the Zone Boundary, which
must be in the range of Z001 - Z239.
For a full description of
Forward
and
Reverse Activating Software Zone
,
see the
Glossary of Terms and Abbreviations
at the end of this manual.
Unless the use of complex Control-By-Event or Cooperative Control-By-Event Equations is required in the
system, set the Zone Boundary to Z200 (default). (For more information, see
Control-By-Event Programming
and Cooperative Control-By-Event Programming
).
The following programming example illustrates setting the Zone Boundary for zone 200.
PRESS@1=INST,2=STY,3=TDLY,4=AVPS,5=ZBND,6=EXTEQ,7=LOCP,8=ISIB,9=PARM@@@@@@@@@:@5
ENTER@ZXXX@OF@HIGHEST@FORWARD@ACTIVATED@ZONE@IN@SYSTEM@@@@@@@@@@@@@@@@@@@@:@Z200
Z001 Zone Boundary Z240
Forward Zones Reverse Zones