Chapter 8: Maintenance
WARNING: PERSONALINJURYORPROPERTYDAMAGERISK
Take care when working near the encoder cables to make sure that they are not
disconnected or damaged.
To access the wheel lift tool:
1.
Remove the right side skin. See: Remove and Replace the Side Skins on page 183.
2.
Use a 5 mm hex key to remove the two M6 screws (A), holding the tool (B) as you
remove the second screw to prevent the tool from falling.
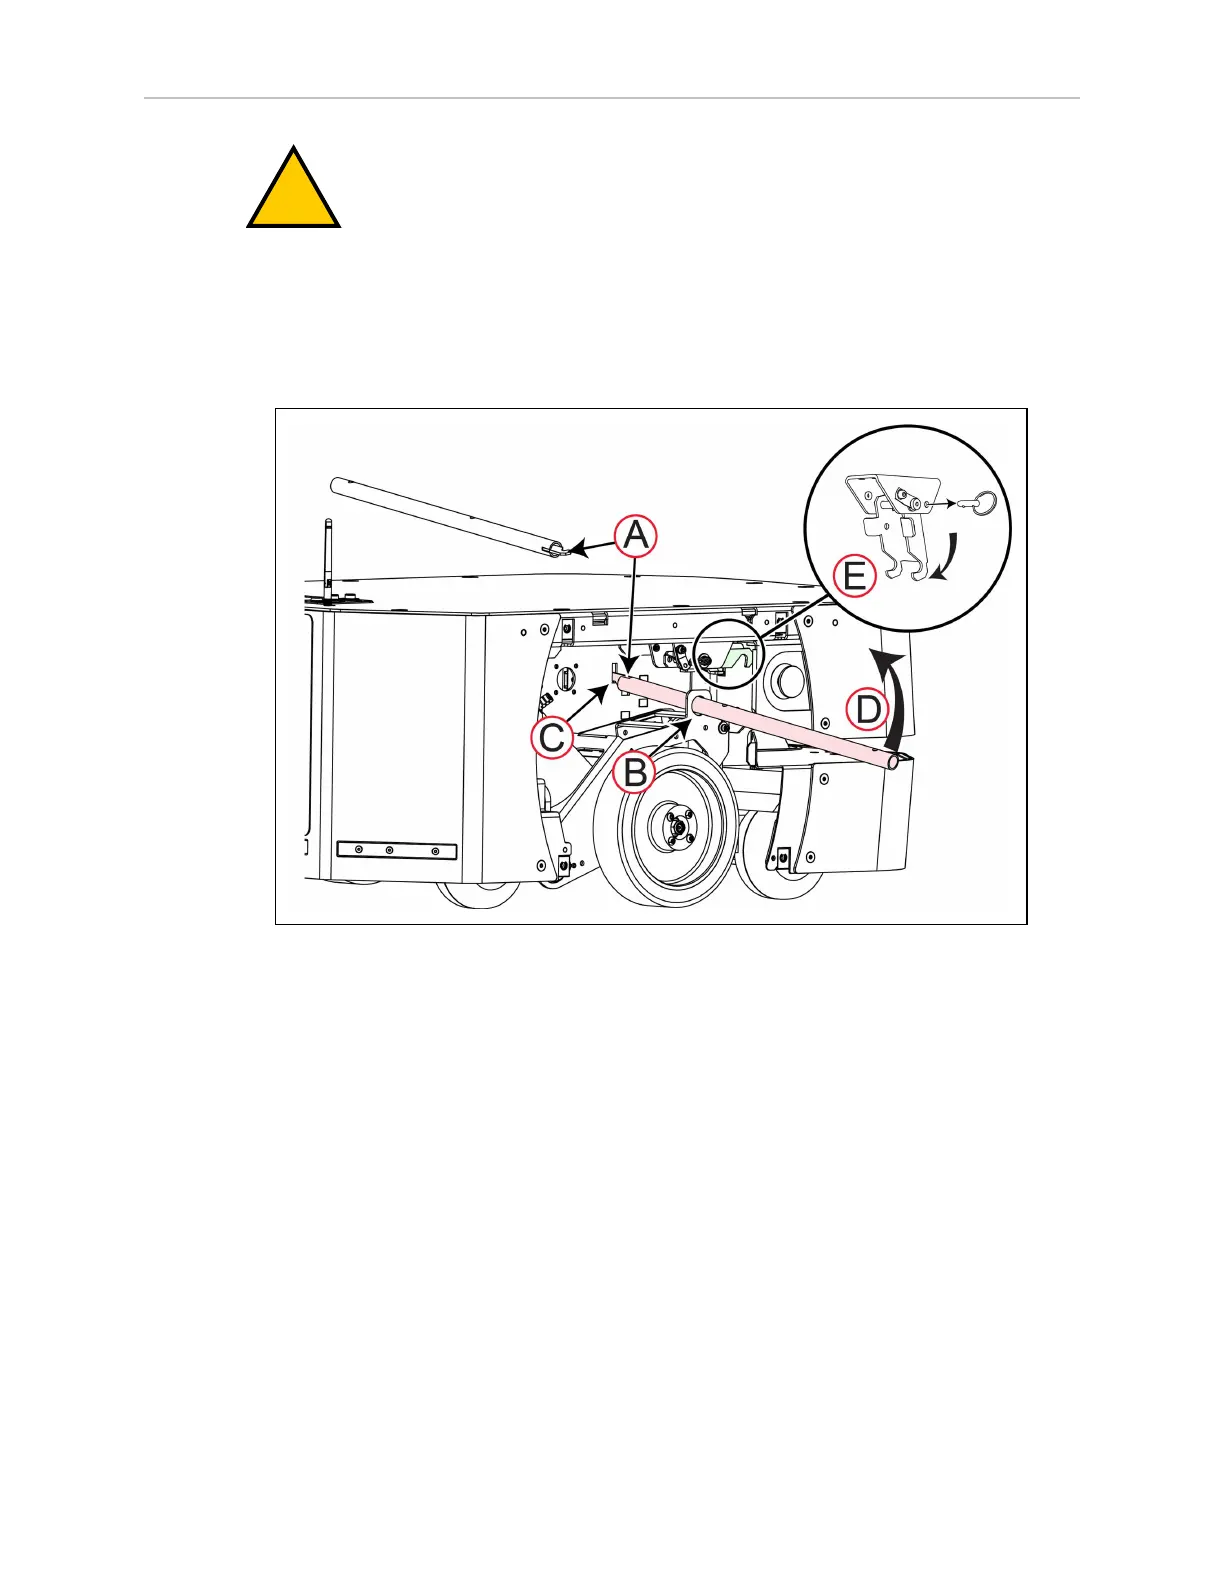
Figure 8-3 Using the Wheel Lift Tool
To use the wheel lift tool:
1.
Insert the hook end of the tool (A) through the hole in the drive train (B) and into the
slot in the chassis (C).
2.
Raise up the end of the tool (D) to lift the drive wheel. This might take some effort
because you are extending the suspension springs.
3.
While keeping the wheel raised, pull out the detente pin to rotate retaining hook (E)
downward. Set the hook under the top suspension bar to hold the suspension extended,
keeping the drive wheel in the raised position.
4.
Remove the left side skin. See: Remove and Replace the Side Skins on page 183.
5. Repeat Step 1 through Step 3 to raise the other drive wheel, if required.
To lower the wheel, refer to Figure 8-3 and:
20472-000 Rev B LD-250 Platform User's Guide 147

 Loading...