7.11
PVT System
7
Drive Belt Removal - Team Driven Clutch
NOTE: Turn the key to the “OFF” position and allow
the engine to come to a complete stop.
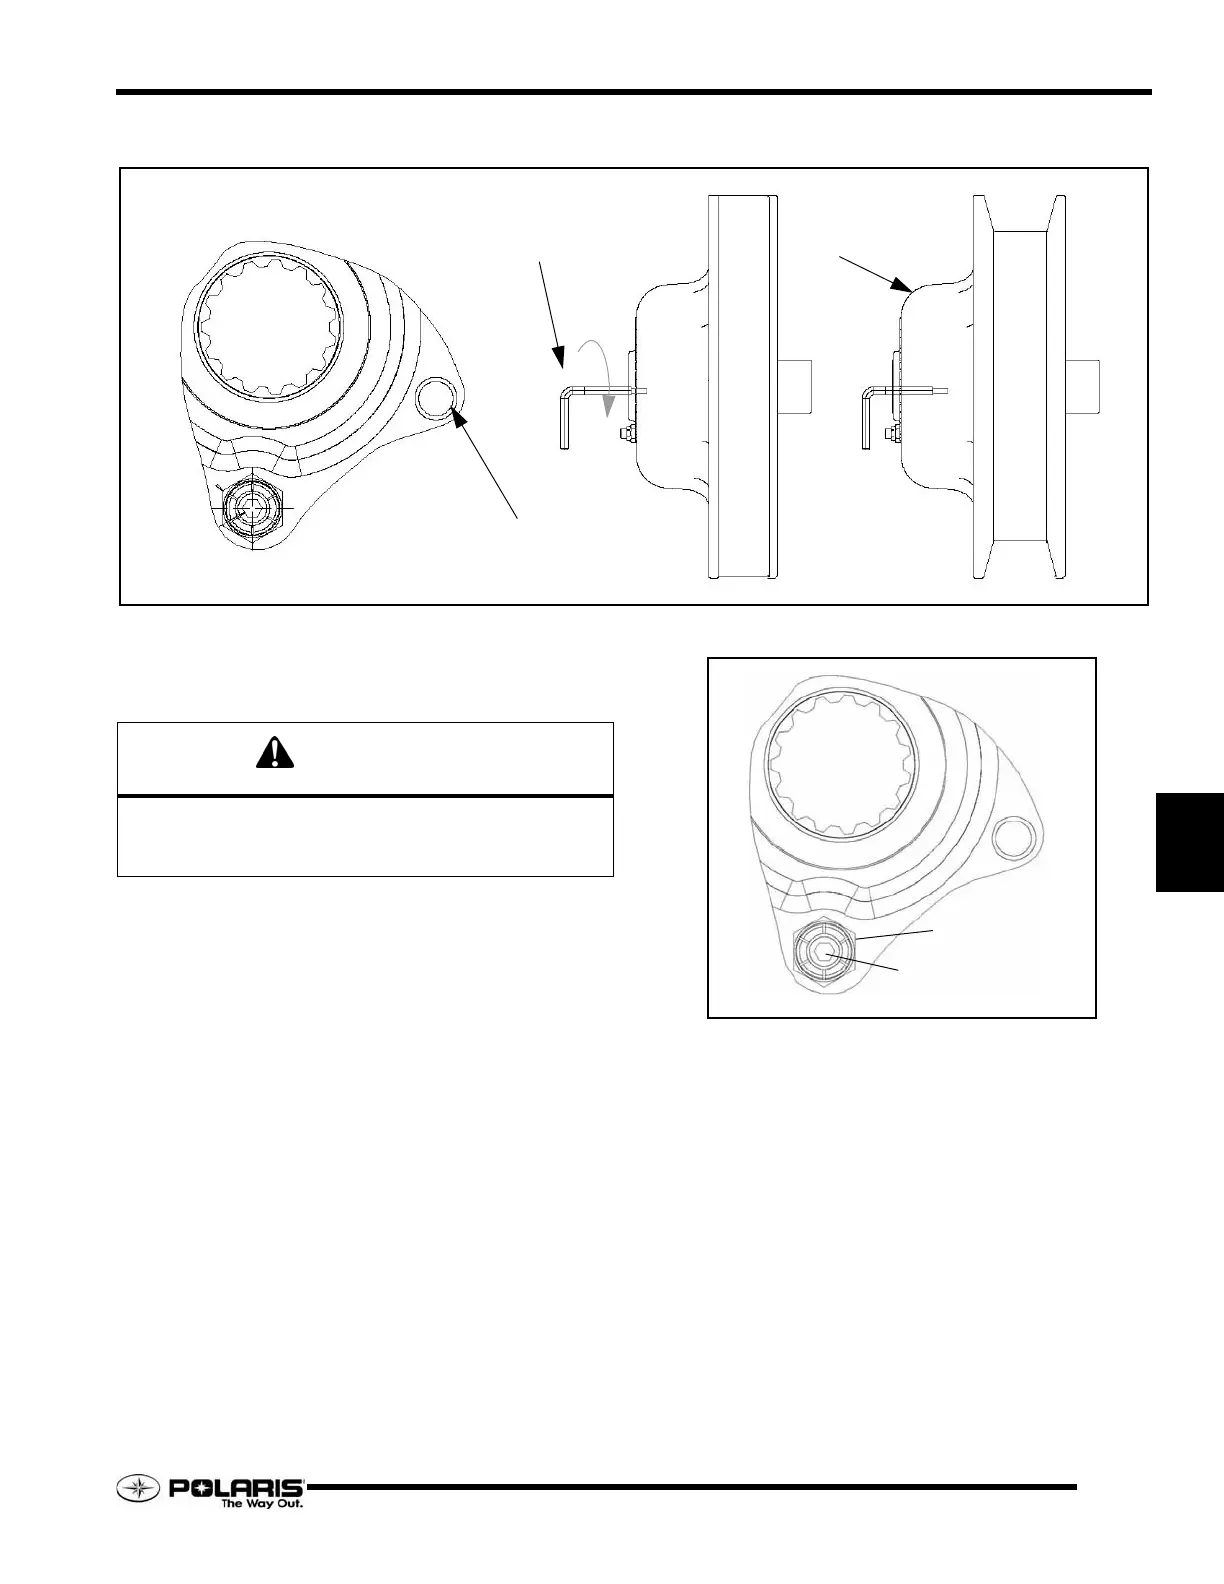
1. Verify the driven clutch is not in reverse. Open the clutch
guard.
2. Insert the L wrench, PN 2874857 (A), into the threaded hole
(B) located on the driven clutch, and turn it clockwise until
the clutch sheaves are in the open position (C).
3. Remove the drive belt.
Drive Belt Installation - Team Driven Clutch
1. With the L wrench inserted into the threaded into hole and
the sheaves in the open position, install the drive belt.
NOTE: Install belt so that the numbers can be read
correctly on the left side of the machine or in the
direction in which the belt was originally installed.
2. Remove the wrench. “Wiggle” the belt to remove slack
while removing the wrench.
3. Close the clutch guard.
Adjusting Belt Deflection - Team Driven
Clutch
1. Loosen the jam nut.
2. Using an 1/8
″ Allen head wrench, turn the stud counter-
clockwise to decrease belt deflection and clockwise to
increase belt deflection.
3. When the proper belt deflection is achieved torque the lock
nut to 90 - 110 in-lb. (10 - 12 Nm).
NOTE: When using a MBL drive belt, the belt
deflection should be set so that .9
″ to .10″ of the
outer cogs are outside of the driven sheaves.
A
B
C
CAUTION
Damage to the driven clutch or L wrench will occur when
attempting to open the driven clutch when the driven
clutch is in the reverse position.
JAM NUT
DEFLECTION STUD
 Loading...