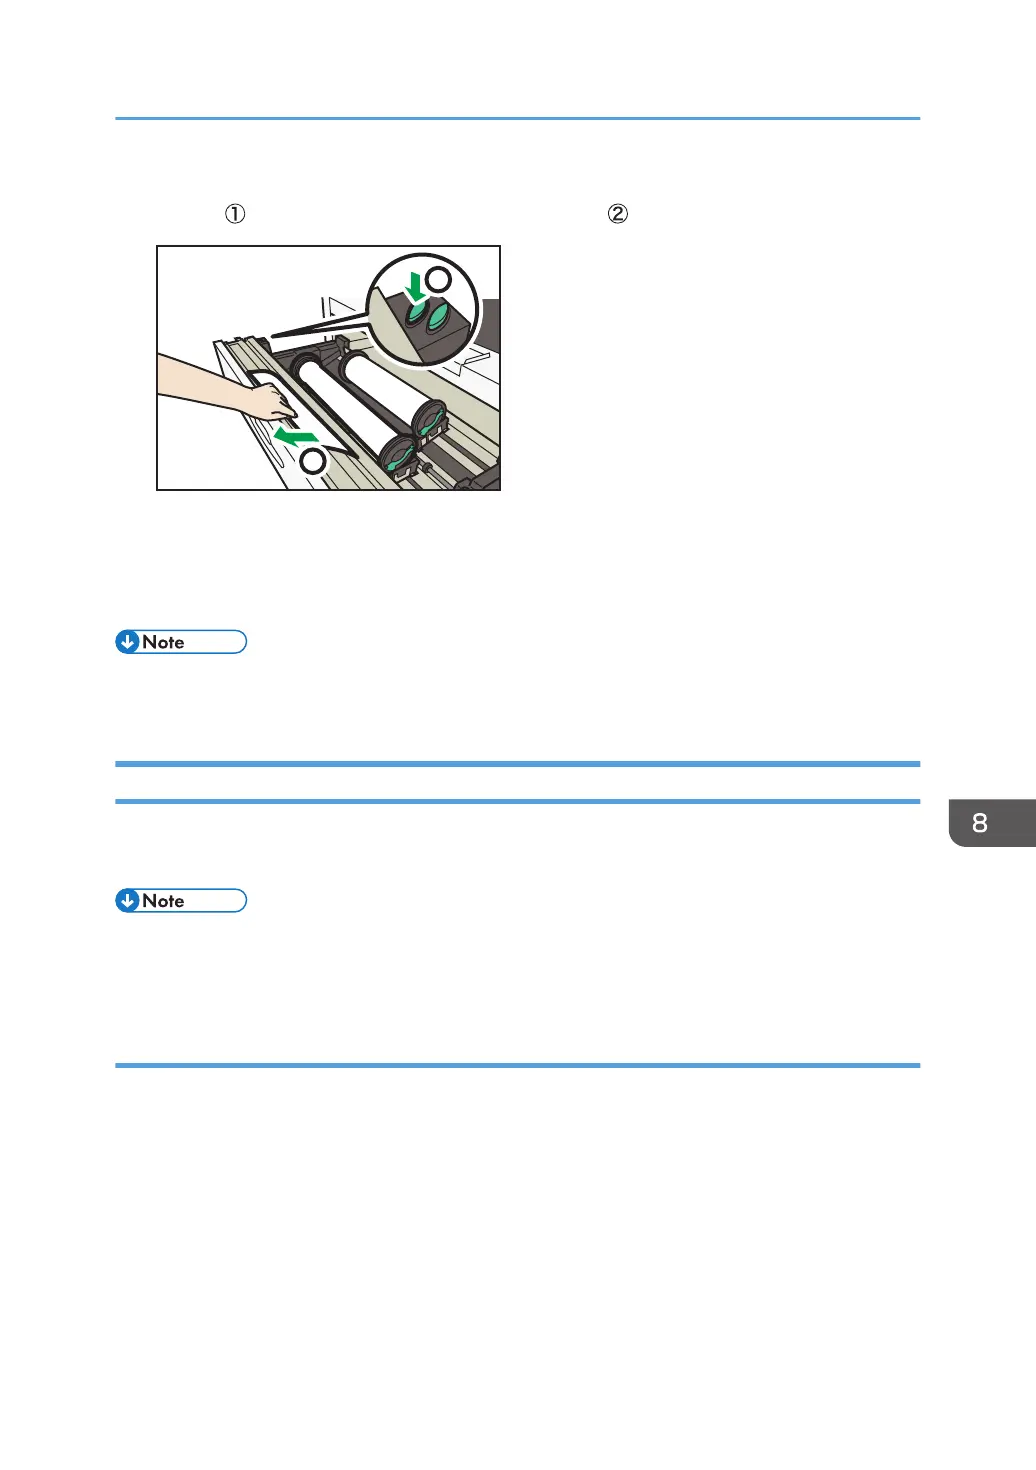
5. Keep pressing the auto feed button until the edge of the paper emerges from the cutter
section ( ), and then remove the cut piece of paper ( ).
The paper will be cut automatically when you release the feed button.
6. Carefully push the paper roll tray fully in.
7. Specify the paper size.
• For details about specifying the paper size, see "Tray Paper Settings ", Connecting the Machine/
System Settings.
Printing from the Tray Using the Printer Function
With the printer function, you can print on a custom size paper roll. This section explains how to specify
the paper size from the control panel of the machine.
• Settings remain valid until they are changed.
• For details about setting printer drivers, see "Printing Documents", Print.
Specifying a custom size roll of paper using the control panel
This section explains how to specify the size for a custom size roll of paper from the control panel when
using RP-GL/2 or RTIFF as a printer language.
For details about how to change the printer language, see "Specifying a Printer Language", RP-GL/2
and RTIFF.
Paper sizes that can be specified are 210-914.4mm (8.3-36.0 inches) horizontally and 210–15,000
mm (8.3–590.5 inches) vertically.
Loading Paper
111
 Loading...