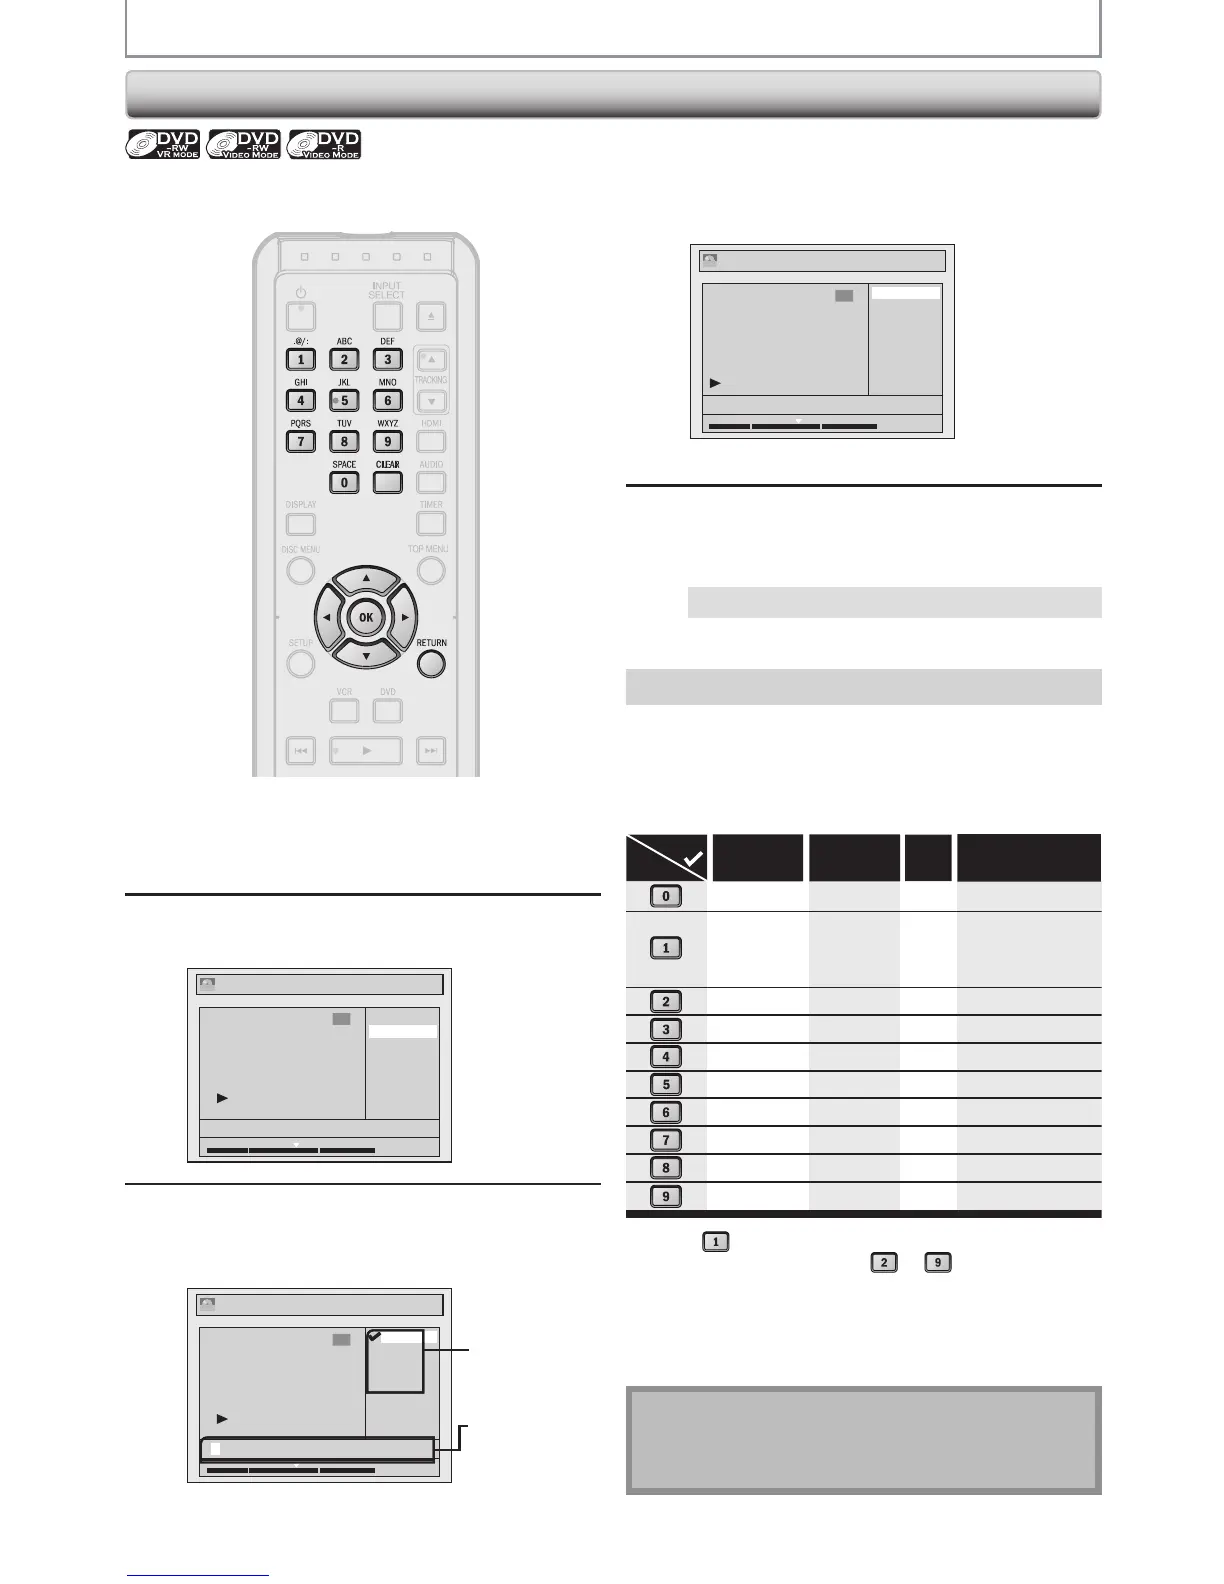
EDITING DISCS
Putting Names on Titles
4
Use [K / L] to select “Yes”, then press
[OK].
Edit - Edit Title Name
No
Yes
MY FAVORITE
1
1 : 05 : 00
ORG
The name you entered will be activated for the title.
5
After this operation is completed, press
[RETURN] to exit.
Data will be written onto the disc momentarily.
This operation may take a while to be completed.
You can put title names on the titles and change the
names from this menu.
1) Use [K / L] to select a desired character set, then
press [OK].
2) Follow the list below, use [the Number buttons]
repeatedly until the desired letter appears.
When you finish entering a title name, press [OK].
*1 Press
, character set will be changed to “ @!? ”
mode automatically. Press
to to back to the
previous character set.
•
To delete letters, press [CLEAR] repeatedly.
Holding [CLEAR] to delete all letters.
•
Use [0 / 1] to move the cursor to the left and right.
•
You can enter up to 30 letters.
Note
•
Undenedlettersinatitlenameareshownby“*”.If
you delete them, adjoining letters may change to “*” or
others.
Guide to Edit Title Name
1
Follow steps 1 to 3 in “DELETING
TITLES” on page 63 to display “Edit”
menu.
2
Use [K / L] to select “Edit Title Name”,
then press [OK].
Edit
Scene Delete
Edit Title Name
Chapter Mark
Protect
JAN/30/15 1:00AM L1 LP
1
1 : 05 : 00
ORG
3
To enter a title name, follow the steps
of “Guide to Edit Title Name” on this
page.
Edit - Edit Title Name
abc
ABC
123
@! ?
1
1 : 05 : 00
M
ORG
character set
area for
entering title
names
•
Whenyounishenteringatitlename,press[OK].
 Loading...