UNPACKING ENGLISH
4.2.5 ASSEMBLY OF SUSPENSION
Unscrew the two central screws on the rear plate of the mowing machine.
P
lace the suspension so that holes for its fastening will coincide with threaded holes.
Fasten the suspension by means of the screws unscrewed before.
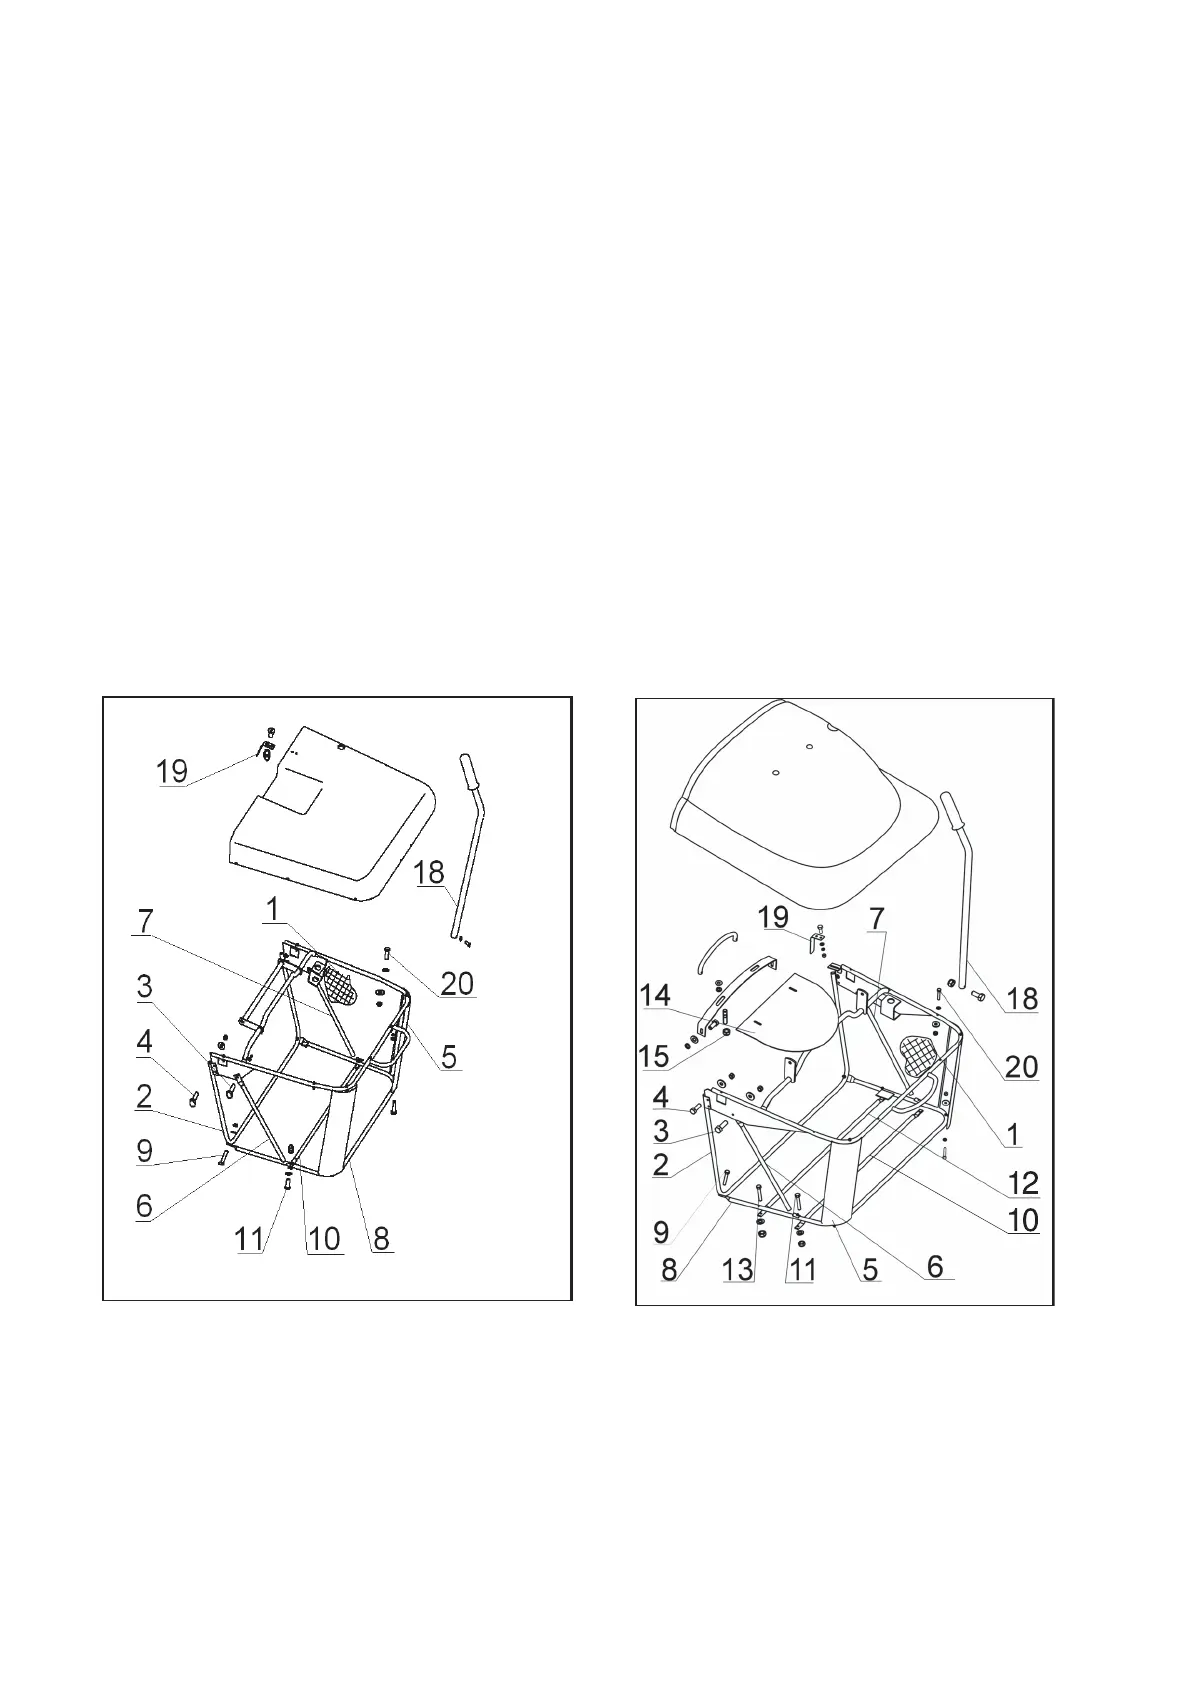
4.2.6 ASSEMBLY OF GRASS COLLECTING BIN
The grass collecting bin is preassembled, it is necessary to mount it onto the machine and adjust it.
Take out the grass bin from the crate, open the bag
1, tilt down the front tube 2, insert the upper screws 3 and 4, and tighten them slightly.
Suspend the grass bin prepared in this way onto the rear part of the mowing machine, match it with the mudguards and tighten the screws
3 and 4 firmly.
Take down the grass bin from the machine and put it on its rear handle with the inlet opening upwards. Unscrew the nuts from the screws 20 under the lid
a
nd insert the corner stiffeners
5 u
nder the upper and bottom tubes. Screw the nuts on the screws
2
0
a
nd tighten them firmly.
Tilt down the left support
6 and right support 7. Insert the bottom tube 8 into the bag. Connect the bottom tube 10 from outside of the grass bin by means
of the screws
11, and tighten these screws firmly. Attach the tube 8 to the front tube 2 and to the corner stiffeners by means of the screws 9.
Grass collecting bin 360 l:
Connect the second bottom tube 12 from outside of the grass bin by means of the screws 13. Insert the upper handle into the holes in the lid, place the sheet 14
to the bottom side of the lid and fasten the handle and sheet by means of nuts 15.
Grasp the grass collecting bin (300 l / 360 l), suspend it on the brackets on the rear plate of the mowing machine, and check again its matching with the mud-
guards. If there is any discrepancy, loosen the screws, readjust the bin position and retighten the screws.
If it is not possible to get the matching by the method stated above, carry out the adjustment by shifting the brackets on the rear plate.
After adjusting take down the grass bin from the machine, tighten all the screws and attach the bag to the frame by means of the plastic clips.
Pass the lifting lever
18 through the upper hole in the lid and fix it by the M5x12 screw with the nut.
Attach the contact spring
19 of the safety switch.
Check the tightening of all the screws and nuts.
300 l GRASS BIN 360 l GRASS BIN
4.2.7 SUSPENSION OF GRASS COLLECTING BIN
Grasp the assembled grass collecting bin (300 l / 360 l) with both hands and lift it.
T
ilt it t
o be r
eclined under the angle of 40° and sus
pend it ont
o the br
ackets on the machine rear plate.
After the proper installation stick the triangles (self-adhesive labels of yellow colour) on the bin and machine so that their tops are opposite one to the other.
Check the correct function of the safety switch.
When the lid is closed the cont
act s
pring
1
9
of the saf
e
ty switch must keep the switch in the switched on state.
13
 Loading...