Load Weighing Device
September 29,2021 ©2021 Smartrise Engineering, Inc. All Rights Reserved Page 15
16. From the SETUP menu, scroll and select Load Weigher. See Figure 6.
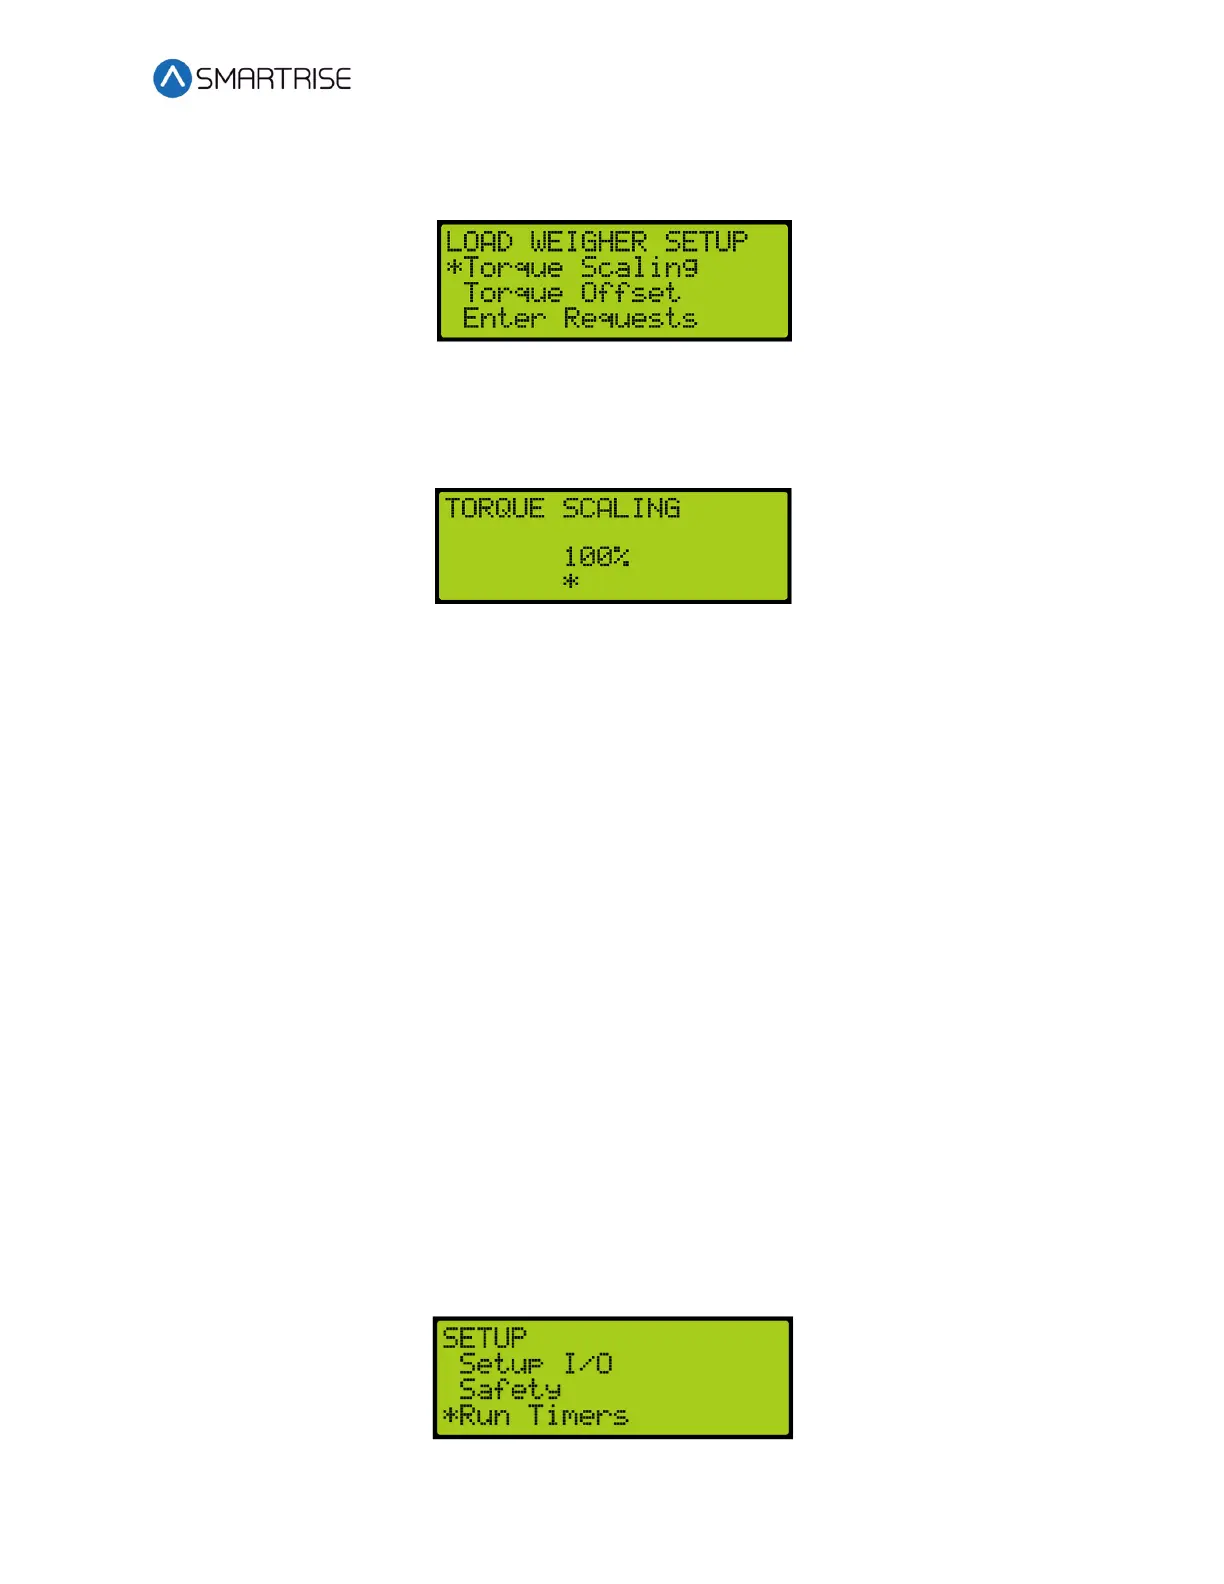
17. From the LOAD WEIGHING SETUP menu, scroll and select Torque Scaling.
Figure 40: LOAD WEIGHER SETUP Menu – Torque Scaling
18. From the TORQUE SCALING menu, scroll and select the scale is set to 100%.
NOTE: If the torque is in the wrong direction, set this to negative value.
Figure 41: TORQUE SCALING Menu
19. Scroll right and press Save.
20. Turn on pretorque on the drive.
• DSD – Function 114 Pre-Torque Enable to 1 (on)
• KEB – Set LC01 control mode to Closed Loop Digital Pretorque(4)
• M1000 – Set Trq Comp Cmd Src in the C1 menu to Serial HPV
• Set one of the analog inputs to Torque Comp in C5 menu
Tuning
The start sequence must be adjusted to maximize reliance on pretorque and prevent the car
from driving off the brake. This will be done by running the car on zero speed and adjusting for
roll back.
The following procedure describes how to set the start sequence.
1. Set the C4 controller to Inspection operation by toggling the NORMAL/INSPECTION
switch on the MR board to INPSECTION.
2. Press the left button until the SETUP menu displays, See Figure 3.
3. Set the inspection speed in the Speeds menu to 0 fpm. See the C4 User Manual
Inspection Run Options and Adjustments.
4. From the SETUP menu, scroll and select Run Timers.
Figure 42: SETUP Menu – Run Timers