533
• Only configuration data backed up using File Manager
can be restored.
• For details about backup/restore functions that use the
public key of the Maintenance Menu, contact your Sony
service representative.
Displaying the Switcher/Panel menu
In the menu selection area, click/tap [Switcher/Panel].
The Switcher/Panel menu appears in the menu display
area.
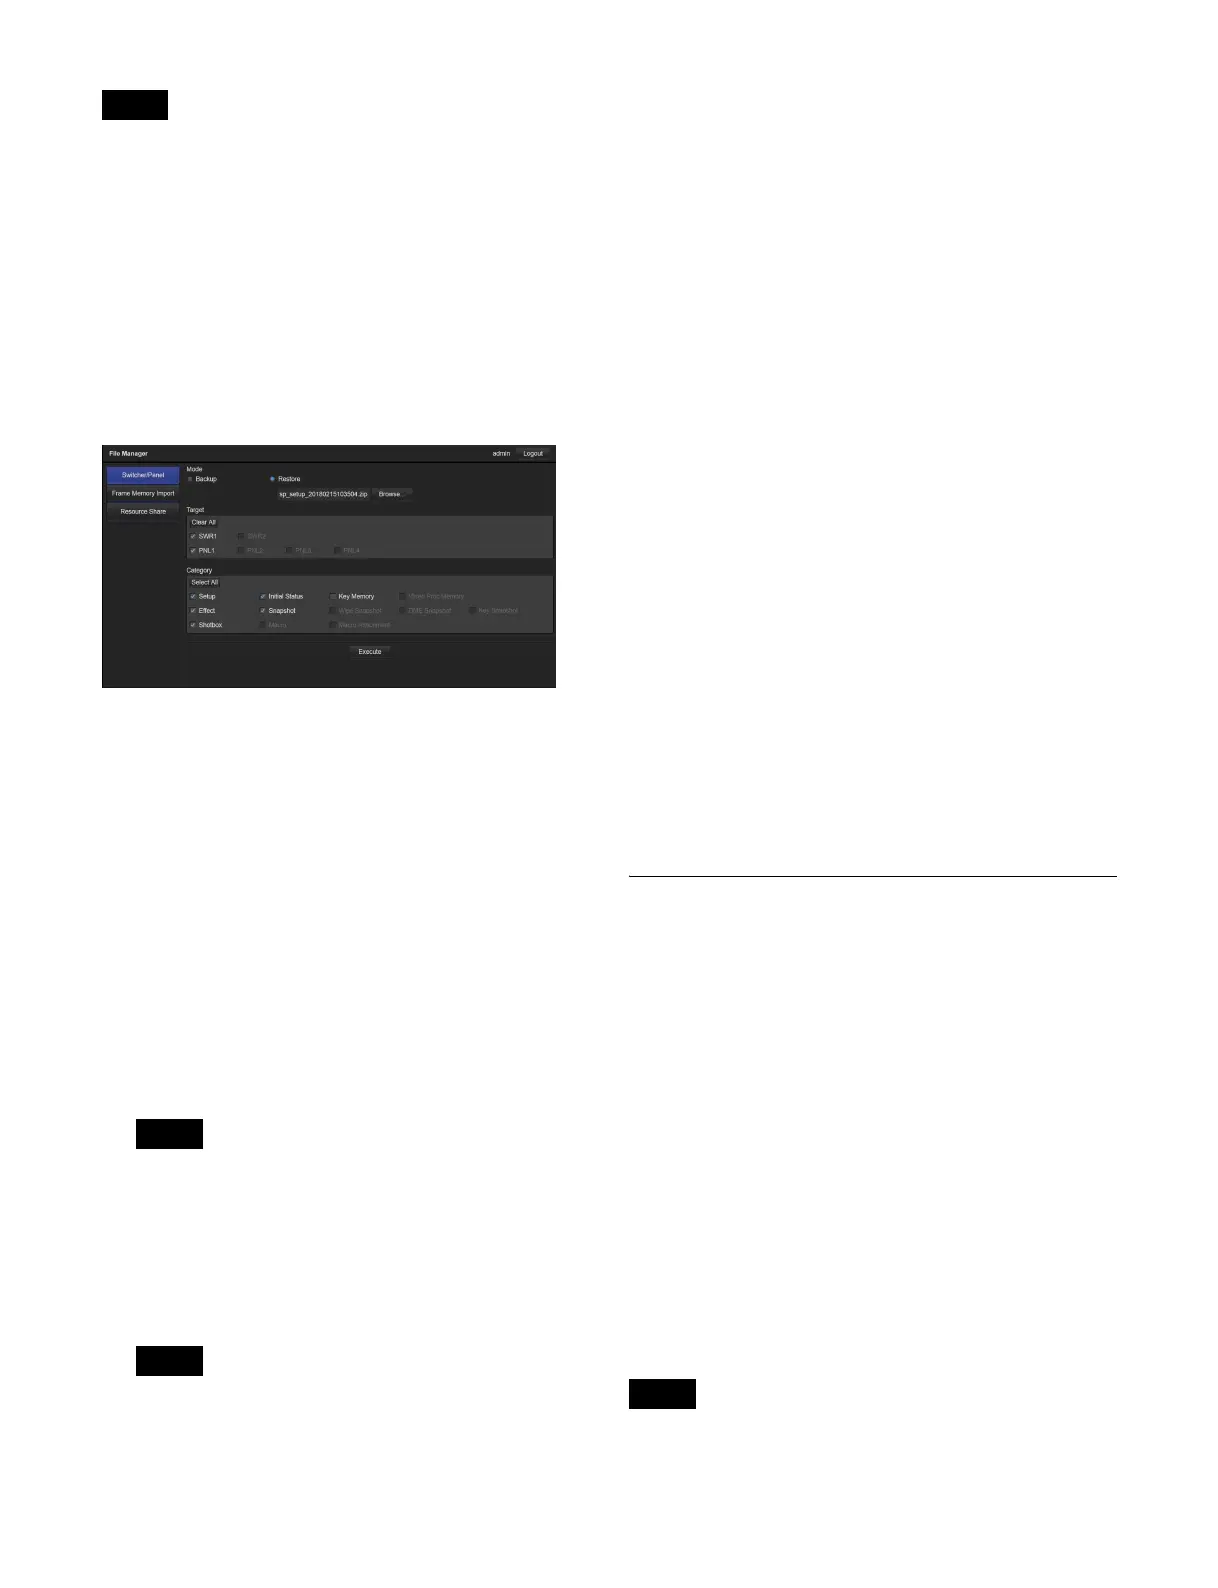
Switcher/Panel menu
Backing up a file
1
In [Mode], select [Backup].
2
In [Target], select the target switcher/control panel.
To select all switchers/control panels, click/tap [Select
All].
To clear the selection of all switchers/control panels,
click/tap [Clear All].
3
In [Category], select a data category.
To select all categories, click/tap [Select All].
To clear the selection of all categories, click/tap [Clear
All].
The categories that can be selected vary depending on
the setting in step 2.
4
Click/tap [Execute].
Data for the selected categories is saved on the
computer as a ZIP file.
• By default, the file name has the following format.
“sp_setup_YYYYMMDDhhmmss.zip” (where
“YYYYMMDDhhmmss” is the creation date)
• The file save destination depends on the OS and
browser settings.
Restoring a file
1
In [Mode], select [Restore].
Click/tap [Browse …], and select a file in the file
selection window.
The name of the selected file appears.
2
In [Target], select the target switcher/control panel.
The switchers/control panels included in the file are
displayed in the selected state.
To remove a switcher/control panel from the restore
targets, click/tap it to clear the check mark.
3
In [Category], select a data category you want to
restore.
The categories included in the file are displayed in the
selected state.
To remove a category from the restore targets, click/
tap it to clear the check mark.
4
Click/tap [Execute].
5
Check the message, then click/tap [Yes].
The selected file is loaded, and the configuration data
is applied.
Frame Memory Import Menu
Operations
This menu is used to import image data files stored on a
computer into frame memory storage.
The format of files that can be imported are given below.
• TIF (TIFF files, “.tif” file name extension)
• BMP (Bitmap files, “.bmp” file name extension)
• TGA (Targa files, “.tga” file name extension)
• PNG (PNG files, “.png” file name extension)
• SFH (frame memory dedicated file format)
Files in formats other than SFH format are converted to
SFH format when they are imported.
When multiple files are selected having a
“character_string + number (or character_string + # +
number)” name format, files with the same
“character_string” portion are imported as clips. Other
files are imported as still images.
The following files cannot be imported using File
Manager.
Notes
Note
Notes
Note
 Loading...