PERIODIC MAINTENANCE 2-5
VALVE CLEARANCE
Excessive valve clearance results in valve noise and insufficient
valve clearance results in valve damage and reduced power.
Check the intake and exhaust valve clearances at the distances
indicated above and adjust the valve clearances to specification,
if necessary.
• Remove the fuel tank. ("5-3)
• Remove the spark plug. ("2-6)
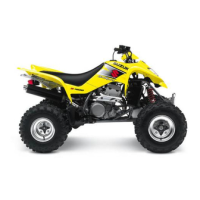
• Remove the valve inspection caps
1.
• Rmove the left mud guard. ("7-8)
• Remove the gear switch
2.
• Remove the recoil starter
3. ("3-13)
• Remove the TDC plug
4.
$ Valve clearance (when cold)
IN: 0.05 – 0.10 mm (0.002 – 0.004 in)
EX: 0.17 – 0.22 mm (0.007 – 0.009 in)
NOTE:
Valve clearance is to be checked when the engine is cold.
The intake and exhaust valves must be checked and adjusted
when the piston is at Top-Dead-Center (TDC) of the compres-
sion stroke.
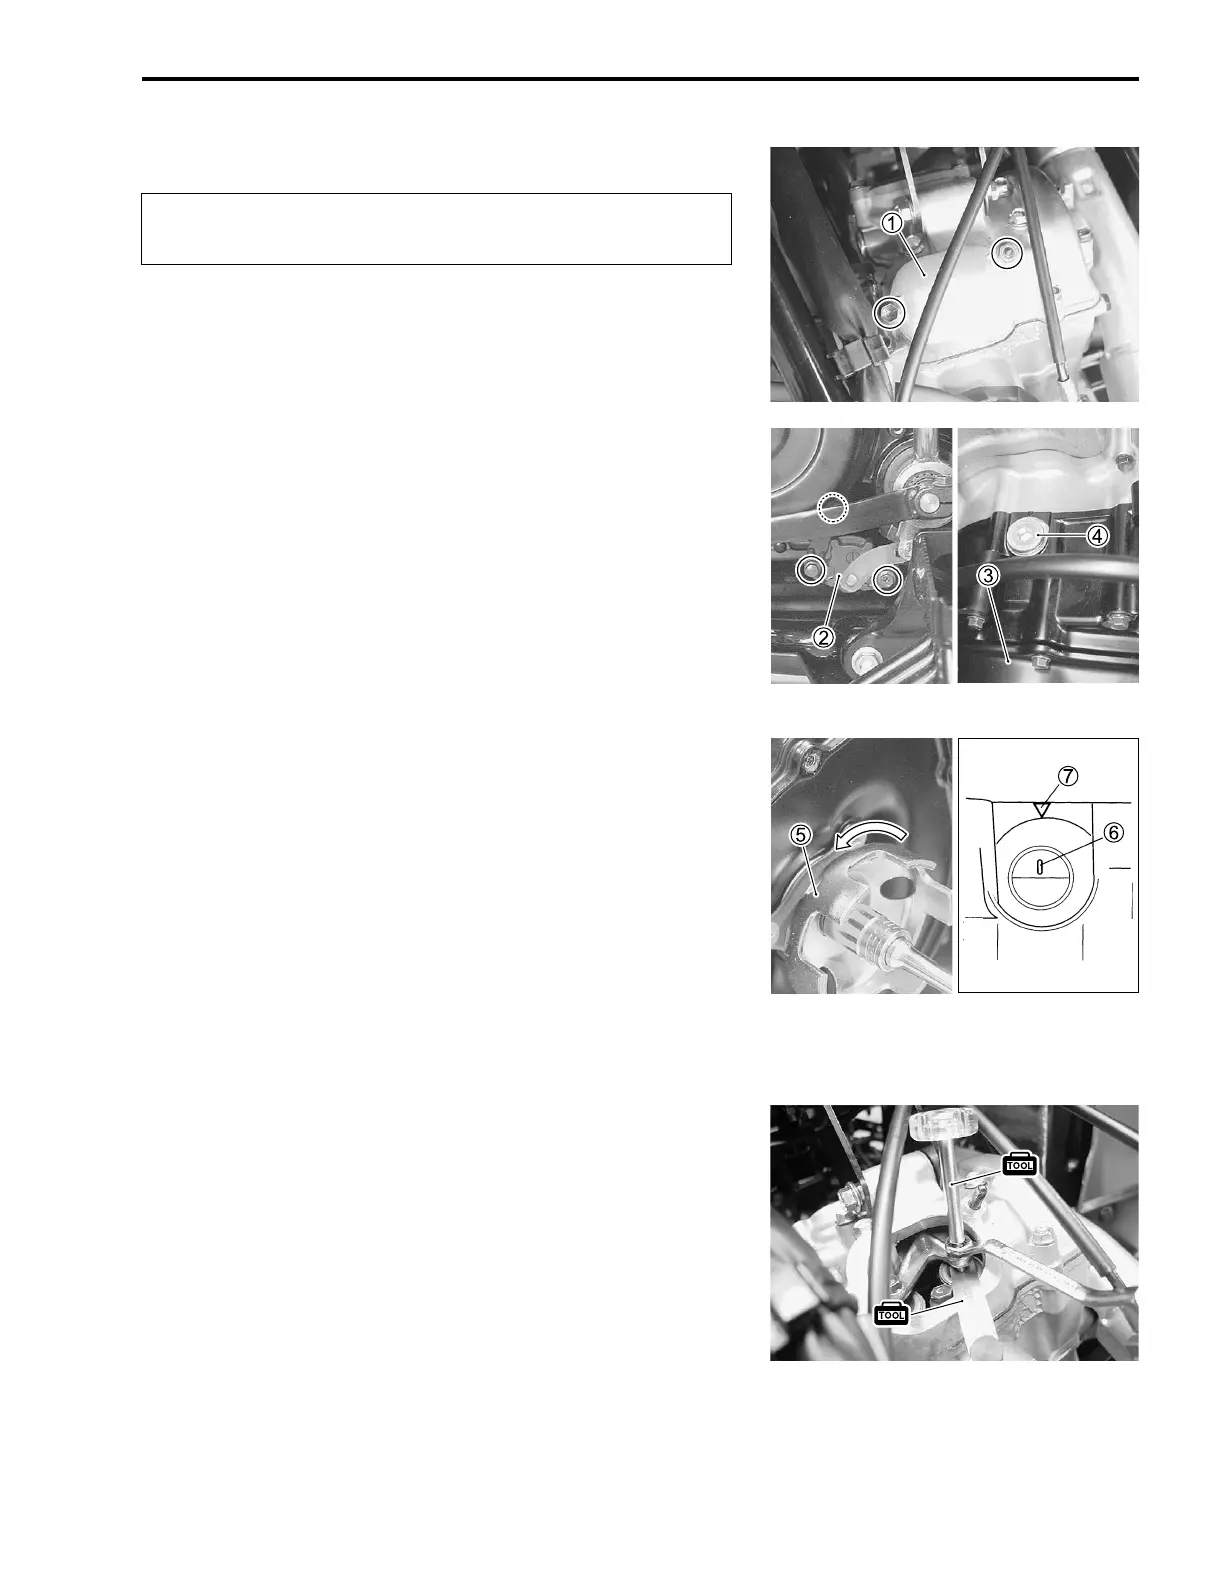
• Turn the crankshaft until the piston reaches TDC on the com-
pression stroke by turning the starter cup
5. Turn the starter
cap until the line
6 on the generator rotor is aligned with the
mark
7 on the crankcase
• The crankshaft can be turned to align the line
6 and mark
7
by slowly pulling the recoil starter lope without removing the
ricoil stater.
• Insert the thickness gauge to check the clearance between
the valve stem end and the adjusting screw on the rocker
arm.
% 09900-20803: Thickness gauge
• If the clearance is out of specification, bring it into the speci-
fied range using the special tool.
% 09917-14920: Valve adjuster driver
# Valve clearance adjuster locknut:
10 N·m (1.0 kgf-m, 7.0 lb-ft)
Inspect initially at 200 km (100 miles, 1 month) and
every 2 000 km (1 200 miles, 6 months) thereafter.

 Loading...