ChangingtheNozzleFilter
Note:Determinetheappropriatenozzleltermesh
sizethatyouneedforyourjob;refertoSelectinga
Nozzle-TipFilter(Optional)(page26).
1.Parkthemachineonalevelsurface,engagethe
parkingbrake,shutoffthesprayerpump,shut
offtheengine,andremovethekey.
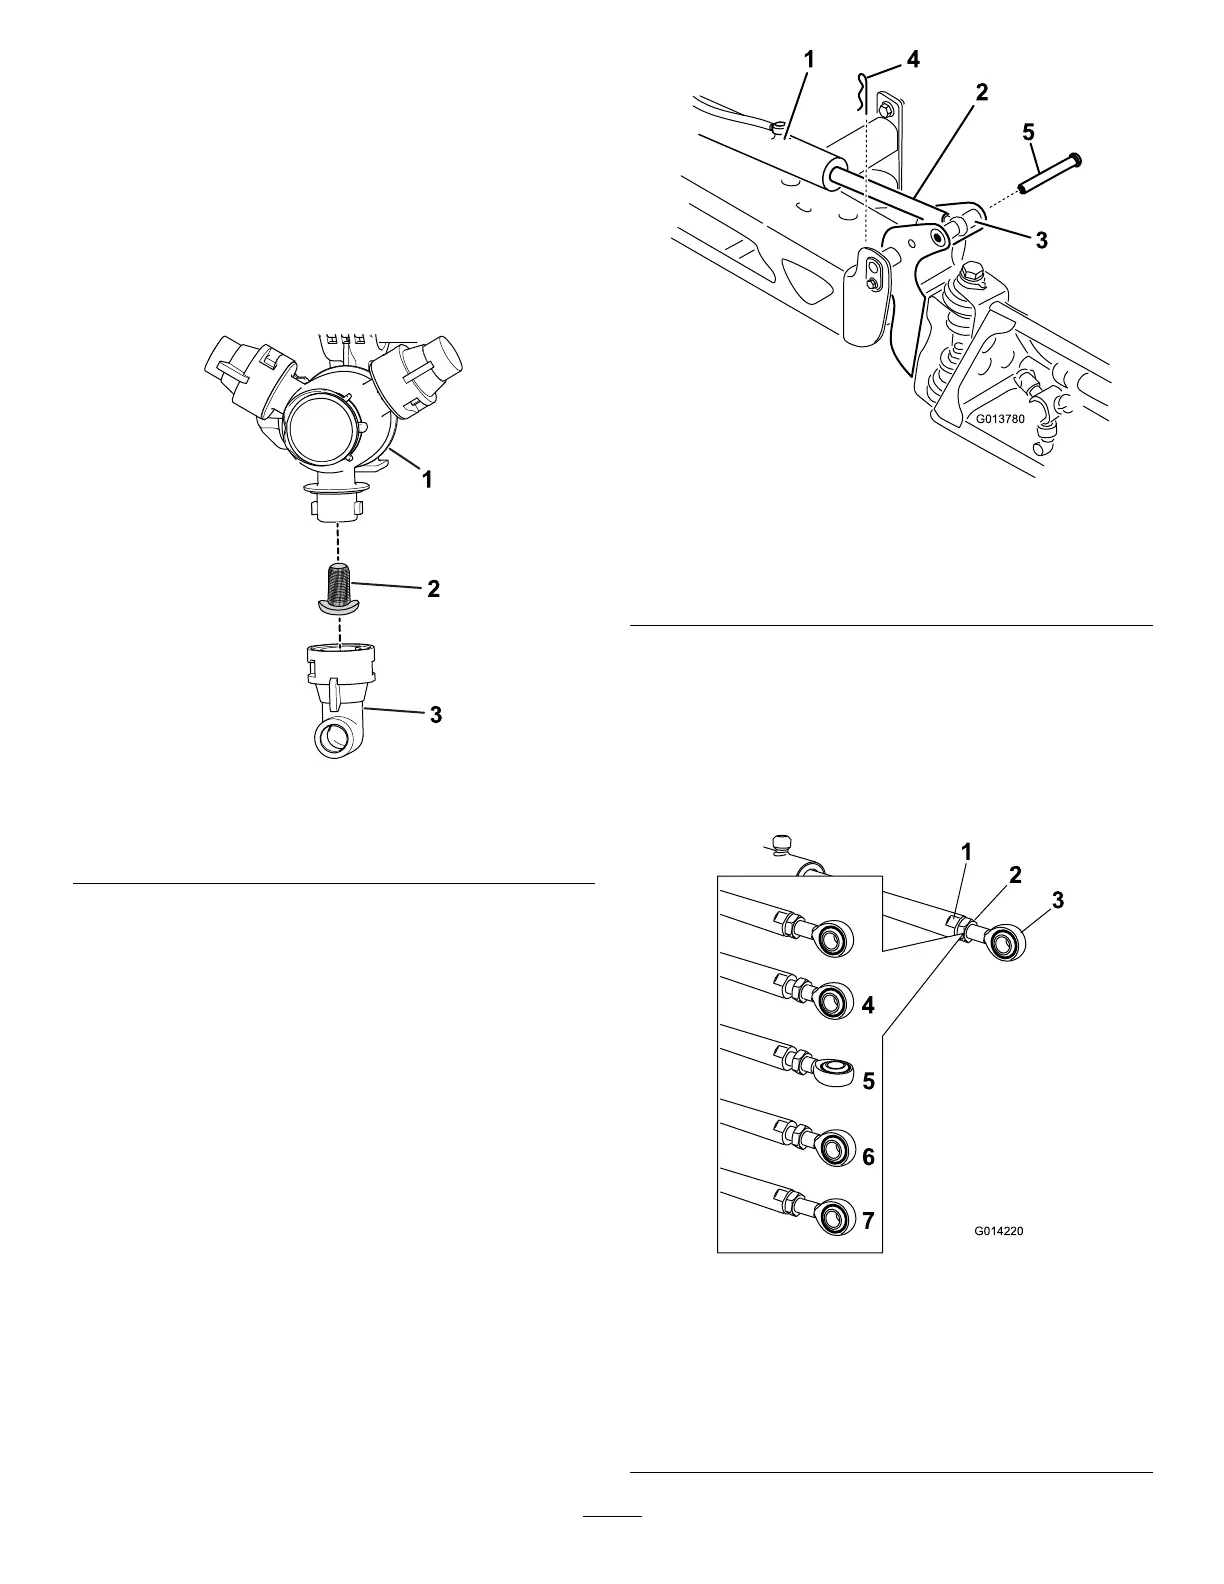
2.Removethenozzlefromthesprayturret(Figure
104).
g209504
Figure104
1.Sprayturret
3.Nozzle
2.Nozzlelter
3.Removetheoldnozzlelter(Figure104).
Note:Discardtheoldlter.
4.Installthenewnozzlelter(Figure104).
Note:Ensurethatthelterisfullyseated.
5.Installthenozzleontothesprayturret(Figure
104).
AdjustingtheBoomsto
Level
Thefollowingprocedurecanbeusedtoadjustthe
actuatorsonthecenterboomtokeeptheleftand
rightboomsatlevel.
1.Extendtheboomstothesprayposition.
2.Removethecotterpinfromthepivotpin(Figure
105).
g013780
Figure105
1.Actuator
4.Cotter
2.Actuatorrod5.Pin
3.Boom-pivotpinhousing
3.Liftupontheboomandremovethepin(Figure
105),andslowlylowertheboomtotheground.
4.Inspectthepinforanydamage,andreplaceit
ifnecessary.
5.Useawrenchontheatsidesoftheactuator
rodtoimmobilizeit,thenloosenthejamnutto
allowtheeyeletrodtobeadjusted(Figure106).
g014220
Figure106
1.Flatontheactuatorrod5.Eyeletadjusted
2.Jamnut
6.Eyeletpositionfor
assembly
3.Eyelet7.Jamnuttightenedtolock
newposition
4.Jamnutloosened
76
 Loading...