e-STUDIO162/162D/151/151D DISASSEMBLY AND ASSEMBLY 8 - 4
2) Set the charger cleaner to the transfer unit, and move it recipro-
cally a few times in the direction of the arrow shown in the figure
below.
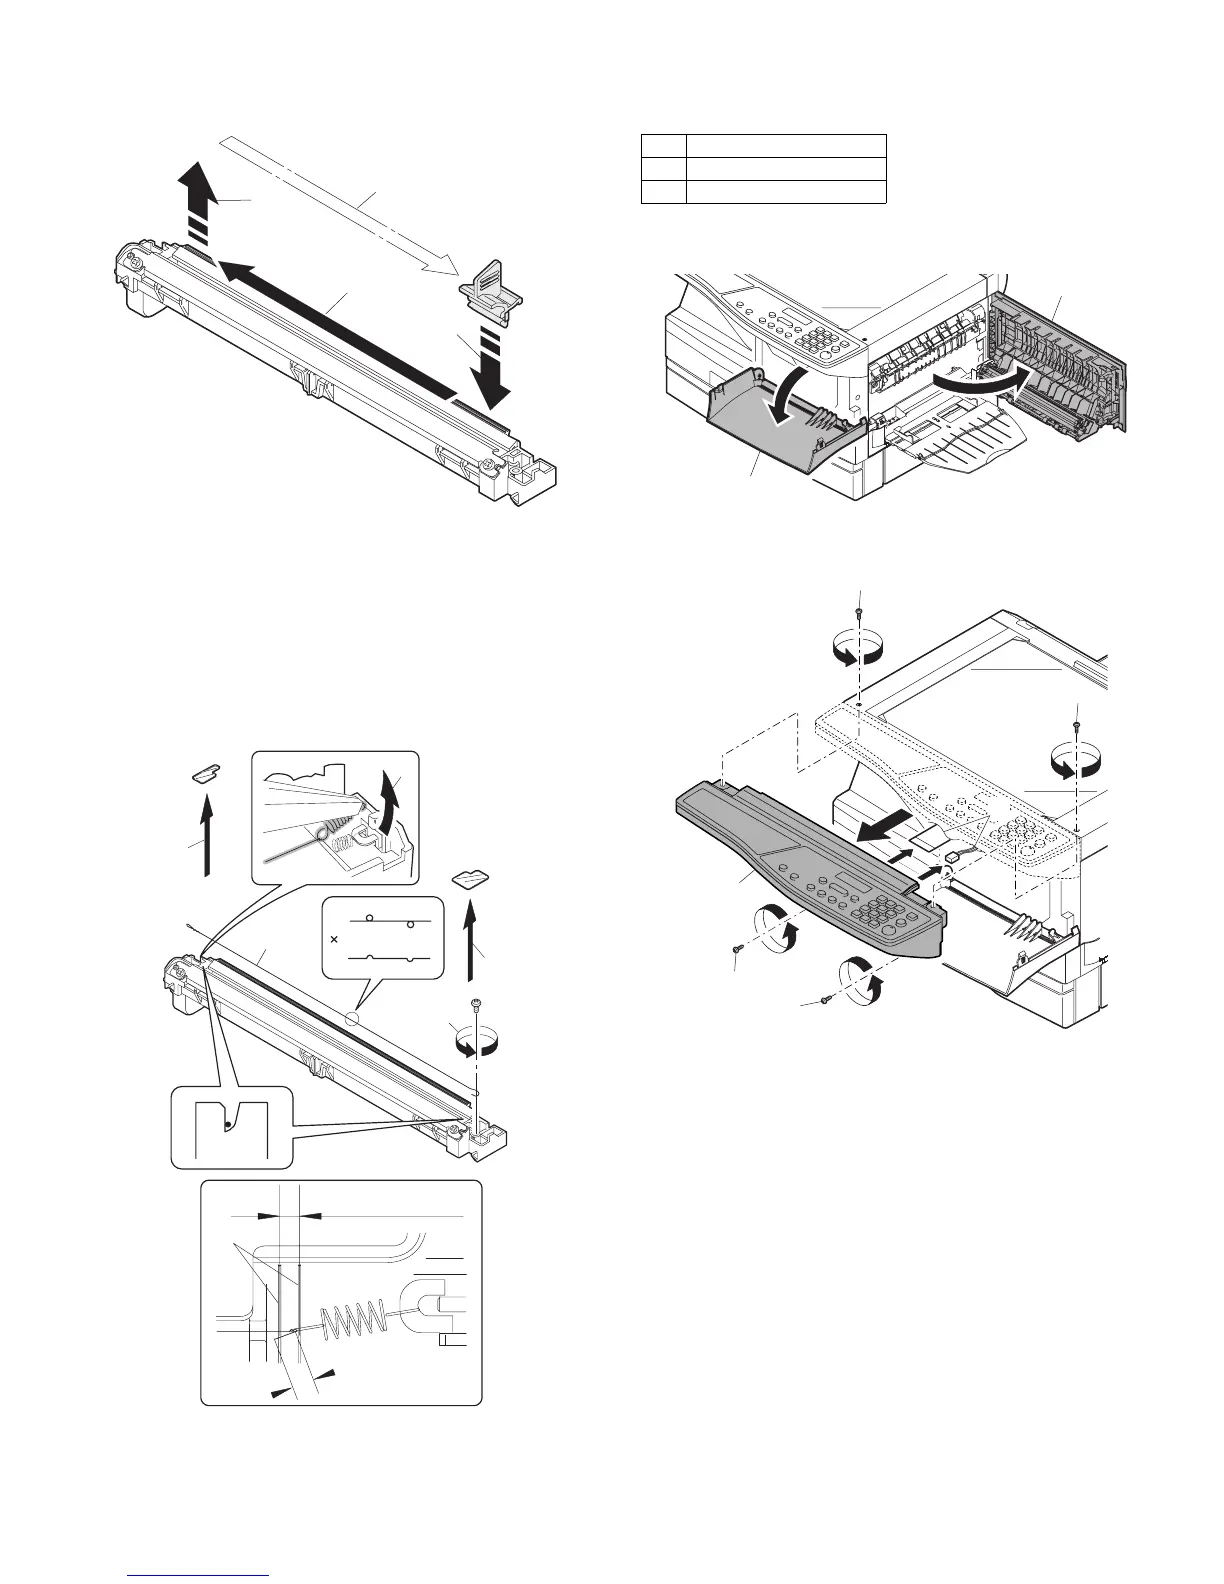
F. Charger wire replacement
1) Remove the TC cover and remove the screw.
2) Remove the spring and remove the charger wire.
3) Install a new charger wire by reversing the procedures (1) and (2).
At that time, be careful of the following items.
• The rest of the charger wire must be within 1.5mm. Refer to Fig.1
• The spring hook section (charger wire winding section) must be in
the range of the projection section.
• Be careful not to twist the charger wire.
2. Operation panel section
A. List
B. Disassembly procedure
1) Open the side door, and Open the front cover.
2) Remove the screws (4 pcs.), the harness, and the operation panel
unit.
1)
2)
3)
4)
1mm
1.5mm
Fig.1
1)
1)
2)
3)
Charger wire
Protrusion
No. Part name Ref.
1 Operation panel unit
2 Operation PWB
1)
2)
1)
1)
1)
1)
2)
3)
e-STUDIO162_151.book 4 ページ 2004年12月2日 木曜日 午後9時37分
 Loading...