e-STUDIO162/162D/151/151D DISASSEMBLY AND ASSEMBLY 8 - 16
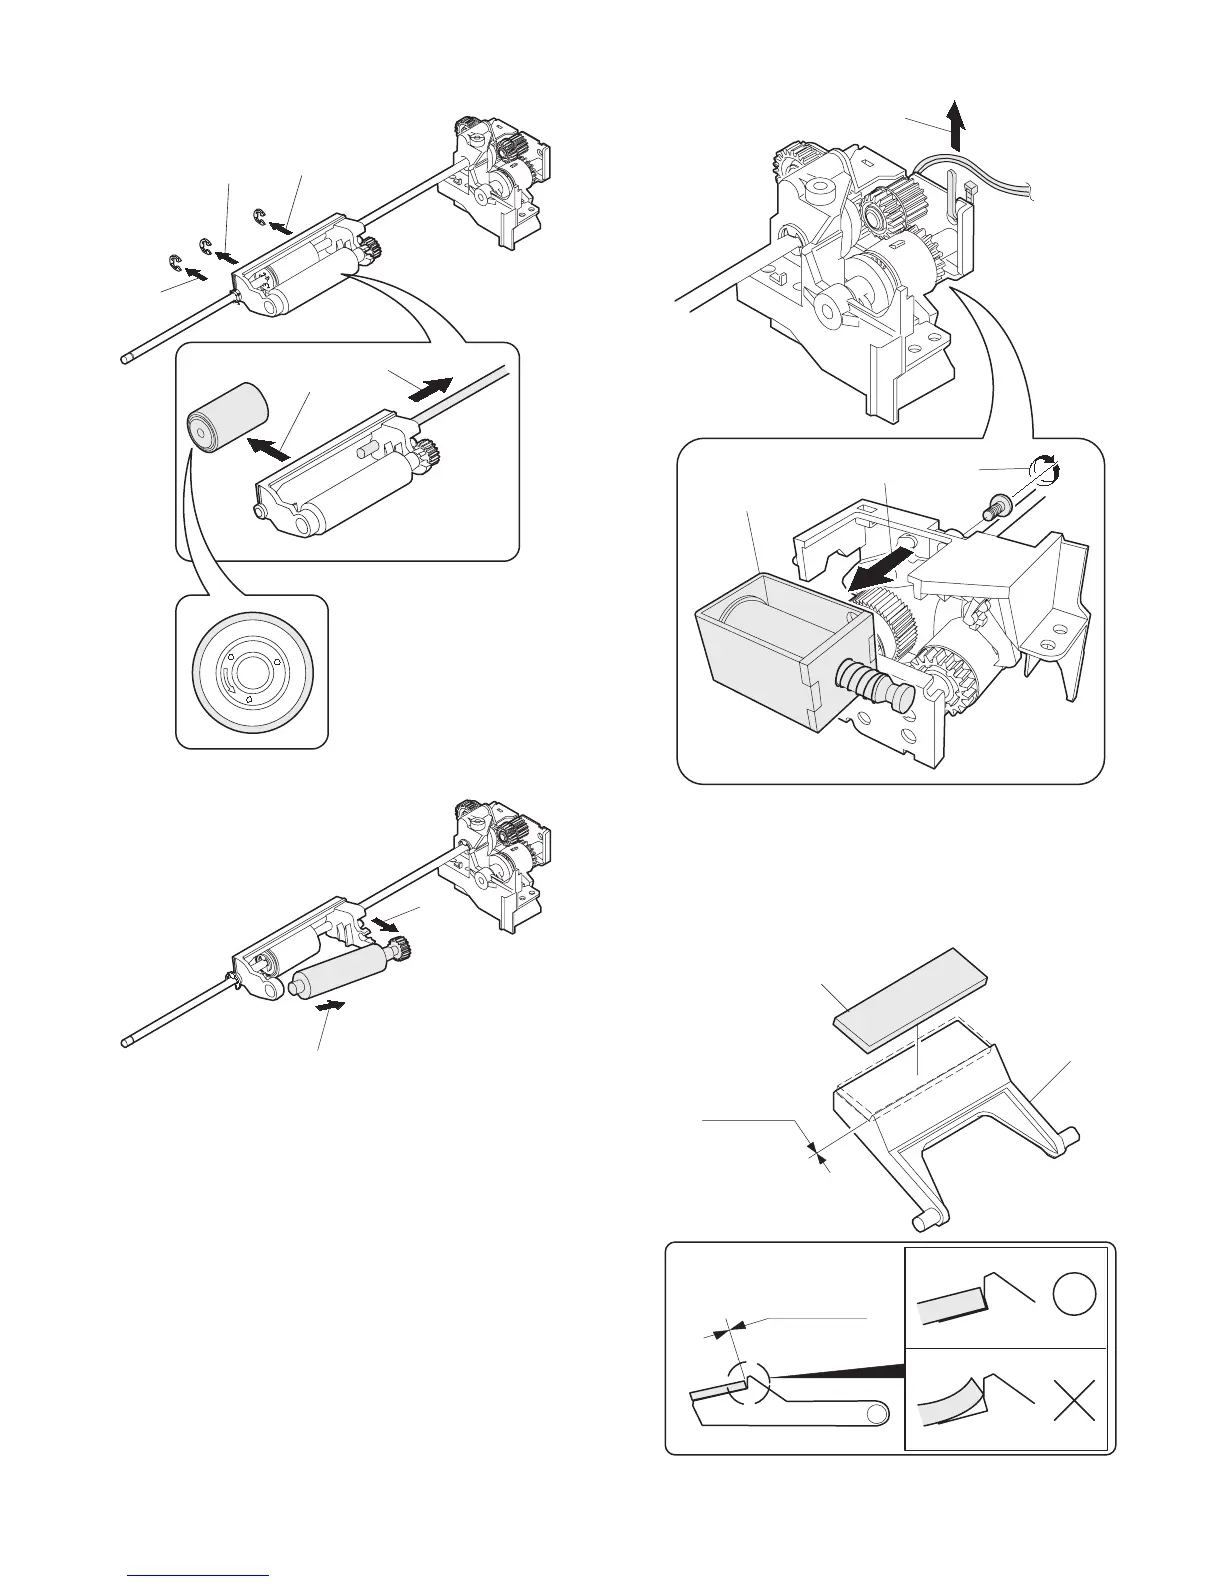
5) Remove three E-rings and remove the manual paper feed roller
B9.
6) Remove the pick-up roller.
7) Cut the binding band and remove the multi paper feed solenoid.
C. Assembly procedure
For assembly, reverse the disassembly procedure.
D. Pressure plate holder attachment
1) Attach the pressure plate holder so that the resin section is not
covered with the seal M1-N.
2)
1)
1)
1)
3)
L
O
C
K
T
O
K
2)
1)
1)
2)
3)
Multi paper feed
solenoid
Pressure plate
holder
Seal M1-N
Attachment
reference
Attachment
reference
e-STUDIO162_151.book 16 ページ 2004年12月2日 木曜日 午後9時37分
 Loading...