e-STUDIO162/162D/151/151D DISASSEMBLY AND ASSEMBLY 8 - 14
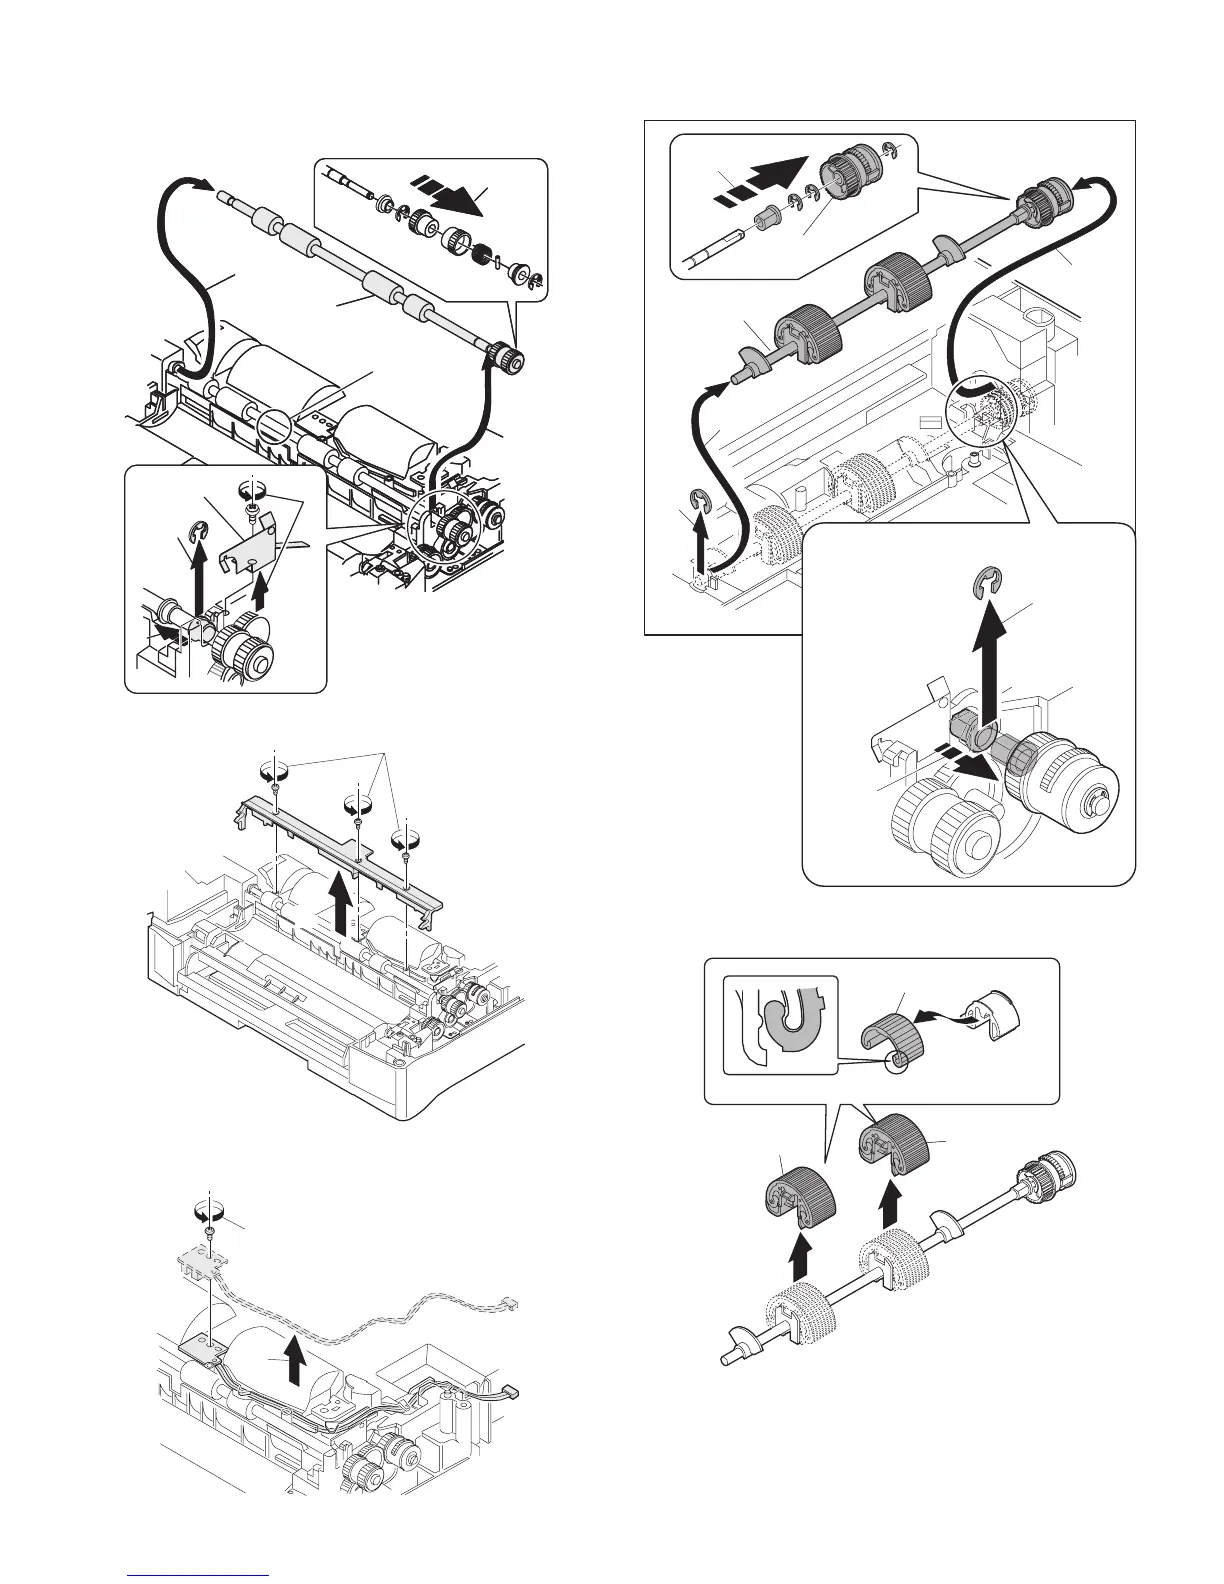
32) Remove the screw and the E-ring, and remove the PS semi-circu-
lar earth plate and the PS roller unit.
33) Remove the E-ring and remove the spring clutch from the PS roller
unit.
34) Remove three screws and remove the TC front paper guide.
35) Remove the screw and the connector, and remove the PPD1 sen-
sor PWB.
36) Remove two E-rings and remove the paper feed roller.
37) Remove three E-rings and remove the clutch unit.
38) Remove the semi-circular roller unit.
39) Remove the semi-circular rubber.
C. Assembly procedure
For assembly, reverse the disassembly procedure.
5)
4)
4)
1)
2)
3)
PS roller unit
PS semi-circuler
earth plate
5)
4)
4)
1)
2)
3)
PS semi-circular
earth plate
Use grease of
Floil FG40H
only to apply to
this section.
1)
2)
1)
2)
4)
5)
1)
2)
3)
4)
Back
Front
Clutch unit
Paper feed
roller
2)
1)
1)
e-STUDIO162_151.book 14 ページ 2004年12月2日 木曜日 午後9時37分
 Loading...