e-STUDIO162/162D/151/151D DISASSEMBLY AND ASSEMBLY 8 - 6
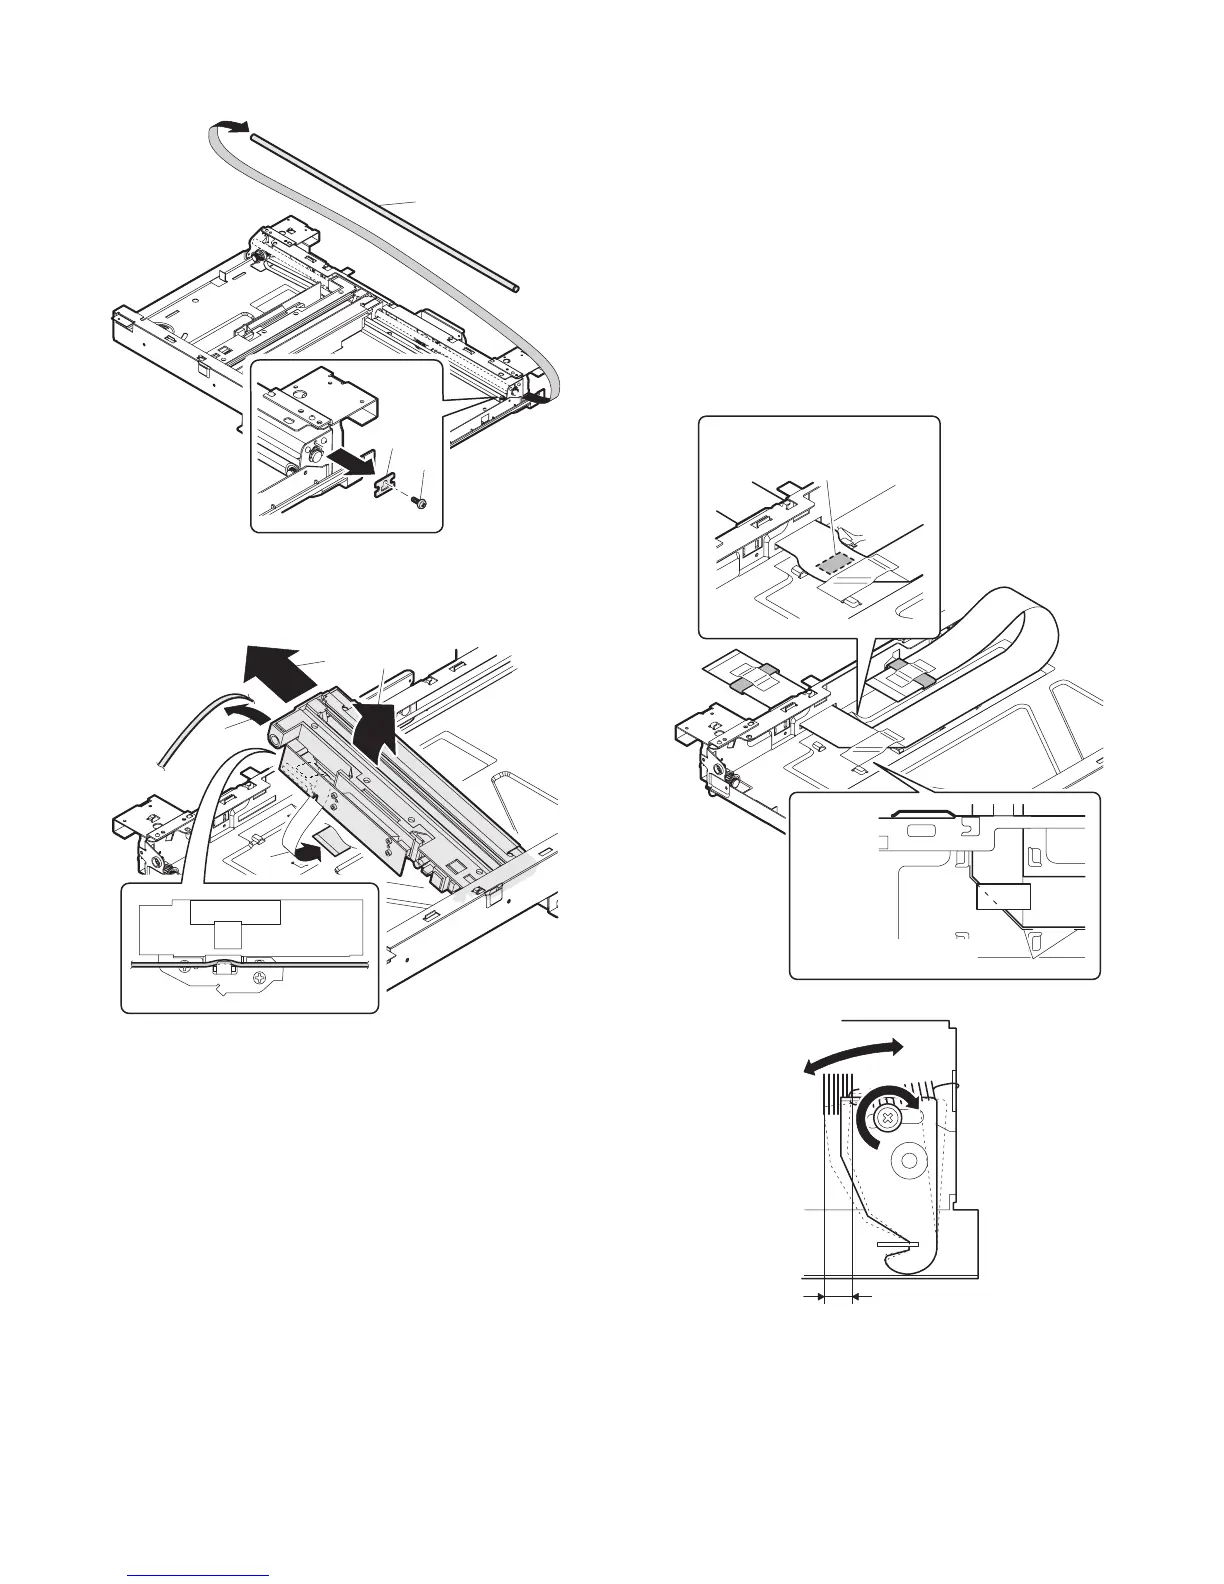
10) Remove the screw, and remove the rod stopper.
11) Remove the rod.
Caution: Be careful not to touch the sharp edge on the circumference
of the metal frame.
12) Lift the rear side of the carriage, remove the belt and the connec-
tor, and remove the carriage.
C. Assembly procedure
CCD core
1) Pass the core through the CCD-MCU harness.
2) Insert the CCD-MCU harness into the CCD PWB connector of the
carriage unit.
3) Move the core which was passed through the CCD-MCU harness
near the CCD PWB connector as shown in the figure below, and fix
it with a filament tape (19mm wide, 40mm long). For the attach-
ment reference, refer to the figure below. Clean and remove oil
from the attachment section.
4) Attach the CCD-MCU harness to the duplex tape on the back of
the carriage unit.
5) Attach the PWB holder to the position specified in the figure below.
6) Pass the core through the FFC and the PWB holder, and fix the
core.
1)
2)
3)
1)
2)
4)
3)
Note: Attach the FCC to the base
plate securely with duplex tape to
prevent against coming loose.
Note: Attach the FCC to
fit with the marking line.
Marking line.
08_DISSASEMBLY.fm 6 ページ 2004年12月23日 木曜日 午後1時8分
 Loading...