e-STUDIO162/162D/151/151D DISASSEMBLY AND ASSEMBLY 8 - 5
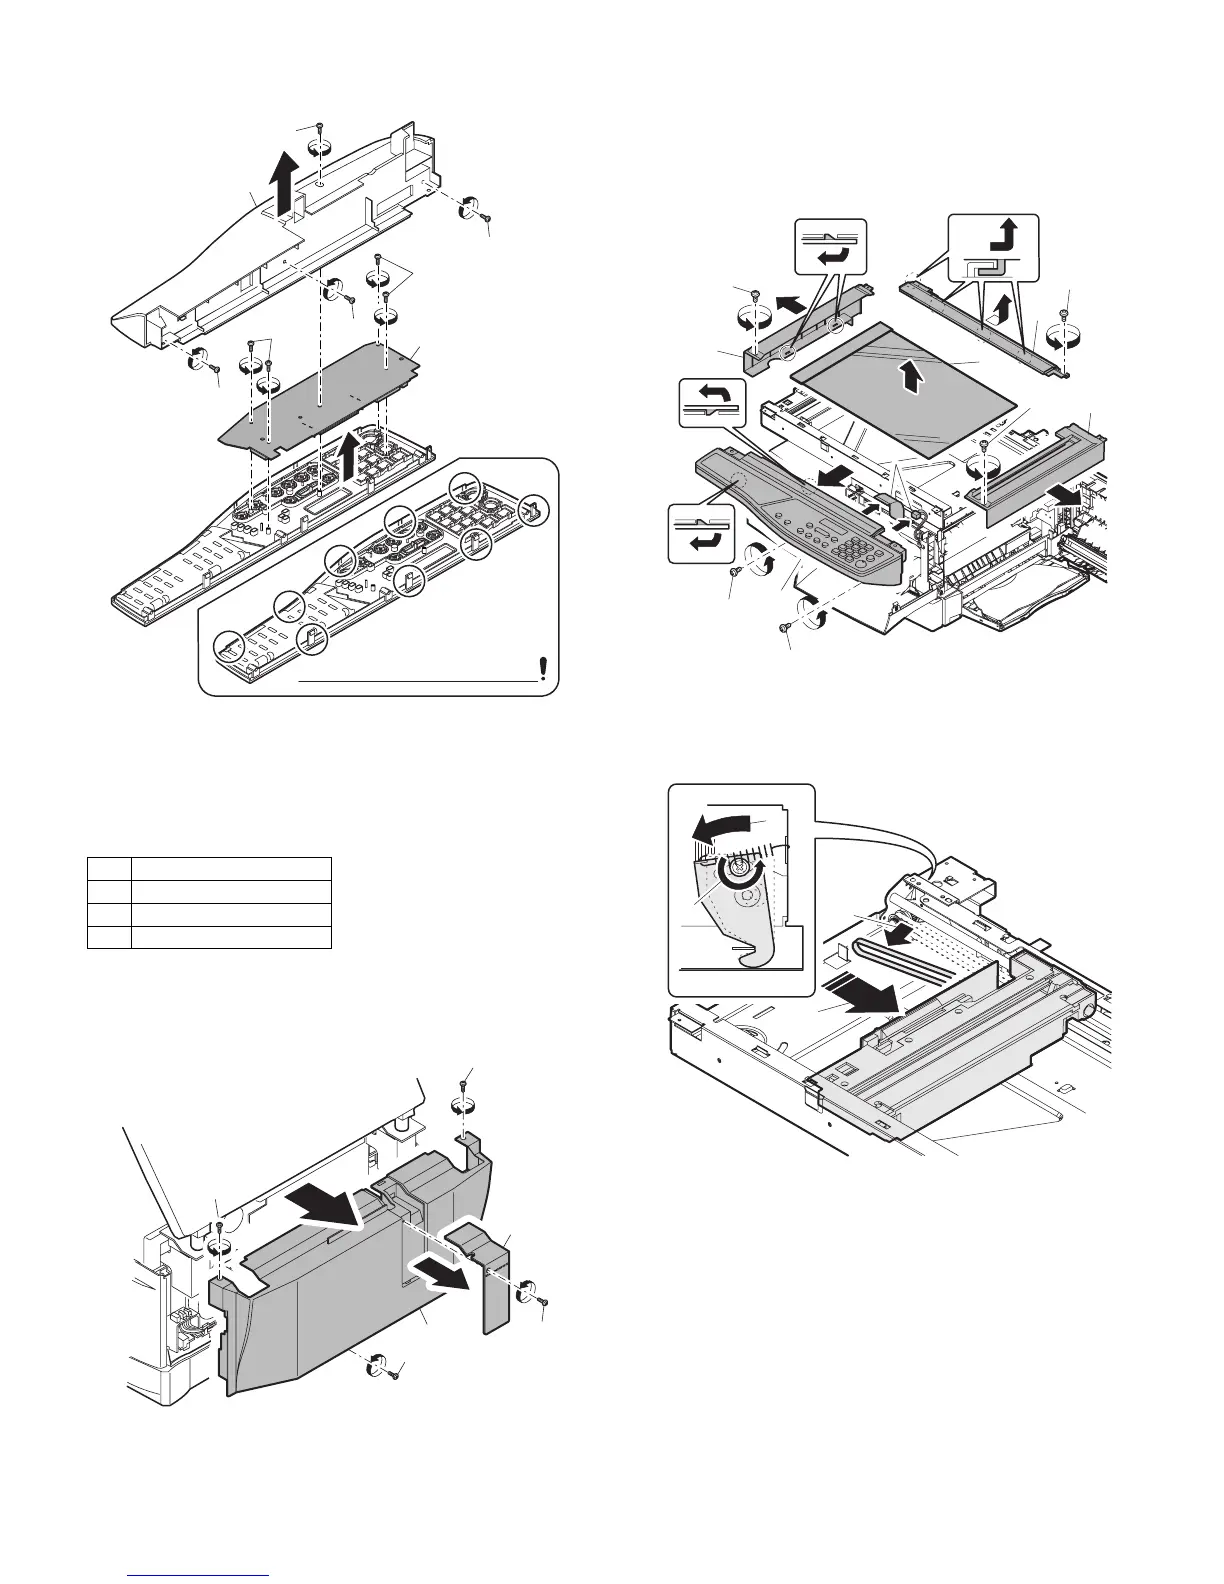
3) Remove four screws, and remove the operation cabinet.
4) Remove four screws, and remove the operation PWB.
C. Assembly procedure
For assembly, reverse the disassembly procedure
3. Optical section
A. List
B. Disassembly procedure
1) Remove four screws, and remove the rear cabinet and the rear
cabinet cover.
2) Remove the four screws, remove the operation unit, and discon-
nect the connector.
3) Remove the right cabinet.
4) Remove the left cabinet.
5) Remove the screw, and remove the rear cover.
6) Remove the table glass.
7) Move the carriage to the position indicated on the figure.
8) Loosen the screw which is fixing the tension plate.
9) Move the tension plate in the arrow direction to release the ten-
sion, and remove the belt.
NO. Part name Ref.
1 Copy lamp unit
2 Copy lamp
3 Lens unit
1)
1)
1)
4)
1)
3)
3)
2)
Note that there are 9 pawls
1)
1)
1)
1)
2)
2)
1)
1)
2)
4)
5)
6)
7)
8)
1)
1)
3)
1)
2)
4)
3)
e-STUDIO162_151.book 5 ページ 2004年12月2日 木曜日 午後9時37分
 Loading...