116
4.SETTING ITEMS (ADMIN)
3.SETTING NETWORK FUNCTIONS (Cont.)
4
Setting the IPX/SPX Protocol
You can set the IPX/SPX protocol on this equipment. The IPX/SPX protocol is usually used to communi-
cate with the NetWare file server through the network.
1
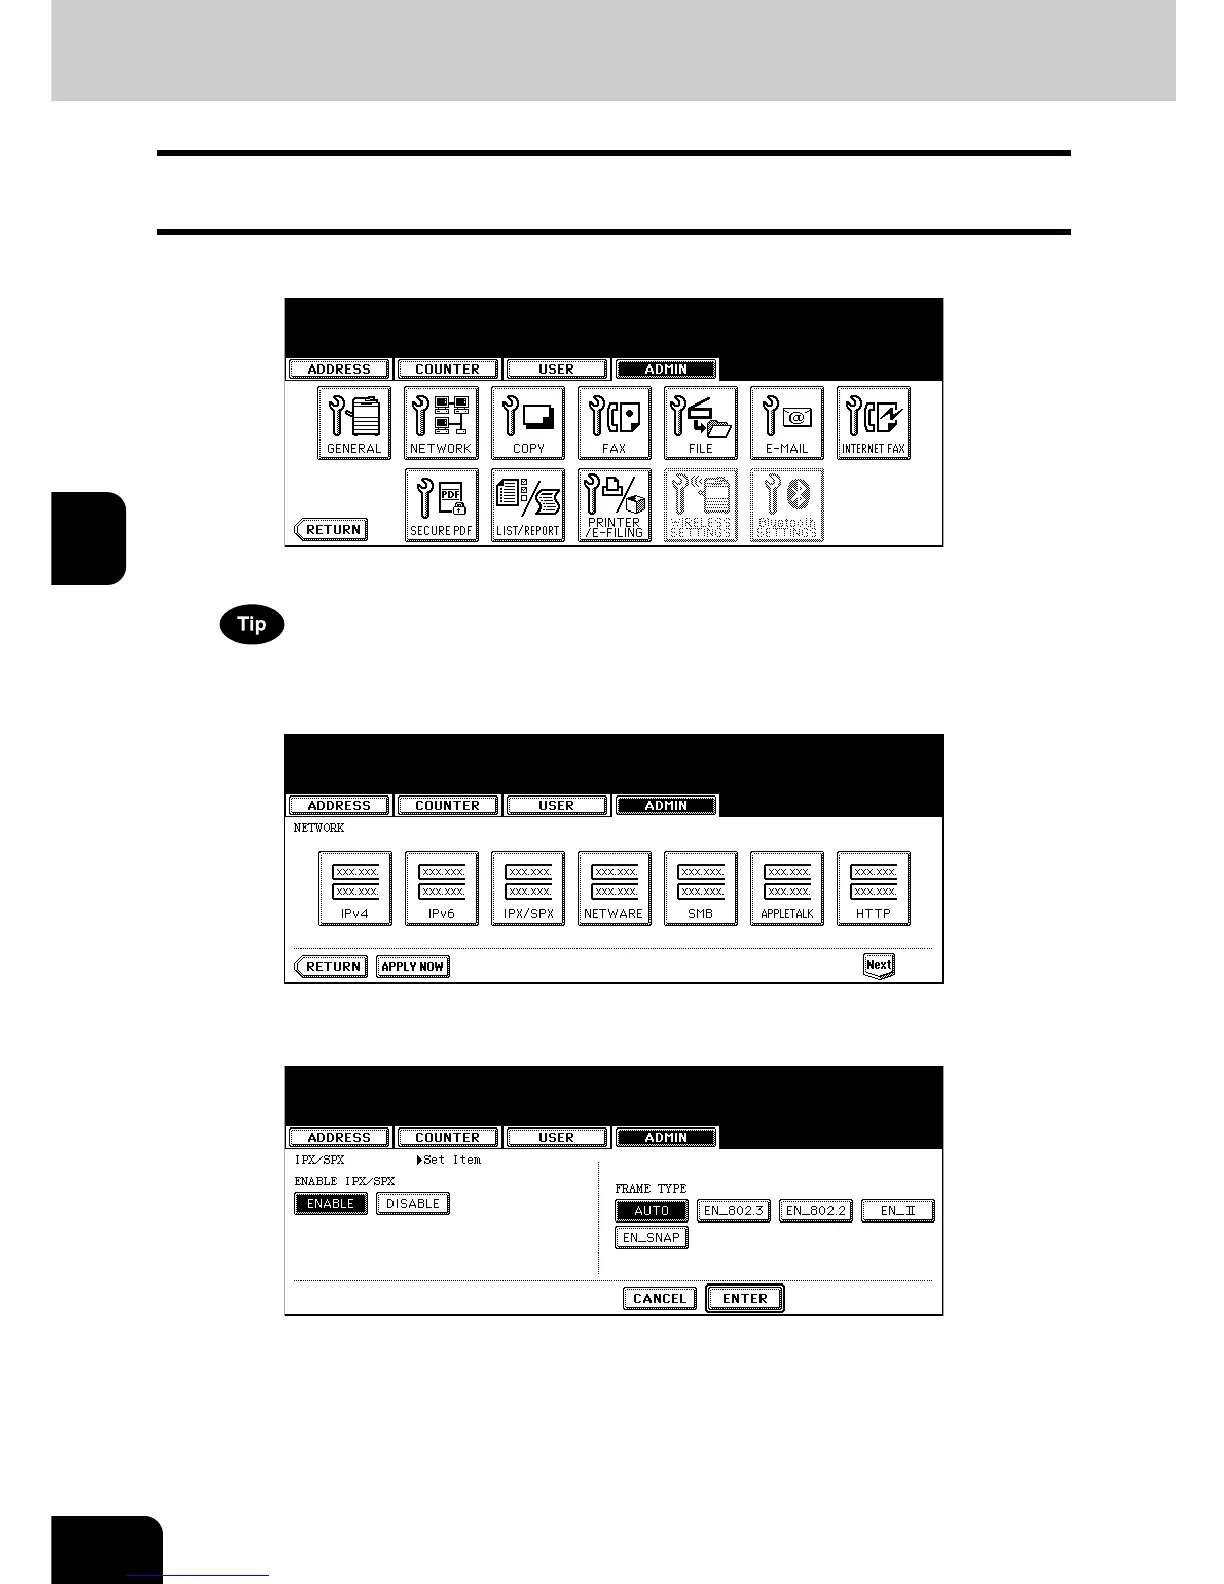
Press the [NETWORK] button in the ADMIN menu.
• The NETWORK menu is displayed.
To display the ADMIN menu, see “1.ENTERING TO ADMIN MENU”. P. 8 7
2
Press the [IPX/SPX] button.
• The IPX/SPX screen is displayed.
3
Specify the following items as required.
• ENABLE IPX/SPX — Press the [ENABLE] button to enable the IPX/SPX protocol, or [DISABLE] button to dis-
able the IPX/SPX protocol.
• FRAME TYPE — Press the [AUTO] button to automatically detect the appropriate frame type, or press other
specific frame type button. If you do not know the frame type that must be used, select the [AUTO] button.
4
Press the [ENTER] button.
• Returns you to the NETWORK menu.

 Loading...


