123
4
Setting the AppleTalk Protocol
The AppleTalk protocol must be enabled and properly configured to enable AppleTalk printing with the
Macintosh computer.
1
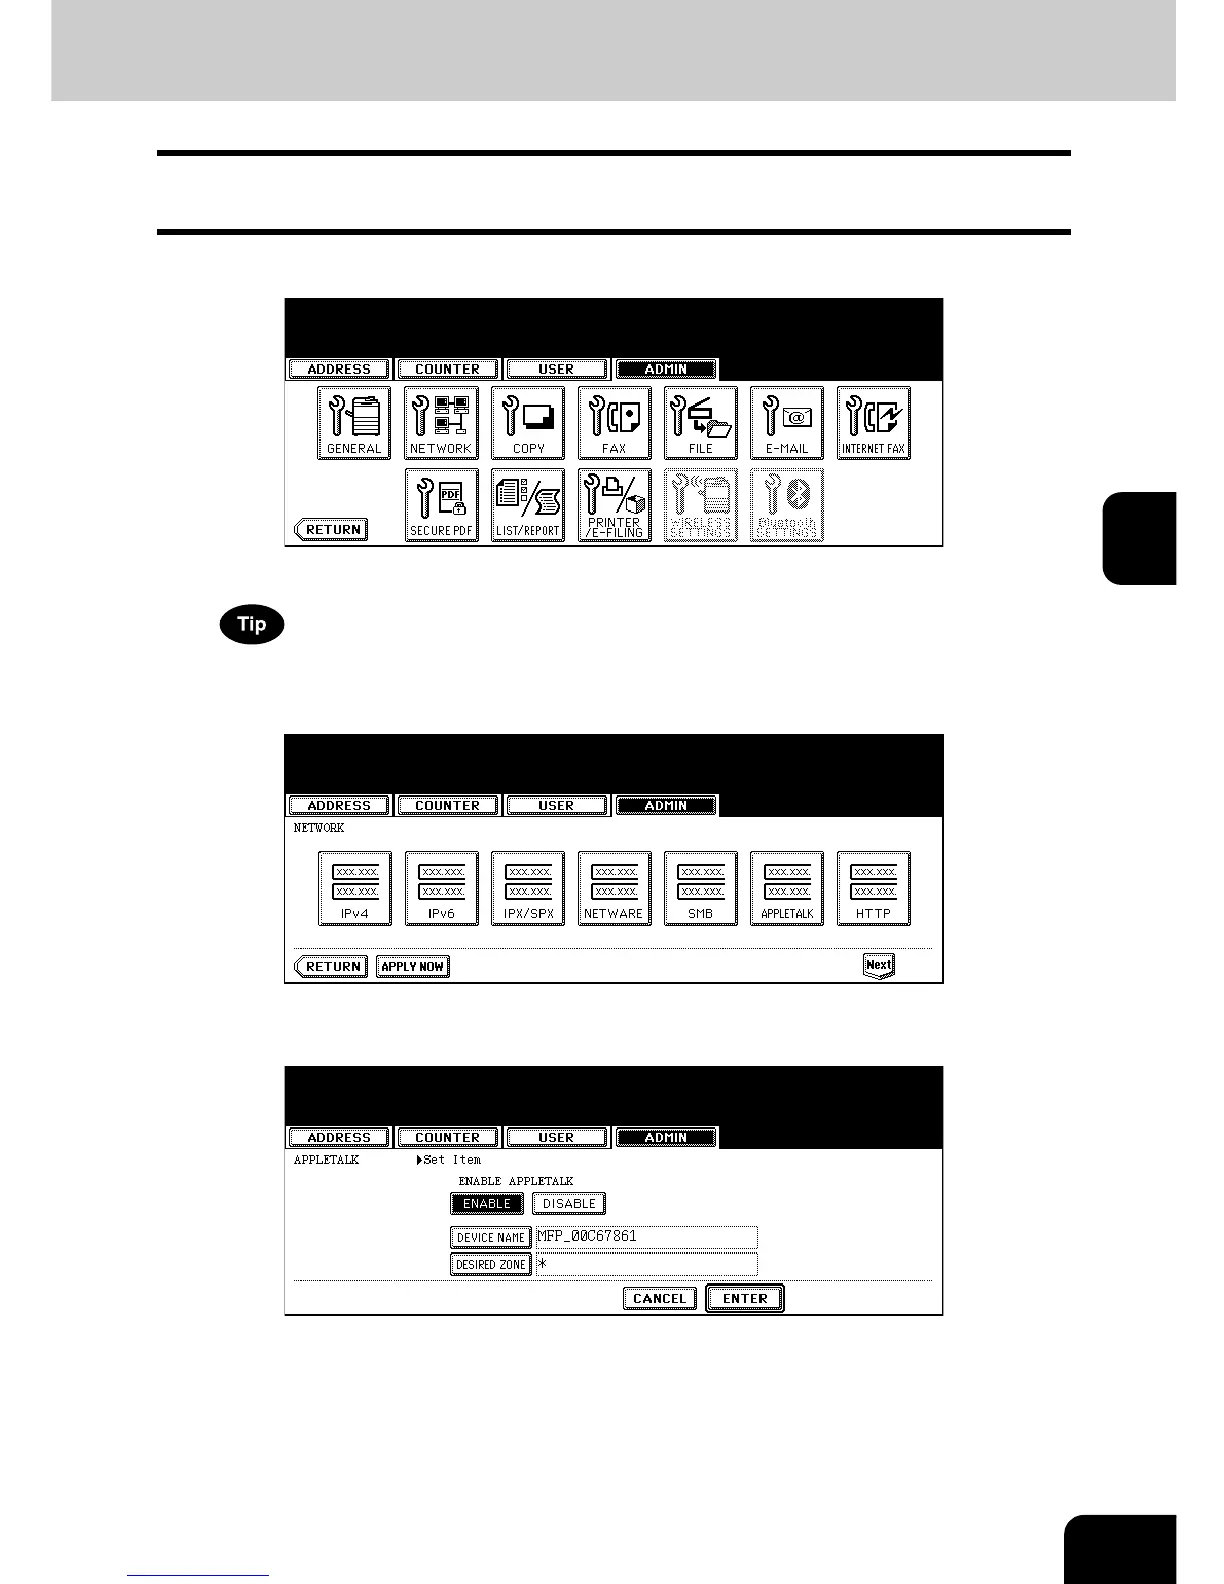
Press the [NETWORK] button in the ADMIN menu.
• The NETWORK menu is displayed.
To display the ADMIN menu, see “1.ENTERING TO ADMIN MENU”. P. 8 7
2
Press the [APPLETALK] button.
• The APPLETALK screen is displayed.
3
Specify following items as required.
• ENABLE APPLETALK — Press the [ENABLE] button to enable the AppleTalk, or [DISABLE] button to disable
the AppleTalk.
• [DEVICE NAME] — Press this to enter the AppleTalk name of this equipment.
• [DESIRED ZONE] — Press this to enter the AppleTalk zone name this equipment joins. If your AppleTalk net-
work has not been configured with a zone, you do not have to enter the zone name.

 Loading...


