1.4. Mounting Instructions
1.4.4 Mounting the Controller Box
The controller box can be hung on a wall, or it can be placed on the ground. A
clearance of 50mm on each side allows for sufficient airflow.
1.4.5 Mounting the Teach Pendant
The teach pendant can be hung on a wall or on the controller box. Extra fittings
can be bought.
1.4.6 Connecting the Robot Cable
The cable from the robot must be plugged in to the connector at the button
of the controller box. Ensure that the connector is properly locked. Connecting
and disconnecting the robot cable may only be done when the robot power is
turned off.
1.4.7 Connecting the Mains Cable
The mains cable from the controller box has a standard IEC plug in the end.
Connect a country specific mains plug or cable to the IEC plug.
If the current rating of the specific plug is insufficient or if a more permanent
solution is prefered then wire the controller box directly. The mains supply shall
be equiped with the following as a minimum:
1. Main fuse.
2. Residual current device.
3. Connection to earth.
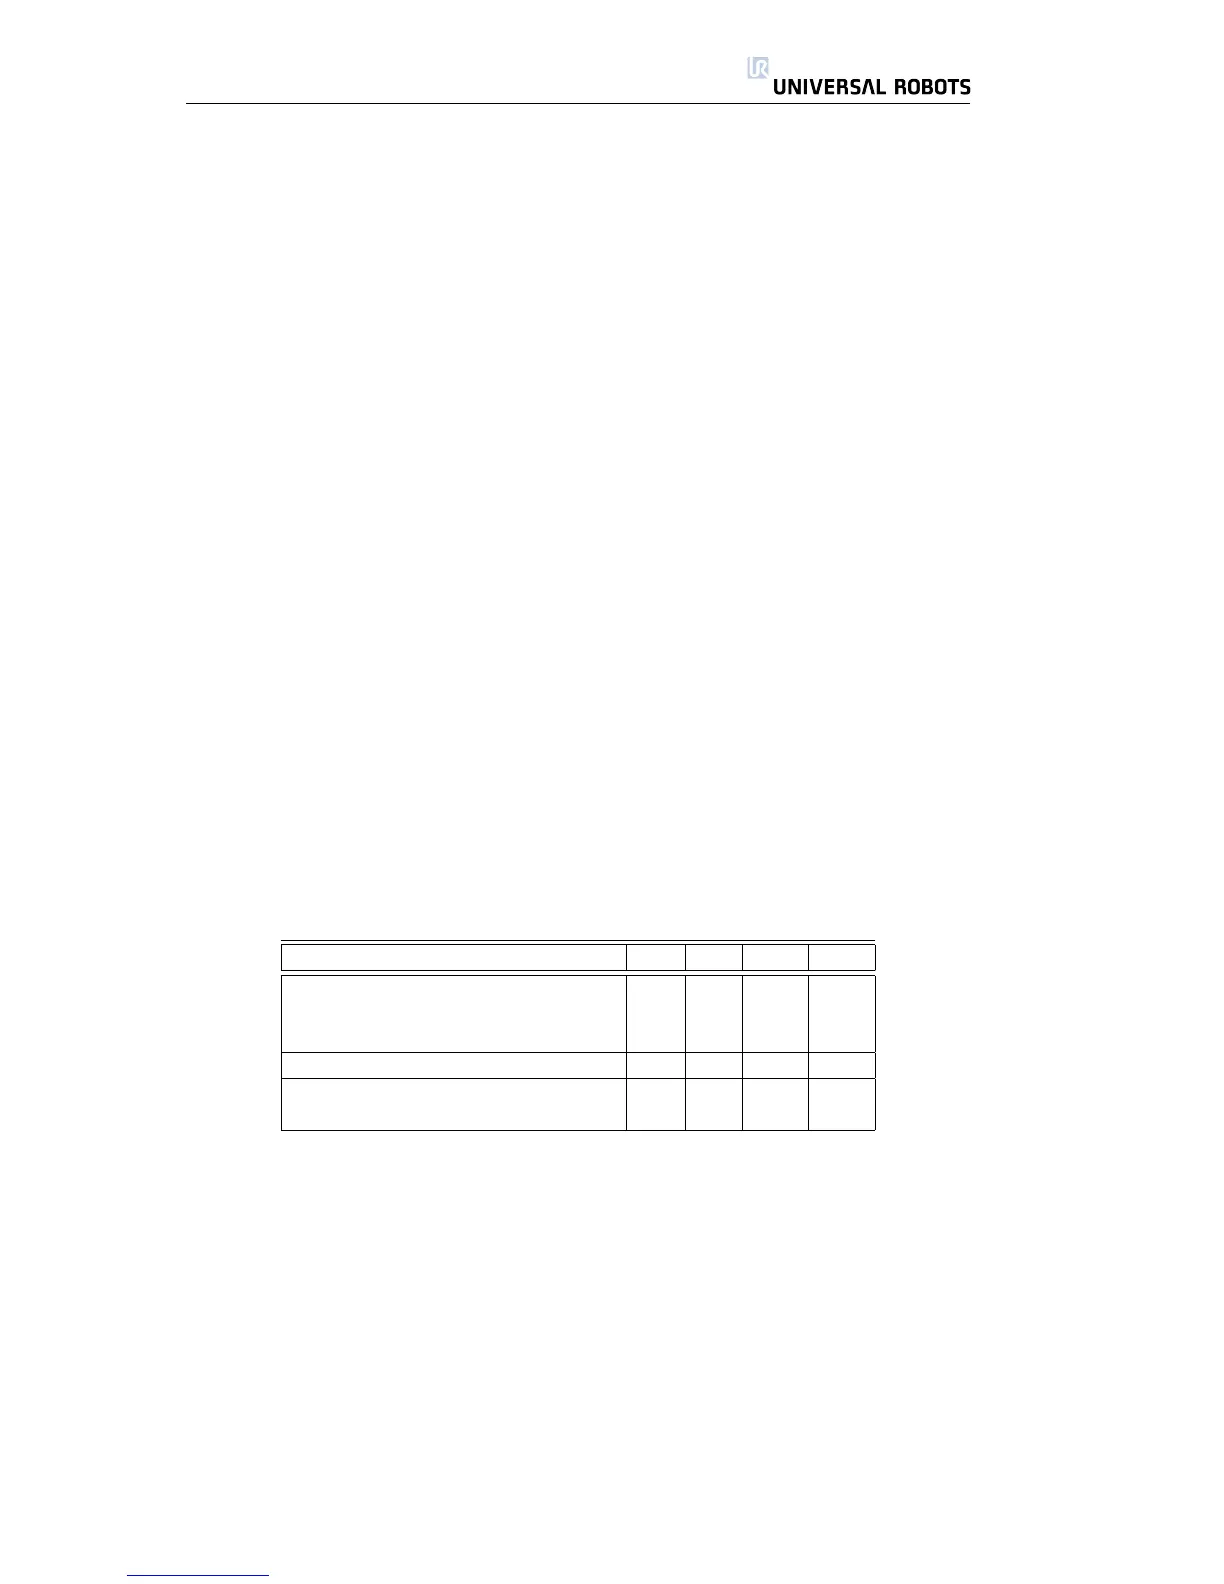
Mains input specification is shown below.
Parameter Min Typ Max Unit
Input voltage 100 - 240 VAC
External mains fuse (@ 100-200V) 15 - 16 A
External mains fuse (@ 200-240V) 8 - 16 A
Input frequency 47 - 63 Hz
Stand-by power - - 0.5 W
Nominal operating power 90 250 500 W
Use the screw connection marked with earth symbol inside the controller box
when potential equalization with other machinery is required.
All Rights Reserved
13 UR10

 Loading...


