1.2. Turning On and Off
Features
Besides moving through waypoints, the program can send I/O signals to other
machines at certain points in the robot’s path, and perform commands like
if..then and loop, based on variables and I/O signals.
1.1.3 Safety Evaluation
The robot is a machine and as such a safety evaluation is required for each
installation of the robot. Chapter 3.1 describes how to perform a safety evalua-
tion.
1.2 Turning On and Off
How to turn the different parts of the robot system on and off is described in the
following subsections.
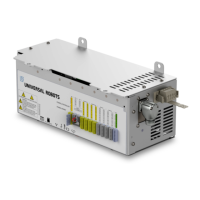
1.2.1 Turning on the Controller Box
The controller box is turned on by pressing the power button, at the front side
of the teach pendant. When the controller box is turned on, a lot of text will
appear on the screen. After about 20 seconds, the Universal Robot’s Logo will
appear, with the text ’Loading’. After around 40 seconds, a few buttons appear
on the screen and a popup will force the user to go to the initialization screen.
1.2.2 Turning on the Robot
The robot can be turned on if the controller box is turned on, and if all emer-
gency stop buttons are not activated. Turning the robot on is done at the ini-
tialization screen, by touching the ’ON’ button at the screen, and then pressing
’Start’. When a robot is started, a noise can be heard as the brakes unlock.
After the robot has powereded up, it needs to be initialized before it can begin
to perform work.
1.2.3 Initializing the Robot
After the robot is powered up, each of the robot’s joints needs to find its ex-
act position, in order to do so the joints need to move. The amount of motion
needed depends on the joint position and type. Small joints need to move be-
tween 22.5
◦
and 45
◦
, large joints need to move half as much, the direction of
rotation is unimportant. The Initialization screen, shown in figure 1.1, gives ac-
cess to manual and semi-automatic driving of the robot’s joints. The robot can-
not automatically avoid collision with itself or the surrounds during this process.
Therefore, caution should be exercised.
The Auto button near the top of the screen drives all joints until they are
ready. When released and pressed again, all joints change drive direction. The
Manual buttons permit manual driving of each joint.
A more detailed description of the initialization screen is found in the PolyScope
manual.
All Rights Reserved
7 UR10

 Loading...


