8-S11
L3130 · L3430 · L3830 · L4630 · L5030, WSM
HYDRAULIC SYSTEM
[2] RELIEF VALVE
(1) Checking and Adjusting
Relief Valve Setting Pressure Test
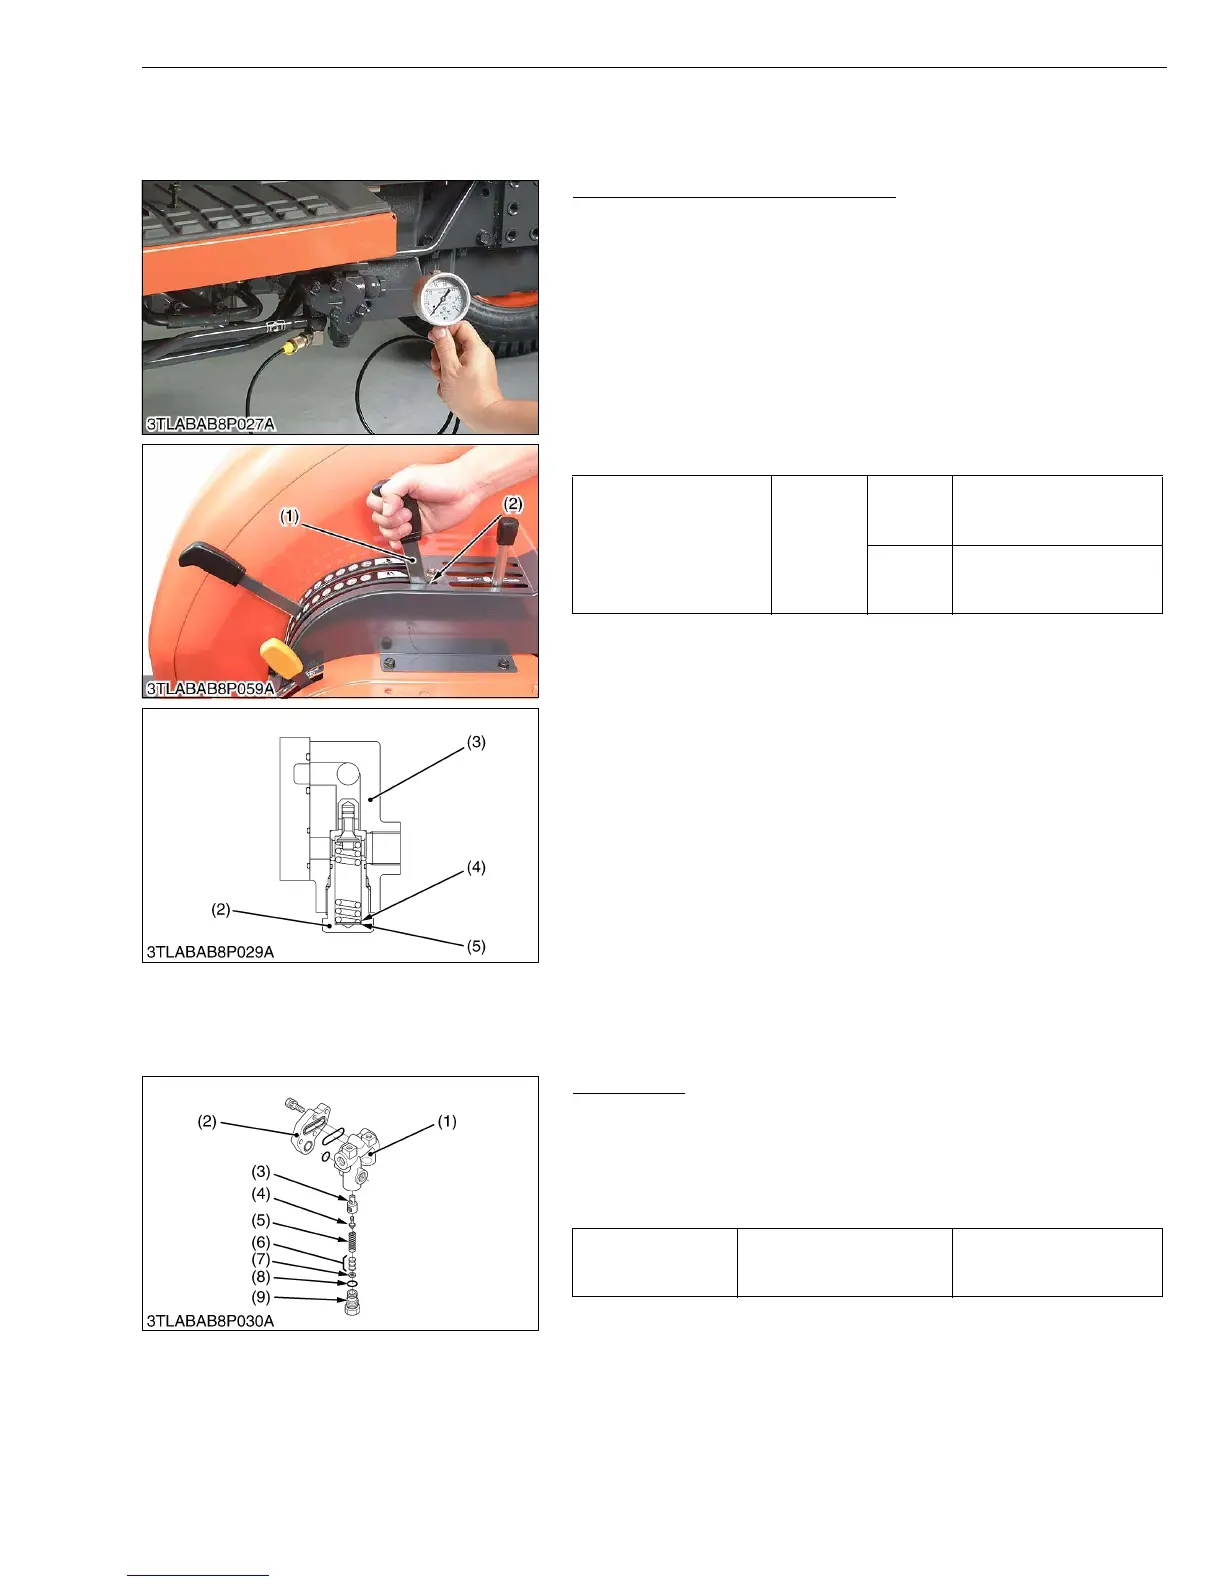
1. Remove the delivery pipe joint bolt from front hydraulic block.
2. Install the adaptor E. Then connect the cable and pressure
gauge to adaptor E.
3. Start the engine and set at maximum speed.
4. Move the position control lever (1) all way up to operate the relief
valve and read the gauge.
5. If the pressure is not within the factory specifications, remove the
relief plug (2) of front hydraulic block (3) and adjust with the
adjusting shims (4).
6. After the relief valve setting pressure test, reset the position
control lever stopper firmly.
Condition
• Engine speed.........Maximum
• Oil temperature.....40 to 60 °C
104 to 140 °F
(Reference)
• Thickness of shims (4) : 0.1 mm (0.0039 in.)
0.2 mm (0.0079 in.)
0.4 mm (0.0157 in.)
• Pressure change per
0.1 mm (0.0039 in.) shim : Approx. 264.8 kPa
2.7 kgf/cm
2
38.4 psi
W1014806
(2) Disassembling and Assembling
Relief Valve
1. Remove the plug (9), and draw out the spring (5) and the poppet
(4).
2. Take out the valve seat (3).
(When reassembling)
• Take care not to damage the O-ring.
• After disassembling and assembling the relief valve, be sure
to adjust the relief valve setting pressure.
W1015237
Relief valve setting
pressure
Factory
spec.
L3130
L3430
L3830
17.1 to 18.1 MPa
174.4 to 184.6 kgf/cm
2
2480 to 2625 psi
L4630
L5030
18.1 to 19.1 MPa
184.6 to 194.8 kgf/cm
2
2625 to 2770 psi
(1) Position Control Lever
(2) Relief Plug
(3) Front Hydraulic Block
(4) Adjusting Shim
(5) Washer
Tightening torque Relief valve plug
49.0 to 68.6 N·m
5.0 to 7.0 kgf·m
36.2 to 50.6 ft-lbs
(1) Front Hydraulic Block
(2) Cap
(3) Valve Seat
(4) Poppet
(5) Spring
(6) Adjusting Shim
(7) Washer
(8) O-ring
(9) Plug
 Loading...