CentreWare Internet Services
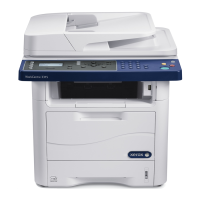
Xerox WorkCentre 3315DN/3325DN/3325DNI
System Administrator Guide
24
Change the Administrator Password
It is recommended that you change the default administrator password to a more secure password, so
this Xerox machine is not compromised.
To change the Administrator password:
1. At your workstation, open the web browser and enter the IP Address of the machine in the
Address Bar.
2. Press Enter.
3. Select the Properties icon.
4. If prompted, enter the Administrator User Name (admin) and Password (1111), and select Login.
Click Properties.
5. In the Security link on the left hand side, select System Security.
6. Select the System Administrator link.
7. In the Access Control area:
a. Ensure Web UI Access Control Enable checkbox is selected.
b. In the Login ID field, enter a new login name.
c. Select the Change password box to change the password. In the Password field, enter a new
numeric password.
d. Enter the password again in the Confirm Password field.
CAUTION: Do not forget the password or you could be completely locked out of the system,
requiring a service call.
8. Select Apply to save the changes.
9. Select OK when the acknowledgement message displays.
10. Select the Advanced button. The Advanced Access Control screen appears.
11. Select the number of days for the Password Expires In: option.
12. Select Protect Login IPv4 Address to enable this feature if required, and enter an IPv4 Address in
the box.
13. Select the required option for the Login Failure Policy, for users who fail to login several times. The
options are: Off, 3 times or 5 times.
14. Select the required option for Auto Logout. The options are 5, 10, 15 or 30 minutes.
15. Select Security Settings Reset if required.
16. Select Save to save your changes.
For further information, refer to Administrator Accounts on page 118.
Configure Wireless Connectivity Using Internet Services (WorkCentre 3325DNI)
Note The machine will not connect to the wireless network while the network cable is attached.
1. At your workstation, open the web browser and enter the IP Address of the machine in the
Address Bar.
2. Press Enter.

 Loading...


