Creating Accompaniment Styles — Style Creator
PF-1000
108
You can use the Realtime Recording features to create your own accompaniment style — either from scratch or based
on the preset accompaniment data. The operations here apply to step 4 on page 107.
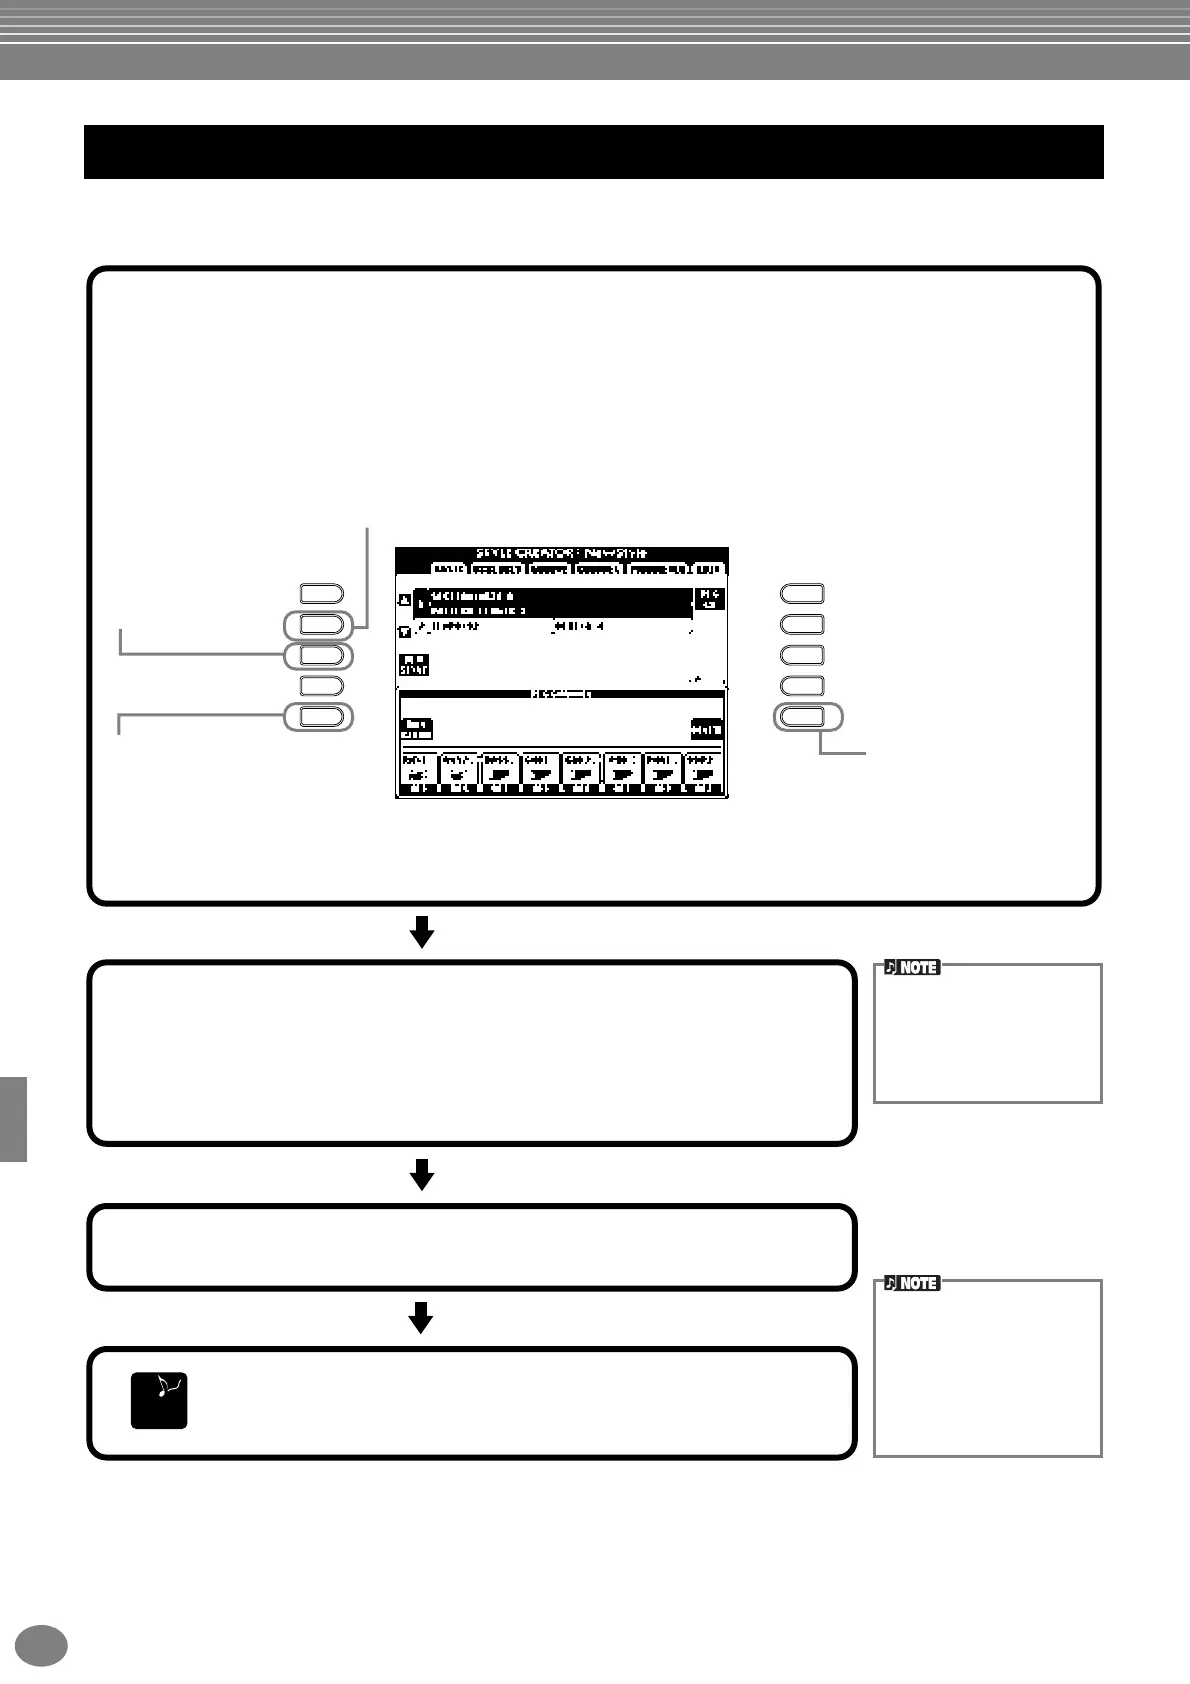
Realtime Recording — Basic
E
D
C
B
A
J
I
H
G
F
REC.... Channel is enabled for recording.
ON...... Channel is enabled for playback.
OFF .... Channel is muted.
Selects an empty
style, allowing you to
create a new style
from scratch.
Calls up the display for changing the
tempo or beat (time signature).
To release or cancel the
selection, press the [1▼] -
[8▼] button corresponding to
the channel you wish to
cancel. As long as you
continue to hold down the [J]
button, you can toggle
between deleting and
restoring the selected data.
Releasing the [J] button
permanently deletes the
data. Before recording to one
of the non-rhythm channels
(BASS - PHR 2), make sure to
delete the existing data of the
appropriate channel.
Available only when the channel
is set to [RHY1] or [RHY2], this
lets you delete specific
percussion sounds during
recording. Simultaneously hold
down this button and press the
key corresponding to the
instrument you want to delete.
2
First, select the desired voice. Start recording by pressing the STYLE
CONTROL [START/STOP] button.
The selected section of the style starts playing back. Since the rhythm pattern
loops repeatedly, you can record new sounds and notes on each pass while
listening to the pattern. Icons above the keys conveniently indicate the
percussion instruments assigned to the keys.
3
Stop recording by pressing the STYLE CONTROL [START/STOP] button
again.
With the REC CHANNEL display shown, close the display by pressing
the [EXIT] button.
END
If you’ve enabled Sync Start
(by pressing the SYNC.
START button), you can
start recording by simply
pressing a key on the key-
board.
1
Select the desired channel for recording by simultaneously holding down the [F] (REC CH) button and
pressing the appropriate [1▲▼] - [8▲▼] button.
Before recording to one of the non-rhythm channels (BASS - PHR 2), make sure to delete the existing data
of the appropriate channel. You can make other settings (see the box “Other Parameters in the BASIC
Display” on page 109) after closing the REC CHANNEL display by pressing the [EXIT] button. To call up the
REC CHANNEL display again, press the [F] (REC CH) button.
• Only Drum Kit/SFX Kit can
be selected for the RHY 2
channel.
• For the non-rhythm chan-
nels (BASS - PHR 2), all
voices with the exception
of the Drum Kit/SFX Kit
can be selected.
When this button is pressed, “DELETE” will appear over
channels containing data. To delete data from a specific
channel, simultaneously hold down this button and press the
appropriate [1▲] - [8▲] button.
 Loading...